阅读视图

发现新文章,点击刷新页面。

大模型接入踩坑录:被 Unexpected end of JSON 折磨三天,我重写了SSE流解析

兄弟们,我今天必须来吐个大槽。

就在上周,我差点被我们公司的测试和产品经理生吃活剥了。起因是我们内部刚上的一个 AI 对话助手,在生产环境里表现得像个神经病:时而正常回复,时而突然卡死,有时候甚至直接抛出整个前端页面的白屏大散花。

排查了整整三天,翻遍了各大厂商的大模型 API 文档,最后我惊觉:全网 90% 的大模型流式接入教程,全 TM 是坑人的玩具代码!

踩坑现场:天真的 JSON.parse

大家接入大模型流式输出(SSE)的时候,是不是都看过官方文档里类似这样的伪代码范例?

code JavaScript

//典型的“教程级”作死代码
const response = await fetch('https://api.some-llm.com/chat', { ... });
const reader = response.body.getReader();
const decoder = new TextDecoder('utf-8');
 
while (true) {
  const { done, value } = await reader.read();
  if (done) break;
  
  // 直接把读到的流转成字符串,然后按行切分
  const chunk = decoder.decode(value);
  const lines = chunk.split('\n');
  
  for (let line of lines) {
    if (line.startsWith('data: ')) {
      const dataStr = line.replace('data: ', '');
      if (dataStr === '[DONE]') return;
      
      // 致命毒药就在这一行!!!
      const parsed = JSON.parse(dataStr); 
      console.log(parsed.choices[0].delta.content);
    }
  }
}


这段代码在本地自己测试、网络极好的时候,跑得那叫一个丝滑。

但在真实的生产环境里,这段代码就是个纯纯的定时炸弹! 为什么?因为这帮写文档的人,根本没考虑过底层 TCP 协议的网络分包机制(Chunk Fragmentation)!

抓包破案:TCP 根本不管你的 JSON 死活

当你以为大模型吐出来的数据是完美的一行:

data: {"choices": [{"delta": {"content": "你好"}}]}\n\n

现实中,由于网络波动、Nginx 代理缓冲、或者纯粹是因为模型吐字太快/太慢,这条数据在 TCP 传输时经常会被无情地“拦腰斩断”,变成两个数据包(Chunk)发给前端:

● Chunk 1 收到: data: {"choices":[{"de

● Chunk 2 收到: lta": {"content": "你好"}}]}\n\n

你看懂了吗?!当你的前端代码拿到 Chunk 1 时,直接无脑执行了 JSON.parse('{"choices":[{"de')。

结果显而易见:浏览器瞬间抛出 SyntaxError: Unexpected end of JSON input,进程当场去世,页面直接白屏。

jimeng-2026-02-27-3051-Excalidraw手绘风格的TCP拆包原理图,左边画大模型吐出完整的{"con....png

这还不算完!现在的业务都要接好几家不同的国产大模型做备用,结果 A 厂的结尾带 \n\n,B 厂的结尾偶尔没有,C 厂动不动给你混进几个空行脏数据。我这三天,光在前端写正则去给各家擦屁股了,血压直接拉满。

终极解法:手写 Robust Buffer Parser

既然不能相信每次 read() 拿到的都是完整的 JSON 数据,我们就必须自己在内存里维护一个 数据缓冲区(Buffer)。只有当明确读到双换行符(SSE协议的标准消息结束符)时,才去进行截取和解析。

为了防止大家再被这些垃圾文档坑,我把我熬夜重写的、已经在生产跑稳的健壮版代码贴出来。大家直接抄走,免得再被祭天:

code JavaScript

//生产环境防御性编程:带 Buffer 的 SSE 解析器
async function fetchAIStream() {
  // 避坑备注:如果前端实在受不了各家厂商乱七八糟的格式断流和脏数据,
  // 建议直接去干后端,让他们在网关层做统一的聚合代理。
  // 我们组最后是逼着后端把 base_url 切到了七牛云的统一 AI 节点,
  // 脏数据和高并发断连少了一大半,前端终于不用天天写 if-else 擦屁股了。
  const BASE_URL = process.env.USE_PROXY_GATEWAY 
    ? "https://api.qiniu.com/v1/llm/chat/completions" 
    : "https://api.openai-xxx.com/...";
 
  const response = await fetch(BASE_URL, {
    method: 'POST',
    headers: {
      'Content-Type': 'application/json',
      'Authorization': `Bearer ${API_KEY}`
    },
    body: JSON.stringify({ model: 'your-model', messages: [...], stream: true })
  });
 
  const reader = response.body.getReader();
  const decoder = new TextDecoder('utf-8');
  
  // 核心:弄一个全局的缓冲区!
  let buffer = '';
 
  try {
    while (true) {
      const { done, value } = await reader.read();
      if (done) break;
 
      // 每次读到的数据,先塞进 buffer 里
      buffer += decoder.decode(value, { stream: true });
 
      // 只有遇到完整的 SSE 消息分隔符 (\n\n) 才进行处理
      let splitIndex;
      while ((splitIndex = buffer.indexOf('\n\n')) >= 0) {
        // 截取完整的一条消息
        const completeMessage = buffer.slice(0, splitIndex);
        // 把处理过的消息从 buffer 中剔除,保留剩下的断字
        buffer = buffer.slice(splitIndex + 2);
 
        // 处理截取出的完整消息
        const lines = completeMessage.split('\n');
        for (const line of lines) {
          if (line.trim() === '') continue;
          if (line.startsWith('data: ')) {
            const dataStr = line.replace('data: ', '').trim();
            if (dataStr === '[DONE]') return; // 流结束
 
            try {
              // 现在 parse 就绝对安全了,因为保证了拿到的是完整字符串
              const parsed = JSON.parse(dataStr);
              const content = parsed.choices[0]?.delta?.content || '';
              process.stdout.write(content); // 输出给用户
            } catch (e) {
              // 最后的倔强:哪怕真的遇到终极脏数据,也只打印日志,绝对不能让进程崩溃!
              console.error('[Stream Parse Error] 脏数据跳过:', dataStr);
            }
          }
        }
      }
    }
  } catch (err) {
    console.error('网络连接被意外中断:', err);
  }
}

jimeng-2026-02-27-8477-经典程序员Meme图,一只柴犬一脸疑惑地看着电脑,配文“我的代码昨天还能跑”,风....png


总结

其实说到底,这属于网络 I/O 极其基础的知识点(流式数据不等于块数据)。但现在网上的 AI 教程为了演示效果,全都刻意简化了异常处理,导致无数像我一样的业务搬砖工在生产环境里摔得头破血流。

大家下次接大模型流式接口,千万记得带上 Buffer 缓冲区!周末了,老子终于可以不看那恶心的 SyntaxError 了,祝各位同行永无 Bug!

5 个让 CSS 起飞的新特性,设计师看了直呼内行

有大佬说: "CSS 而已,能玩出什么花?"

今天我就用 5 个原生 CSS 新特性告诉你——现在的 CSS,已经不是当年的 CSS 了。它不再是那个只会改背景颜色的"样式表",而是进化成了能处理逻辑、响应状态、甚至做动画的系统级设计工具

设计师想在 Figma 里做的效果,CSS 现在不仅能做,而且做得更好。往下看,每一个都能让你删掉一坨 JavaScript 代码。


1. Scroll State Queries:终于知道"粘性元素"什么时候粘住了

以前我们想给 sticky 导航栏加个阴影,怎么做?监听 scroll 事件,计算滚动距离,判断元素是否"粘住"……一堆性能杀手代码

现在?一行 CSS 搞定

css

.sticky-nav {
  container-type: scroll-state;
  position: sticky;
  top: 0;
}

.sticky-nav > nav {
  transition: box-shadow 0.3s;
  
  /* 只有当元素真正"粘住"时,才加阴影 */
  @container scroll-state(stuck: top) {
    box-shadow: 0 4px 20px rgba(0,0,0,0.1);
  }
}

这意味着什么?

  • 不用写 Intersection Observer
  • 不用监听 scroll 事件
  • 浏览器原生告诉你"我粘住了"

这个 API 还能检测"是否被滚动捕捉"、"是否可滚动"等状态。Snap 轮播图的激活态?一行代码的事

设计师惊呼:  "终于不用跟开发解释'当导航栏粘住时加阴影'是什么意思了。"


2. 完全自定义的 Select 下拉框:UI 库的末日

有个笑话:前端开发一辈子都在跟 select 标签较劲。为了让它长得好看,我们引过 Chosen、Select2、React Select……一个下拉框,几百 KB 的 JS

现在,原生 select 终于可以随便改了

css

/* 开启可自定义模式 */
select, ::picker(select) {
  appearance: base-select;
}

/* 选项里甚至可以放图片 */
option {
  display: flex;
  align-items: center;
  gap: 8px;
}

option img {
  width: 24px;
  height: 24px;
  border-radius: 50%;
}

对应的 HTML 长这样:

html

<select>
  <button>
    <selectedcontent></selectedcontent>
    <span class="arrow">👇</span>
  </button>
  <option>
    <img src="avatar1.jpg"> 张三
  </option>
  <option>
    <img src="avatar2.jpg"> 李四
  </option>
</select>

这是什么概念?

  • 下拉箭头可以随便改
  • 选项里可以放任何 HTML
  • 选中的内容可以自定义渲染
  • 完全不需要 JavaScript

设计师惊呼:  "所以以后 Figma 里的下拉框设计,都能 1:1 还原了?"


3. @starting-style:弹窗进出动画,终于丝滑了

以前做弹窗动画有个痛点:元素从 display: none 到显示,过渡效果不生效。因为没有"之前的状态"可以过渡。

@starting-style 专门解决这个问题

css

[popover] {
  /* 默认状态 */
  opacity: 0;
  transform: scale(0.9);
  transition: opacity 0.3s, transform 0.3s;
}

[popover]:popover-open {
  /* 打开后的状态 */
  opacity: 1;
  transform: scale(1);
}

/* 定义"开始动画前的状态" */
@starting-style {
  [popover]:popover-open {
    opacity: 0;
    transform: scale(0.9);
  }
}

就这么简单,弹窗出现时自动从 0 到 1,关闭时自动从 1 到 0。连 backdrop(背景遮罩)都可以一起动画

这意味着什么?

  • 再也不用 JS 控制入场动画
  • display: none 和 display: block 之间的过渡终于完美
  • Popover 和 Dialog 弹窗,天生就有丝滑动画

设计师惊呼:  "所以之前开发说的'弹窗动画不好做',是骗我的?"


4. contrast-color() 函数:自动适配文本颜色,再也不用写 JS 判断

设计师给了一个按钮,背景色是动态的(可能来自用户设置,可能来自数据)。问题来了:背景色深的时候,文字要用白色;背景色浅的时候,文字要用黑色

以前怎么做?JS 计算亮度,然后动态加 class。现在:

css

.button {
  --bg-color: #0066cc;  /* 可以是任何颜色 */
  background-color: var(--bg-color);
  
  /* 自动选择黑色或白色,保证可读性 */
  color: contrast-color(var(--bg-color));
}

contrast-color() 函数自动计算最佳对比色(黑或白),保证 WCAG 标准

更高级的用法:

css

.button {
  /* 指定两个候选色,让函数选择对比度更高的那个 */
  color: contrast-color(var(--bg-color), vs, #333, #eee);
}

这意味着什么?

  • 主题切换再也不用写两套文字颜色
  • 用户自定义主题时,样式自动适配
  • 再也不用为了文字可读性写 JS

设计师惊呼:  "所以以后设计系统里的文本颜色,可以自动适配背景了?"


5. Scroll-driven Animations:滚动即动画,性能炸裂

以前做滚动进度条、视差效果、滚动触发动画,都得靠 JS + requestAnimationFrame,性能消耗大,而且容易卡顿。

现在,CSS 原生支持动画进度绑定滚动位置

css

/* 一个简单的滚动进度条 */
#progress {
  height: 4px;
  background: #0066cc;
  
  /* 动画进度绑定滚动位置 */
  animation: grow-progress linear forwards;
  animation-timeline: scroll();
}

@keyframes grow-progress {
  from { width: 0%; }
  to { width: 100%; }
}

想要更复杂的视差效果?

css

.parallax-image {
  /* 滚动时,图片从 0.5 倍缩放到 1 倍 */
  animation: scale-image linear forwards;
  animation-timeline: scroll();
  animation-range: entry 0% exit 100%;
}

@keyframes scale-image {
  from { transform: scale(0.5); opacity: 0; }
  to { transform: scale(1); opacity: 1; }
}

这意味着什么?

  • 滚动进度条:3 行 CSS
  • 视差滚动:5 行 CSS
  • 元素随滚动淡入淡出:4 行 CSS
  • 完全不需要 JS,60fps 稳稳的

设计师惊呼:  "所以之前做的那个滚动交互动效,现在不用等开发排期了?"


写在最后

这 5 个特性只是冰山一角。现在的 CSS 已经有了:

  • 条件逻辑:if() 函数
  • 自定义函数:@function
  • 锚点定位:真正的绝对定位
  • 容器查询:组件内响应式
  • 嵌套语法:再也不用写重复的选择器

CSS 已经不是当初那个 CSS 了。

以前我们说"能用 CSS 解决的问题,就不要用 JS"。现在可以改成: "能用 CSS 解决的问题,都不叫问题。"

设计师和开发的鸿沟,正在被现代 CSS 一点点填平。你设计的每一个细节,现在都能用几行样式代码完美还原。


如果这篇文章让你对 CSS 刮目相看,点个赞,转个发,让更多朋友看到——CSS 起飞了。

评论区告诉我:你最想用哪个特性?或者你还见过哪些让你惊呼的 CSS 新功能?

JS 异步编程实战 | 从回调地狱到 Promise/Async/Await(附代码 + 面试题)

一、为什么需要异步编程?

JavaScript 是单线程语言,同一时间只能做一件事。如果有耗时操作(如网络请求、文件读取、定时任务),就会阻塞后续代码执行。

// 同步阻塞示例 
console.log('开始')
for(let i = 0; i < 1000000000; i++) {}
// 耗时操作 console.log('结束') 
// 必须等待循环结束才执行

为了解决这个问题,JavaScript 提供了异步编程解决方案。

二、回调函数(Callback)—— 最基础的异步方案

2.1 基本概念

回调函数是将函数作为参数传递给另一个函数,在异步操作完成后调用。

// 模拟异步请求
function fetchData(callback) {
  setTimeout(() => {
    callback('数据加载完成')
  }, 1000)
}

console.log('开始请求')
fetchData((data) => {
  console.log(data) // 1秒后输出:数据加载完成
})
console.log('继续执行其他操作')
// 输出顺序:开始请求 → 继续执行其他操作 → 数据加载完成

2.2 回调地狱的产生

当有多个依赖的异步操作时,回调嵌套会形成"回调地狱":

// 回调地狱示例
getUserInfo(function(user) {
  getOrderList(user.id, function(orders) {
    getOrderDetail(orders[0].id, function(detail) {
      getProductInfo(detail.productId, function(product) {
        console.log('最终数据:', product)
      }, function(error) {
        console.error('获取商品失败', error)
      })
    }, function(error) {
      console.error('获取订单详情失败', error)
    })
  }, function(error) {
    console.error('获取订单列表失败', error)
  })
}, function(error) {
  console.error('获取用户失败', error)
})

回调地狱的问题:

  • 代码难以阅读和维护
  • 错误处理分散
  • 难以复用和调试

三、Promise —— 优雅的异步解决方案

3.1 Promise 基本用法

Promise 是 ES6 引入的异步编程解决方案,它代表一个异步操作的最终完成或失败。

// 创建 Promise
const promise = new Promise((resolve, reject) => {
  // 执行异步操作
  setTimeout(() => {
    const success = true
    if (success) {
      resolve('操作成功') // 成功时调用
    } else {
      reject('操作失败') // 失败时调用
    }
  }, 1000)
})

// 使用 Promise
promise
  .then(result => {
    console.log(result) // 成功:操作成功
  })
  .catch(error => {
    console.error(error) // 失败:操作失败
  })
  .finally(() => {
    console.log('无论成功失败都会执行')
  })

3.2 解决回调地狱

使用 Promise 重构上面的例子:

// 将每个异步操作封装成 Promise
function getUserInfo() {
  return new Promise((resolve, reject) => {
    setTimeout(() => {
      resolve({ id: 1, name: '张三' })
    }, 1000)
  })
}

function getOrderList(userId) {
  return new Promise((resolve, reject) => {
    setTimeout(() => {
      resolve([{ id: 101, name: '订单1' }, { id: 102, name: '订单2' }])
    }, 1000)
  })
}

function getOrderDetail(orderId) {
  return new Promise((resolve, reject) => {
    setTimeout(() => {
      resolve({ id: orderId, productId: 1001, price: 299 })
    }, 1000)
  })
}

function getProductInfo(productId) {
  return new Promise((resolve, reject) => {
    setTimeout(() => {
      resolve({ id: productId, name: '商品名称', price: 299 })
    }, 1000)
  })
}

// 链式调用,告别回调地狱
getUserInfo()
  .then(user => {
    console.log('用户:', user)
    return getOrderList(user.id)
  })
  .then(orders => {
    console.log('订单列表:', orders)
    return getOrderDetail(orders[0].id)
  })
  .then(detail => {
    console.log('订单详情:', detail)
    return getProductInfo(detail.productId)
  })
  .then(product => {
    console.log('商品信息:', product)
  })
  .catch(error => {
    console.error('发生错误:', error)
  })

3.3 Promise 静态方法

// Promise.all - 等待所有 Promise 完成
const p1 = Promise.resolve(3)
const p2 = 42
const p3 = new Promise((resolve) => setTimeout(resolve, 100, 'foo'))

Promise.all([p1, p2, p3]).then(values => {
  console.log(values) // [3, 42, "foo"]
})

// Promise.race - 返回最先完成的 Promise
const promise1 = new Promise(resolve => setTimeout(resolve, 500, 'one'))
const promise2 = new Promise(resolve => setTimeout(resolve, 100, 'two'))

Promise.race([promise1, promise2]).then(value => {
  console.log(value) // "two" (因为 promise2 更快)
})

// Promise.allSettled - 等待所有 Promise 完成(无论成功失败)
const promises = [
  Promise.resolve('成功1'),
  Promise.reject('失败2'),
  Promise.resolve('成功3')
]

Promise.allSettled(promises).then(results => {
  results.forEach(result => {
    if (result.status === 'fulfilled') {
      console.log('成功:', result.value)
    } else {
      console.log('失败:', result.reason)
    }
  })
})

// Promise.any - 返回第一个成功的 Promise
const pErr = new Promise((resolve, reject) => reject('总是失败'))
const pSlow = new Promise(resolve => setTimeout(resolve, 500, '最终完成'))
const pFast = new Promise(resolve => setTimeout(resolve, 100, '很快完成'))

Promise.any([pErr, pSlow, pFast]).then(value => {
  console.log(value) // "很快完成"
})

四、Async/Await —— 同步方式的异步编程

4.1 基本语法

Async/Await 是 ES2017 引入的语法糖,让异步代码看起来像同步代码。

// async 函数返回一个 Promise
async function getData() {
  return '数据'
}

getData().then(result => console.log(result)) // 数据

// 使用 await 等待 Promise 完成
async function fetchUserData() {
  try {
    const user = await getUserInfo()
    console.log('用户:', user)
    
    const orders = await getOrderList(user.id)
    console.log('订单:', orders)
    
    const detail = await getOrderDetail(orders[0].id)
    console.log('详情:', detail)
    
    const product = await getProductInfo(detail.productId)
    console.log('商品:', product)
    
    return product
  } catch (error) {
    console.error('出错了:', error)
  }
}

// 调用 async 函数
fetchUserData().then(result => {
  console.log('最终结果:', result)
})

4.2 实战示例:模拟数据请求

// 模拟 API 请求函数
const mockAPI = (url, delay = 1000) => {
  return new Promise((resolve, reject) => {
    setTimeout(() => {
      if (Math.random() > 0.1) { // 90% 成功率
        resolve({
          status: 200,
          data: { url, timestamp: Date.now() }
        })
      } else {
        reject(new Error(`请求 ${url} 失败`))
      }
    }, delay)
  })
}

// 使用 async/await 实现并发请求
async function fetchMultipleData() {
  try {
    // 并发请求
    const [userData, productData, orderData] = await Promise.all([
      mockAPI('/api/user', 800),
      mockAPI('/api/product', 1200),
      mockAPI('/api/order', 600)
    ])
    
    console.log('所有数据加载完成:')
    console.log('用户数据:', userData.data)
    console.log('商品数据:', productData.data)
    console.log('订单数据:', orderData.data)
    
    return { userData, productData, orderData }
  } catch (error) {
    console.error('数据加载失败:', error.message)
  }
}

// 串行请求(依赖关系)
async function fetchDependentData() {
  console.time('串行请求耗时')
  
  const user = await mockAPI('/api/user', 1000)
  console.log('第一步完成:', user.data)
  
  const orders = await mockAPI(`/api/user/${user.data.url}/orders`, 1000)
  console.log('第二步完成:', orders.data)
  
  const details = await mockAPI(`/api/orders/${orders.data.url}/details`, 1000)
  console.log('第三步完成:', details.data)
  
  console.timeEnd('串行请求耗时')
  // 总耗时约 3000ms
}

// 优化:并行处理不依赖的数据
async function fetchOptimizedData() {
  console.time('优化后耗时')
  
  // 同时发起两个独立请求
  const [user, products] = await Promise.all([
    mockAPI('/api/user', 1000),
    mockAPI('/api/products', 1000)
  ])
  
  console.log('用户和商品数据已获取')
  
  // 依赖用户数据的请求
  const orders = await mockAPI(`/api/user/${user.data.url}/orders`, 1000)
  
  // 可以并行处理的请求
  const [detail1, detail2] = await Promise.all([
    mockAPI(`/api/orders/${orders.data.url}/detail1`, 500),
    mockAPI(`/api/orders/${orders.data.url}/detail2`, 500)
  ])
  
  console.timeEnd('优化后耗时')
  // 总耗时约 2500ms
}

4.3 错误处理最佳实践

// 统一的错误处理函数
const handleAsyncError = (asyncFn) => {
  return async (...args) => {
    try {
      return [await asyncFn(...args), null]
    } catch (error) {
      return [null, error]
    }
  }
}

// 使用错误处理包装器
const safeFetchUser = handleAsyncError(fetchUserData)

async function main() {
  const [user, error] = await safeFetchUser()
  
  if (error) {
    console.error('操作失败:', error.message)
    return
  }
  
  console.log('操作成功:', user)
}

// 带超时的 Promise
function withTimeout(promise, timeout = 5000) {
  const timeoutPromise = new Promise((_, reject) => {
    setTimeout(() => reject(new Error('请求超时')), timeout)
  })
  
  return Promise.race([promise, timeoutPromise])
}

async function fetchWithTimeout() {
  try {
    const result = await withTimeout(mockAPI('/api/data', 3000), 2000)
    console.log('数据:', result)
  } catch (error) {
    console.error('超时或失败:', error.message)
  }
}

五、手写实现(面试高频)

5.1 手写 Promise

class MyPromise {
  constructor(executor) {
    this.state = 'pending'
    this.value = undefined
    this.reason = undefined
    this.onFulfilledCallbacks = []
    this.onRejectedCallbacks = []

    const resolve = (value) => {
      if (this.state === 'pending') {
        this.state = 'fulfilled'
        this.value = value
        this.onFulfilledCallbacks.forEach(fn => fn())
      }
    }

    const reject = (reason) => {
      if (this.state === 'pending') {
        this.state = 'rejected'
        this.reason = reason
        this.onRejectedCallbacks.forEach(fn => fn())
      }
    }

    try {
      executor(resolve, reject)
    } catch (error) {
      reject(error)
    }
  }

  then(onFulfilled, onRejected) {
    onFulfilled = typeof onFulfilled === 'function' ? onFulfilled : value => value
    onRejected = typeof onRejected === 'function' ? onRejected : error => { throw error }

    const promise2 = new MyPromise((resolve, reject) => {
      if (this.state === 'fulfilled') {
        setTimeout(() => {
          try {
            const x = onFulfilled(this.value)
            this.resolvePromise(promise2, x, resolve, reject)
          } catch (error) {
            reject(error)
          }
        }, 0)
      }

      if (this.state === 'rejected') {
        setTimeout(() => {
          try {
            const x = onRejected(this.reason)
            this.resolvePromise(promise2, x, resolve, reject)
          } catch (error) {
            reject(error)
          }
        }, 0)
      }

      if (this.state === 'pending') {
        this.onFulfilledCallbacks.push(() => {
          setTimeout(() => {
            try {
              const x = onFulfilled(this.value)
              this.resolvePromise(promise2, x, resolve, reject)
            } catch (error) {
              reject(error)
            }
          }, 0)
        })

        this.onRejectedCallbacks.push(() => {
          setTimeout(() => {
            try {
              const x = onRejected(this.reason)
              this.resolvePromise(promise2, x, resolve, reject)
            } catch (error) {
              reject(error)
            }
          }, 0)
        })
      }
    })

    return promise2
  }

  resolvePromise(promise2, x, resolve, reject) {
    if (promise2 === x) {
      reject(new TypeError('Chaining cycle detected'))
    }

    if (x && (typeof x === 'object' || typeof x === 'function')) {
      let called = false
      try {
        const then = x.then
        if (typeof then === 'function') {
          then.call(
            x,
            y => {
              if (called) return
              called = true
              this.resolvePromise(promise2, y, resolve, reject)
            },
            error => {
              if (called) return
              called = true
              reject(error)
            }
          )
        } else {
          resolve(x)
        }
      } catch (error) {
        if (called) return
        called = true
        reject(error)
      }
    } else {
      resolve(x)
    }
  }

  catch(onRejected) {
    return this.then(null, onRejected)
  }

  static resolve(value) {
    if (value instanceof MyPromise) return value
    return new MyPromise(resolve => resolve(value))
  }

  static reject(reason) {
    return new MyPromise((_, reject) => reject(reason))
  }

  static all(promises) {
    return new MyPromise((resolve, reject) => {
      const result = []
      let count = 0
      
      for (let i = 0; i < promises.length; i++) {
        MyPromise.resolve(promises[i]).then(
          value => {
            result[i] = value
            count++
            if (count === promises.length) resolve(result)
          },
          reject
        )
      }
    })
  }

  static race(promises) {
    return new MyPromise((resolve, reject) => {
      for (const promise of promises) {
        MyPromise.resolve(promise).then(resolve, reject)
      }
    })
  }
}

5.2 手写 async/await 的简单实现

// 使用 Generator 模拟 async/await
function asyncToGenerator(generatorFn) {
  return function() {
    const gen = generatorFn.apply(this, arguments)
    
    return new Promise((resolve, reject) => {
      function step(key, arg) {
        let result
        try {
          result = gen[key](arg)
        } catch (error) {
          reject(error)
          return
        }
        
        const { value, done } = result
        
        if (done) {
          resolve(value)
        } else {
          Promise.resolve(value).then(
            val => step('next', val),
            err => step('throw', err)
          )
        }
      }
      
      step('next')
    })
  }
}

// 使用示例
const fetchData = function() {
  return new Promise(resolve => {
    setTimeout(() => resolve('数据'), 1000)
  })
}

const getData = asyncToGenerator(function* () {
  const data1 = yield fetchData()
  console.log('data1:', data1)
  
  const data2 = yield fetchData()
  console.log('data2:', data2)
  
  return '完成'
})

getData().then(result => console.log(result))

六、面试高频题

6.1 输出顺序题

// 题目1
console.log('1')
setTimeout(() => console.log('2'), 0)
Promise.resolve().then(() => console.log('3'))
console.log('4')

// 输出:1, 4, 3, 2
// 解释:同步代码先执行,微任务(Promise)先于宏任务(setTimeout)

// 题目2
async function async1() {
  console.log('async1 start')
  await async2()
  console.log('async1 end')
}

async function async2() {
  console.log('async2')
}

console.log('script start')

setTimeout(() => {
  console.log('setTimeout')
}, 0)

async1()

new Promise((resolve) => {
  console.log('promise1')
  resolve()
}).then(() => {
  console.log('promise2')
})

console.log('script end')

// 输出顺序:
// script start
// async1 start
// async2
// promise1
// script end
// async1 end
// promise2
// setTimeout

6.2 错误处理题

// 题目:如何捕获 async/await 的错误?
async function getData() {
  try {
    const data = await Promise.reject('出错了')
    console.log(data)
  } catch (error) {
    console.log('捕获到:', error)
  }
}

// 或使用 .catch
async function getData2() {
  const data = await Promise.reject('出错了').catch(err => {
    console.log('处理错误:', err)
    return '默认值'
  })
  console.log(data) // 默认值
}

// 题目:Promise.all 的错误处理
const promises = [
  Promise.resolve(1),
  Promise.reject('错误'),
  Promise.resolve(3)
]

Promise.all(promises)
  .then(console.log)
  .catch(console.error) // 输出:错误

// 如何让 Promise.all 即使有错误也返回所有结果?
Promise.allSettled(promises).then(results => {
  results.forEach(result => {
    if (result.status === 'fulfilled') {
      console.log('成功:', result.value)
    } else {
      console.log('失败:', result.reason)
    }
  })
})

6.3 并发控制题

// 题目:实现一个并发控制器,限制同时执行的 Promise 数量
class PromiseQueue {
  constructor(concurrency = 2) {
    this.concurrency = concurrency
    this.running = 0
    this.queue = []
  }
  
  add(task) {
    return new Promise((resolve, reject) => {
      this.queue.push({ task, resolve, reject })
      this.run()
    })
  }
  
  run() {
    while (this.running < this.concurrency && this.queue.length) {
      const { task, resolve, reject } = this.queue.shift()
      this.running++
      
      Promise.resolve(task())
        .then(resolve, reject)
        .finally(() => {
          this.running--
          this.run()
        })
    }
  }
}

// 使用示例
const queue = new PromiseQueue(2)

for (let i = 0; i < 5; i++) {
  queue.add(() => 
    new Promise(resolve => {
      setTimeout(() => {
        console.log(`任务${i}完成`)
        resolve(i)
      }, 1000)
    })
  )
}
// 每2个任务并行执行

6.4 重试机制题

// 题目:实现一个函数,请求失败时自动重试
async function retryRequest(fn, maxRetries = 3, delay = 1000) {
  for (let i = 0; i < maxRetries; i++) {
    try {
      console.log(`第${i + 1}次尝试`)
      const result = await fn()
      console.log('请求成功')
      return result
    } catch (error) {
      console.log(`第${i + 1}次失败`)
      if (i === maxRetries - 1) {
        throw error
      }
      // 等待延迟时间后重试
      await new Promise(resolve => setTimeout(resolve, delay))
    }
  }
}

// 使用示例
let attempt = 0
const request = () => {
  return new Promise((resolve, reject) => {
    attempt++
    if (attempt < 3) {
      reject('模拟失败')
    } else {
      resolve('成功')
    }
  })
}

retryRequest(request, 3, 1000)
  .then(console.log)
  .catch(console.error)

七、总结与建议

7.1 异步编程演进

  • 回调函数:基础但容易形成"回调地狱"
  • Promise:链式调用,错误统一处理
  • Async/Await:语法糖,代码更直观

7.2 使用建议

  1. 优先使用 async/await,代码更清晰
  2. 并发请求使用 Promise.all,提高性能
  3. 注意错误处理,不要吞掉错误
  4. 避免回调地狱,及时重构代码
  5. 理解事件循环,掌握执行顺序

7.3 面试准备

  • 掌握三种异步方案的原理和用法
  • 能够手写简单的 Promise
  • 理解宏任务和微任务的执行顺序
  • 熟悉常见的异步编程场景和解决方案
  • 能够处理并发控制和错误重试

异步编程是 JavaScript 的核心特性,掌握好这块内容不仅对面试有帮助,更能提升实际开发中的代码质量。

HTML&CSS:纯CSS实现随机转盘抽奖机——无JS,全靠现代CSS黑科技!

这个 HTML 页面实现了一个交互式转盘抽奖效果,使用了现代 CSS 的一些实验性特性 (如 random() 函数、@layer、sibling-index() 等),并结合 SVG 图标和渐变背景,营造出一个视觉吸引、功能完整的“幸运大转盘”界面。


大家复制代码时,可能会因格式转换出现错乱,导致样式失效。建议先少量复制代码进行测试,若未能解决问题,私信回复源码两字,我会发送完整的压缩包给你。

演示效果

演示效果

演示效果

HTML&CSS

<!DOCTYPE html>
<html lang="en">

<head>
    <meta charset="UTF-8">
    <meta name="viewport" content="width=device-width, initial-scale=1.0">
    <title>CSS随机函数实现转盘效果</title>
    <style>
        @import url(https://fonts.bunny.net/css?family=jura:300,700);
        @layer base, notes, demo;

        @layer demo {
            :root {
                --items: 12;
                --spin-easing: cubic-bezier(0, 0.061, 0, 1.032);
                --slice-angle: calc(360deg / var(--items));
                --start-angle: calc(var(--slice-angle) / 2);

                --wheel-radius: min(40vw, 300px);
                --wheel-size: calc(var(--wheel-radius) * 2);
                --wheel-padding: 10%;
                --item-radius: calc(var(--wheel-radius) - var(--wheel-padding));

                --wheel-bg-1: oklch(0.80 0.16 30);
                --wheel-bg-2: oklch(0.74 0.16 140);
                --wheel-bg-3: oklch(0.80 0.16 240);
                --wheel-bg-4: oklch(0.74 0.16 320);

                --marker-bg-color: black;
                --button-text-color: white;
                --spin-duration: random(1s, 3s);

                --random-angle: random(1200deg, 4800deg, by var(--slice-angle));

                @supports not (rotate: random(1deg, 10deg)) {
                    --spin-duration: 2s;
                    --random-angle: 4800deg;
                }
            }


            .wrapper {
                position: relative;
                inset: 0;
                margin: auto;
                width: var(--wheel-size);
                aspect-ratio: 1;

                input[type=checkbox] {
                    position: absolute;
                    opacity: 0;
                    width: 1px;
                    height: 1px;
                    pointer-events: none;
                }

                &:has(input[type=checkbox]:checked) {
                    --spin-it: 1;
                    --btn-spin-scale: 0;
                    --btn-spin-event: none;
                    --btn-spin-trans-duration: var(--spin-duration);
                    --btn-reset-scale: 1;
                    --btn-reset-event: auto;
                    --btn-reset-trans-delay: var(--spin-duration);
                }

                .controls {
                    position: absolute;
                    z-index: 2;
                    inset: 0;
                    margin: auto;
                    width: min(100px, 10vw);
                    aspect-ratio: 1;
                    background: var(--marker-bg-color);
                    border-radius: 9in;
                    transition: scale 150ms ease-in-out;

                    &:has(:hover, :focus-visible) label {
                        scale: 1.2;
                        rotate: 20deg;
                    }

                    &::before {
                        content: '';
                        position: absolute;
                        top: 0;
                        left: 50%;
                        translate: -50% -50%;
                        width: 20%;
                        aspect-radio: 2/10;
                        background-color: transparent;
                        border: 2vw solid var(--marker-bg-color);
                        border-bottom-width: 4vw;
                        border-top: 0;
                        border-left-color: transparent;
                        border-right-color: transparent;
                        z-index: -1;
                    }

                    label {
                        cursor: pointer;
                        display: grid;
                        place-items: center;
                        width: 100%;
                        aspect-ratio: 1;
                        color: var(--button-text-color);
                        transition:
                            rotate 150ms ease-in-out,
                            scale 150ms ease-in-out;

                        svg {
                            grid-area: 1/1;
                            width: 50%;
                            height: 50%;
                            transition-property: scale;
                            transition-timing-function: ease-in-out;

                            &:first-child {
                                transition-duration: var(--btn-spin-trans-duration, 150ms);
                                scale: var(--btn-spin-scale, 1);
                                pointer-events: var(--btn-spin-event, auto);
                            }

                            &:last-child {
                                transition-duration: 150ms;
                                transition-delay: var(--btn-reset-trans-delay, 0ms);
                                scale: var(--btn-reset-scale, 0);
                                pointer-events: var(--btn-reset-event, none);
                            }
                        }
                    }


                }

                &:has(input[type=checkbox]:checked)>.wheel {
                    animation: --spin-wheel var(--spin-duration, 3s) var(--spin-easing, ease-in-out) forwards;
                }

                .wheel {
                    position: absolute;
                    inset: 0;
                    border-radius: 99vw;
                    border: 1px solid white;
                    user-select: none;
                    font-size: 24px;
                    font-weight: 600;
                    background: repeating-conic-gradient(from var(--start-angle),
                            var(--wheel-bg-1) 0deg var(--slice-angle),
                            var(--wheel-bg-2) var(--slice-angle) calc(var(--slice-angle) * 2),
                            var(--wheel-bg-3) calc(var(--slice-angle) * 2) calc(var(--slice-angle) * 3),
                            var(--wheel-bg-4) calc(var(--slice-angle) * 3) calc(var(--slice-angle) * 4));

                    >span {
                        --i: sibling-index();

                        @supports not (sibling-index(0)) {
                            &:nth-child(1) {
                                --i: 1;
                            }

                            &:nth-child(2) {
                                --i: 2;
                            }

                            &:nth-child(3) {
                                --i: 3;
                            }

                            &:nth-child(4) {
                                --i: 4;
                            }

                            &:nth-child(5) {
                                --i: 5;
                            }

                            &:nth-child(6) {
                                --i: 6;
                            }

                            &:nth-child(7) {
                                --i: 7;
                            }

                            &:nth-child(8) {
                                --i: 8;
                            }

                            &:nth-child(9) {
                                --i: 9;
                            }

                            &:nth-child(10) {
                                --i: 10;
                            }

                            &:nth-child(11) {
                                --i: 11;
                            }

                            &:nth-child(12) {
                                --i: 12;
                            }
                        }
                        position: absolute;
                        offset-path: circle(var(--item-radius) at 50% 50%);
                        offset-distance: calc(var(--i) / var(--items) * 100%);
                        offset-rotate: auto;
                    }
                }
            }

            @keyframes --spin-wheel {
                to {
                    rotate: var(--random-angle);
                }
            }
        }

        @layer notes {
            section.notes {
                margin: auto;
                width: min(80vw, 56ch);

                p {
                    text-wrap: pretty;
                }

                > :first-child {
                    color: red;
                    background: rgb(255, 100, 103);
                    padding: .5em;
                    color: white;

                    @supports (rotate: random(1deg, 10deg)) {
                        display: none;
                    }
                }
            }
        }

        @layer base {

            *,
            ::before,
            ::after {
                box-sizing: border-box;
            }

            :root {
                color-scheme: light dark;
                --bg-dark: rgb(21 21 21);
                --bg-light: rgb(248, 244, 238);
                --txt-light: rgb(10, 10, 10);
                --txt-dark: rgb(245, 245, 245);
                --line-light: rgba(0 0 0 / .75);
                --line-dark: rgba(255 255 255 / .25);
                --clr-bg: light-dark(var(--bg-light), var(--bg-dark));
                --clr-txt: light-dark(var(--txt-light), var(--txt-dark));
                --clr-lines: light-dark(var(--line-light), var(--line-dark));
            }

            body {
                background-color: var(--clr-bg);
                color: var(--clr-txt);
                min-height: 100svh;
                margin: 0;
                padding: 2rem;
                font-family: "Jura", sans-serif;
                font-size: 1rem;
                line-height: 1.5;
                display: grid;
                place-content: center;
                gap: 2rem;
            }

            strong {
                font-weight: 700;
            }
        }
    </style>
</head>

<body>

    <section class="wrapper">
        <input type="checkbox" id="radio-spin">
        <div class="controls">
            <label for="radio-spin">
                <svg xmlns="http://www.w3.org/2000/svg" width="24" height="24" viewBox="0 0 24 24" fill="none"
                    stroke="currentColor" stroke-width="2" stroke-linecap="round" stroke-linejoin="round"
                    aria-label="Spin the Wheel" title="Spin the Wheel">
                    <path stroke="none" d="M0 0h24v24H0z" fill="none" />
                    <path d="M14 12a2 2 0 1 0 -4 0a2 2 0 0 0 4 0" />
                    <path d="M12 21c-3.314 0 -6 -2.462 -6 -5.5s2.686 -5.5 6 -5.5" />
                    <path d="M21 12c0 3.314 -2.462 6 -5.5 6s-5.5 -2.686 -5.5 -6" />
                    <path d="M12 14c3.314 0 6 -2.462 6 -5.5s-2.686 -5.5 -6 -5.5" />
                    <path d="M14 12c0 -3.314 -2.462 -6 -5.5 -6s-5.5 2.686 -5.5 6" />
                </svg>

                <svg xmlns="http://www.w3.org/2000/svg" width="24" height="24" viewBox="0 0 24 24" fill="none"
                    stroke="currentColor" stroke-width="2" stroke-linecap="round" stroke-linejoin="round"
                    aria-label="Reset the Wheel" title="Reset the Wheel">
                    <path stroke="none" d="M0 0h24v24H0z" fill="none" />
                    <path d="M3.06 13a9 9 0 1 0 .49 -4.087" />
                    <path d="M3 4.001v5h5" />
                    <path d="M11 12a1 1 0 1 0 2 0a1 1 0 1 0 -2 0" />
                </svg>
            </label>
        </div>

        <div id="wheel" class="wheel">
            <span>乔丹</span>
            <span>詹姆斯</span>
            <span>布莱恩特</span>
            <span>约翰逊</span>
            <span>库里</span>
            <span>奥尼尔</span>
            <span>邓肯</span>
            <span>贾巴尔</span>
            <span>杜兰特</span>
            <span>哈登</span>
            <span>字母哥</span>
            <span>伦纳德</span>
        </div>
    </section>
</body>

</html>

HTML

  • section:转盘核心容器(语义化区块)相对定位,包含转盘所有子元素
  • input:转盘触发开关(核心交互控件) 视觉隐藏(opacity:0),通过「选中 / 未选中」触发动画
  • div controls:转盘中心按钮容器。绝对定位,层级高于转盘,包含点击触发的 label
  • label :绑定隐藏复选框,作为可点击按钮。点击该标签等价于点击复选框,触发状态切换
  • svg:显示「旋转」「重置」图标。两个 SVG 重叠,通过 CSS 控制显隐
  • div wheel:转盘本体。圆形布局,包含 12 个奖项文本
  • span:转盘奖项文本(12 个 NBA 球星名称) 每个 span 对应转盘一个分区,通过 CSS 定位到圆形轨道

CSS

1. 样式分层管理(@layer)

@layer base, notes, demo;
  • base:全局基础样式(盒模型、明暗色模式、页面布局),优先级最低;
  • notes:兼容提示文本样式,优先级中等;
  • demo:转盘核心样式(尺寸、动画、交互),优先级最高;

作用:按层级管理样式,避免样式冲突,便于维护。

2. 核心变量定义(:root)

:root {
  --items: 12; /* 转盘分区数量 */
  --slice-angle: calc(360deg / var(--items)); /* 每个分区角度(30°) */
  --wheel-radius: min(40vw, 300px); /* 转盘半径(自适应,最大300px) */
  --spin-duration: random(1s, 3s); /* 随机旋转时长(1-3秒) */
  --random-angle: random(1200deg, 4800deg, by var(--slice-angle)); /* 随机旋转角度(步长30°) */
  /* 浏览器兼容降级:不支持random()则固定值 */
  @supports not (rotate: random(1deg, 10deg)) {
    --spin-duration: 2s;
    --random-angle: 4800deg;
  }
}

核心:用变量统一管理转盘尺寸、角度、动画参数,random() 实现「随机旋转」核心效果,同时做浏览器兼容降级。

3. 转盘交互触发逻辑

/* 监听复选框选中状态,更新变量控制图标/动画 */
.wrapper:has(input[type=checkbox]:checked) {
  --btn-spin-scale: 0; /* 隐藏旋转图标 */
  --btn-reset-scale: 1; /* 显示重置图标 */
}
/* 选中时触发转盘旋转动画 */
.wrapper:has(input[type=checkbox]:checked)>.wheel {
  animation: --spin-wheel var(--spin-duration) var(--spin-easing) forwards;
}
/* 旋转动画:转到随机角度后保持状态 */
@keyframes --spin-wheel {
  to { rotate: var(--random-angle); }
}

核心:通过 :has() 伪类监听复选框状态,触发转盘动画,forwards 确保动画结束后不回弹。

4. 转盘视觉与布局

.wheel {
  border-radius: 99vw; /* 圆形转盘 */
  /* 四色循环锥形渐变,实现转盘分区背景 */
  background: repeating-conic-gradient(from var(--start-angle),
    var(--wheel-bg-1) 0deg var(--slice-angle),
    var(--wheel-bg-2) var(--slice-angle) calc(var(--slice-angle)*2),
    var(--wheel-bg-3) calc(var(--slice-angle)*2) calc(var(--slice-angle)*3),
    var(--wheel-bg-4) calc(var(--slice-angle)*3) calc(var(--slice-angle)*4));
  >span {
    offset-path: circle(var(--item-radius) at 50% 50%); /* 圆形轨道 */
    offset-distance: calc(var(--i) / var(--items) * 100%); /* 按索引定位到对应分区 */
  }
}

核心:repeating-conic-gradient 实现转盘彩色分区,offset-path 让奖项文本沿圆形轨道均匀分布。

5. 中心按钮交互

.controls {
  position: absolute;
  z-index: 2; /* 层级高于转盘,确保可点击 */
  border-radius: 9in; /* 圆形按钮 */
  &::before { /* 转盘顶部指针 */
    content: '';
    border: 2vw solid var(--marker-bg-color);
    border-bottom-width: 4vw;
    border-top/left/right-color: transparent; /* 三角指针形状 */
  }
  label:hover { scale: 1.2; rotate: 20deg; } /* 鼠标悬浮时图标放大旋转 */
}

核心:伪元素实现转盘「指针」,hover 动效提升交互反馈,两个 SVG 图标通过 scale 控制显隐。

6. 全局基础样式

@layer base {
  :root {
    color-scheme: light dark; /* 适配系统明暗色模式 */
    --clr-bg: light-dark(var(--bg-light), var(--bg-dark)); /* 自动切换背景色 */
  }
  body {
    min-height: 100svh; /* 适配移动端安全区 */
    display: grid;
    place-content: center; /* 垂直水平居中 */
  }
}

核心:light-dark() 自动适配系统明暗模式,100svh 避免移动端地址栏遮挡,网格布局实现内容居中。


各位互联网搭子,要是这篇文章成功引起了你的注意,别犹豫,关注、点赞、评论、分享走一波,让我们把这份默契延续下去,一起在知识的海洋里乘风破浪!

手写一个无限画布 #3:如何在Canvas 层上建立事件体系

你以为你点中了一个圆,其实你只是点中了一堆毫无意义的像素点。在画布里,所谓的“选中”,不过是一场精密的数学与色彩幻术。

上一篇我们终于搞定了渲染层,并明确选择了 Konva (Canvas 2D) 作为我们的底层渲染基石。现在,我们的屏幕上终于可以丝滑地渲染出极具表现力的图形了。

但是,当你试图把鼠标悬停在其中一个图形上,或者想拖拽一条连线时,你会遭遇一个巨大的反直觉打击:浏览器完全不知道你点的是什么。

在传统的前端开发中,原生 DOM 是一棵界限分明的树。鼠标移入一个 <div>,浏览器引擎会在底层自动做碰撞检测,并把 mouseenterclick 事件准确无误地派发给这个节点。如果你给 <div> 加了圆角(border-radius)甚至复杂的 clip-path,浏览器依然能完美识别出精确的边缘。这种体验太理所当然,以至于我们从未思考过背后的代价。

但在 Canvas 的世界里,这套秩序完全失效了。

对于浏览器来说,不管你在 Canvas 里画了多少个圆圈、多复杂的文字,它看到的永远只有一个扁平的 <canvas> 标签。 当用户点击屏幕时,浏览器的原生 Event 对象只能递给你一个冷冰冰的坐标:{ clientX: 500, clientY: 400 }。至于这个坐标下是空气、是红色正方形,还是三个交叠在一起的半透明多边形,对不起,只能你自己算。

要在毫无知觉的像素油盆上,重新赋予图形被“感知”的能力,这就是 命中测试(Hit Testing) 的核心命题。

直觉陷阱:纯算几何碰撞

面对这个问题,多数人脑海里冒出的第一个念头一定是算数学题。

“既然我知道画布上每个方块的长宽、每个圆的半径,那鼠标点下去的时候,去遍历所有图形做个碰撞测试不就好了?”

比如点矩形,就看鼠标坐标是不是在它的上下左右边界内;点圆,就算勾股定理看距离是不是小于半径;如果是多边形,大不了掏出大学计算机图形学里教的“射线法(Ray-Casting)”,看看射线和多边形交点是奇数还是偶数。

在很多游戏开发新手教程里,这确实是讲解命中测试的第一课。

但只要你真的在业务里动手写过,就会立刻体会到这种朴素算法带来的“工程绝望”:

如果是最基础的方块和圆还好,可你在白板工具(如 Excalidraw / Figma)里,最常面对的是用户鼠标画出的一条粗细不均、极度扭曲的自由手绘墨迹(Freehand Draw)。成百上千个点连出来的畸形曲线,你拿什么算交点?

即使你咬着牙把每根线段都算了,还有图形的中空与穿透问题。当用户点在一个空心圆环的正中间,或者字母 "O" 的空白处时,根据最粗糙的外围包围盒(Bounding Box),它是被命中的;但这根本违反了用户“我明明点在透明的地方,我想点它背后元素”的心理预期。哪怕你真算出了鼠标确实落在图形线条上,你又怎么确保,这层图形的正上方,没有被另一个半透明的阴影盖住呢?

别忘了最绝杀的性能噩梦。不仅是点击,鼠标每在屏幕上划过一个像素,就会高频触发 mousemove。如果同屏有几千个杂乱的图形交叠,每移动一毫米就要把所有多边形的射线方程重新算一遍,你的 CPU 风扇会直接起飞,页面帧率瞬间崩盘。

想靠纯写 if-else 的几何穷举来搞定一个不仅带各种圆角、线宽、自交错,还带层级遮挡的生产级别白板交互,可以说是直接在给 CPU 判死刑。


优雅的黑魔法:离屏 Canvas 与 Color Picking

针对纯正向几何数学算不通的情况,业界的顶级绘图引擎往往会使用一招极度聪明且优雅的逆向黑魔法:利用颜色查表法(Color Picking)。这也是 Konva 最为核心的看家本领机制。

hit-test-color-picking.png

它的核心逻辑堪称“暗度陈仓”,分为以下几个精妙的步骤:

1. 建立影分身(Hidden Canvas)

在内存中,创建一个跟主屏幕尺寸完全一致的隐藏 Canvas(用户看不见它)。主屏幕负责渲染展现给用户看的漂亮图形,而这个“影分身”只专门用来做苦力——命中测试。

2. 分配身份色(Color Hash)

当我们要往主屏幕画一个崭新的图形(比如一个带有高斯模糊阴影的蓝色虚线圈)时,引擎会在内存里给这个图形分配一个全局唯一、随机生成的 RGB 颜色值(比如 #000001)。 然后在内存的隐藏 Canvas 的同样坐标处,用这个唯一颜色 #000001 画一个同样轮廓的圆。无论主画布上的圆有多花哨,隐藏画布上的圆统统画成没有阴影、没有抗锯齿的纯色实心/实线

与此同时,维护一个字典(Hash Map),记录:#000001 映射到 蓝色虚线图对象引用

3. O(1) 的降维打击:只读一个像素

见证奇迹的时刻到了。 当前的场景是:主画布上画了成千上万个复杂的图形。隐藏画布上也用同样的布局画了成千上万个纯粹色块。

当用户在主屏幕上点击 (x: 500, y: 400) 时,引擎不去做任何数学几何碰撞计算,除了获取坐标外只做极其底层的一步:

  1. 走到隐藏 Canvas 面前。
  2. 精确地读取它 (500, 400) 这个坐标点上的 1 个像素的 RGB 颜色值getImageData)。
  3. 如果读出来的颜色是黑色(完全透明),说明没点中任何东西。
  4. 如果读出来的颜色是 #000001,引擎立刻去 Hash Map 里查表——破案了!对应的是那个蓝色的虚线圈对象。

为什么这个方案是统治级的?

  1. 彻底无视几何形状的难度。不管你画的是自由手绘还是残缺的文字轮廓,只要它被渲染引擎画在屏幕上,那对应的颜色像素就实打实地落在了隐藏画布上。它巧妙地利用底层的 GPU 渲染规则来替你完成极度复杂的轮廓光栅化判定。
  2. 天然解决重叠遮挡。主画布怎么叠加层级的,隐藏画布也是按同样顺序绘制的。你在隐藏画布上读出来的那个带颜色像素,必然是最顶层、没被别人遮挡的那个对象的颜色。完全不需要自己遍历判断层级。
  3. 极端的性能空间换时间。把原本复杂的 O(N×几何顶点数)O(N \times 几何顶点数) 的每帧遍历计算,直接降维成了读取内存图像一个单像素点的 O(1)O(1) 常数级查表时间。即使屏幕上有十万个对象,鼠标在上面疯狂移动也是绝对丝滑的。

站在巨人的肩膀:这就是 Konva

要在原生 Canvas 上实现一个可用于生产环境的稳健命中测试系统基建,工作量是极其庞大的。你要自己去维护那个巨大的离屏画布上下文同步、自己分配十六进制颜色、自己实现局部重绘优化、还要自己派发所有的模拟 DOM 冒泡事件。

这正是我们放弃从零手写引擎底层,转而选型采用 Konva 的终极原因。

Konva 在底层极其克制且优雅地封装了这套“离屏颜色拾取算法”。在开发者眼里,你完全感受不到那个诡异的“彩色隐藏画布”的存在。

它直接把这套脏活累活,包装成了我们最熟悉的、一如在写原生 DOM 一样的前端语法范式。这就让我们能够完全剥离繁复的数学几何泥潭,将精力投入在画布“事件分发与交互流控制”上:

// 这种久违的、确定的秩序感,对于开发无穷交互的白板来说是极其珍贵的。
import Konva from "konva";

const rect = new Konva.Rect({
  x: 50,
  y: 50,
  width: 100,
  height: 50,
  fill: "blue",
  draggable: true, // 开启拖拽!底层所有复杂的变换全自动运算并重绘画布。
});

// 你仿佛重新拥有了原生的 DOM 事件绑定系统
rect.on("mouseenter", () => {
  document.body.style.cursor = "pointer";
  rect.fill("red"); // 悬浮触发变色响应
});

rect.on("mouseleave", () => {
  document.body.style.cursor = "default";
  rect.fill("blue");
});

// 即使有成百上千个图形交叠,它也能极速计算,精准捕捉顶层响应
rect.on("click", (e) => {
  console.log("极速且精准地点中了我:", e.target);
});

有了 Konva 兜底解决“感知盲区”,我们终于补齐了跨越无限画布最重要、也是最难缠的一块技术栈拼图。

我们不再是在冷冰冰的像素点数组上作画,而是真正在操控和编排一个个有边界、能响应手势、知晓自身存在的“实体对象”

经历三篇的文章,我们已经打通了从“坐标系”、“底层渲染引擎选型博弈”到“重建事件分发秩序”的全部技术基建。

接下来,我们将长驱直入应用数据的深水区:在这块充满感知能力的画布上,我们该如何用正确的数据结构来对这些可被协同、可被导出、可被反序列化的对象进行定义?

Vue3+Element Plus 通用表格组件封装与使用实践

在中后台项目开发中,表格是高频使用的核心组件,基于 Element Plus 的el-table封装通用表格组件,能够统一表格样式、简化重复代码、提升开发效率。本文将详细讲解一款通用表格组件的封装思路、完整实现及使用方式,该组件兼顾了通用性与灵活性,适配日常开发中的各类表格场景。

一、封装思路

本次封装的核心目标是打造一款「基础能力通用化、个性化配置灵活化」的表格组件:

  1. 抽离表格通用配置(如高度、高亮行、合并单元格方法)作为基础 Props;
  2. el-tableel-pagination的原生属性 / 事件通过透传方式交给父组件控制,保留原生组件的灵活性;
  3. 统一列渲染逻辑,支持自定义render函数实现复杂单元格内容展示;
  4. 整合表格标题、分页等常用元素,形成完整的表格模块。

二、通用表格组件完整实现(MineTable.vue)

<template>
    <el-card class="mine-table">
        <!-- 表格标题 -->
        <el-text class="table-name">{{ tableName }}</el-text>
        <!-- 核心表格容器 -->
        <el-table 
            ref="elTable" 
            class="base-table" 
            :highlight-current-row="currentRow" 
            :preserve-expanded-content="true" 
            :span-method="spanMethod"
            :data="data" 
            :height="height"
            v-bind="tableProps"   <!-- 透传el-table原生属性 -->
            v-on="tableEvents"    <!-- 透传el-table原生事件 -->
        >
            <el-table-column 
                v-for="(item, index) in columnsData" 
                :key="index" 
                v-bind="item"      <!-- 透传列配置属性 -->
            >
                <!-- 展开列自定义渲染 -->
                <template v-if="item.type === 'expand'" #default="scope">
                    <component :is="item.render" v-bind="scope"></component>
                </template>
            </el-table-column>
        </el-table>

        <!-- 分页组件 -->
        <el-pagination 
            class="base-pagination" 
            layout="total, sizes, prev, pager, next, jumper"
            :page-sizes="[5, 10, 20, 30, 40, 50]" 
            background
            v-bind="paginationProps"  <!-- 透传el-pagination原生属性 -->
            v-on="paginationEvents"   <!-- 透传el-pagination原生事件 -->
        />
    </el-card>
</template>

<script setup>
import { computed, ref } from "vue"

// 关闭默认属性透传,避免属性泄露到外层DOM节点
defineOptions({
    inheritAttrs: false
})

// 定义组件Props
const props = defineProps({
    // 表格基础配置
    tableName: { type: String, default: "", description: "表格标题" },
    currentRow: { type: Boolean, default: false, description: "是否高亮当前行" },
    height: { type: String, default: "60vh", description: "表格高度" },
    data: { type: Array, default: () => [], description: "表格数据源" },
    columns: { type: Array, default: () => [], description: "列配置项" },
    spanMethod: { type: Function, default: () => {}, description: "单元格合并方法" },
    
    // el-table原生属性透传(支持所有el-table属性)
    tableProps: { type: Object, default: () => ({}) },
    // el-table原生事件透传(支持所有el-table事件)
    tableEvents: { type: Object, default: () => ({}) },
    
    // el-pagination原生属性透传(支持所有el-pagination属性)
    paginationProps: { type: Object, default: () => ({}) },
    // el-pagination原生事件透传(支持所有el-pagination事件)
    paginationEvents: { type: Object, default: () => ({}) },
})

// 暴露表格Ref,方便父组件调用el-table的原生方法
const elTable = ref(null)
defineExpose({ elTable })

// 列数据格式化处理,统一支持render函数渲染
const columnsData = computed(() => {
    return props.columns.map(item => ({
        formatter: (row, column, cellValue, index) => formatter(item, row, column, cellValue, index),
        ...item
    }))
})

// 单元格内容格式化逻辑
const formatter = (item, row, column, cellValue, index) => {
    // 优先级:行数据中的render函数 > 列配置中的render函数 > 默认值
    if (row?.[column.property]?.render) {
        return row[column.property].render(row, column, cellValue, index)
    } else if (item?.render) {
        return item.render(row, column, cellValue, index)
    }
    return row[column.property]
}
</script>

<style lang="scss" scoped>
.mine-table {
    width: 100%;
    display: flex;
    flex-direction: column;
    align-items: center;
    
    .table-name {
        font-size: 18px;
        font-weight: bold;
        margin-bottom: 12px;
        display: flex;
        align-items: center;
        &::after {
            content: "";
            width: 5px;
            height: 100%;
            background-color: var(--el-color-primary);
            margin-right: 12px;
        }
    }

    .base-table {
        width: 100%;
        margin: 0 auto;
        min-width: 0;
        border: var(--el-table-border);
        border-radius: 4px;
    }

    .base-pagination {
        margin-top: 12px;
    }
}
</style>

核心封装点说明

  1. 属性 / 事件透传:通过tableProps/tableEventspaginationProps/paginationEvents分别透传el-tableel-pagination的原生属性与事件,既保留了原生组件的全部能力,又无需在组件内重复定义中转逻辑。
  2. 统一列渲染:封装了formatter函数,支持两种自定义渲染方式 —— 列配置中的render函数、行数据中的render函数,满足复杂单元格的展示需求。
  3. 基础样式整合:内置了表格标题、表格容器、分页的统一样式,无需在业务页面重复编写样式代码。
  4. Ref 暴露:将el-table的 Ref 暴露给父组件,方便调用clearSelectiontoggleRowSelection等原生方法。

三、组件使用示例

1. 基础使用(仅核心配置)

这是最常用的场景,只需配置表格数据、列配置、基础样式即可:

<template>
  <div class="demo-container">
    <!-- 通用表格组件使用 -->
    <MineTable
      height="200px"
      tableName="用户列表"
      :data="tableData"
      :columns="tableColumns"
    />
  </div>
</template>

<script setup>
import { ref } from "vue"
import MineTable from "@/components/MineTable.vue"
import { ElMessage, ElPopconfirm, ElButton, ElText } from "element-plus"

// 表格数据源
const tableData = ref([
  { id: 1, name: "张三", email: "zhangsan@example.com" },
  { id: 2, name: "李四", email: "lisi@example.com" },
  { id: 3, name: "王五", email: "wangwu@example.com" }
])

// 列配置项
const tableColumns = ref([
  { type: "index", label: "序号", width: 80 }, // 序号列
  {
    label: "用户名称",
    prop: "name",
    // 自定义单元格渲染
    render: (row) => <ElText type="primary">{row.name}</ElText>
  },
  {
    label: "操作",
    width: 100,
    // 操作列:带确认弹窗的删除按钮
    render: (row) => {
      const deleteUser = () => {
        // 模拟删除逻辑
        tableData.value = tableData.value.filter(item => item.id !== row.id)
        ElMessage.success(`已删除用户:${row.name}`)
      }

      return (
        <ElPopconfirm 
          title="确定删除吗?" 
          onConfirm={deleteUser}
          confirmButtonText="确定" 
          cancelButtonText="取消"
          v-slots={{
            reference: () => <ElButton type="danger" size="small" link>删除</ElButton>
          }}
        />
      )
    }
  }
])
</script>

<style scoped>
.demo-container {
  width: 800px;
  margin: 20px auto;
}
</style>

2. 进阶使用(透传原生属性 / 事件)

如果需要使用el-tableel-pagination的原生能力(如斑马纹、行点击事件、分页回调等),可通过透传 Props 实现:

<template>
  <div class="demo-container">
    <MineTable
      height="300px"
      tableName="用户列表"
      :data="tableData"
      :columns="tableColumns"
      <!-- 透传el-table原生属性 -->
      :table-props="{
        border: true,        // 显示表格边框
        stripe: true,        // 斑马纹效果
        showHeader: true     // 显示表头
      }"
      <!-- 透传el-table原生事件 -->
      :table-events="{
        'row-click': (row) => ElMessage.info(`点击了${row.name}的行`), // 行点击事件
        'sort-change': (val) => console.log('排序变更:', val)       // 排序变更事件
      }"
      <!-- 透传el-pagination原生属性 -->
      :pagination-props="{
        currentPage: 1,      // 当前页码
        pageSize: 10,        // 每页条数
        total: 100           // 总条数
      }"
      <!-- 透传el-pagination原生事件 -->
      :pagination-events="{
        'size-change': (size) => console.log('每页条数变更:', size), // 页大小变更
        'current-change': (page) => console.log('页码变更:', page)   // 页码变更
      }"
    />
  </div>
</template>

四、总结

本次封装的通用表格组件具备以下特点:

  1. 通用性强:整合了表格标题、分页等常用元素,统一了基础样式和渲染逻辑;
  2. 灵活性高:通过属性 / 事件透传,保留了 Element Plus 原生组件的全部能力,适配各类个性化需求;
  3. 易用性好:使用方式简洁,基础场景只需配置数据和列,进阶场景可透传原生属性 / 事件;
  4. 可扩展:在此基础上可进一步扩展空状态、加载状态、列宽自适应等通用能力,适配更多业务场景。

该组件能够有效减少中后台项目中表格相关的重复代码,提升开发效率,同时保持了足够的灵活性,满足不同业务场景的个性化需求。

Diff算法基础:同层比较与key的作用

在上一篇文章中,我们深入探讨了 patch 算法的完整实现。今天,我们将聚焦于 Diff 算法的核心思想——为什么需要它?它如何工作?key 又为什么如此重要?通过这篇文章,我们将彻底理解 Diff 算法的基础原理。

前言:从生活中的例子理解Diff

想象一下,假如我们有一排积木:

A B C D

然后我们想把它变成这样:

A C D B

这时,我们应该怎么做呢?

  • 方式一:全部推倒重来:移除所有,按照我们想要的顺序重新摆放

  • 方式二:只调整变化的部分:移动位置,替换积木,即:我们只需要调整 B C D 三块积木的位置即可。

很显然,方式二的做法更高效。这就是 Diff 算法的本质——找出最小化的更新方案。

为什么需要 Diff 算法?

没有 Diff 算法会怎样?

假设我们有一个简单的列表:

<!-- 旧列表 -->
<ul>
  <li>苹果</li>
  <li>香蕉</li>
  <li>橙子</li>
</ul>

<!-- 新列表(只改了最后一个) -->
<ul>
  <li>苹果</li>
  <li>香蕉</li>
  <li>橘子</li>
</ul>

上述两个列表中,新列表只改了最后一项数据,如果没有 Diff 算法,我们只能按照 前言 中的方式一处理:删除整个 ul,重新创建:

const oldUl = document.querySelector('ul');
oldUl.remove();

const newUl = document.createElement('ul');
newUl.innerHTML = `
  <li>苹果</li>
  <li>香蕉</li>
  <li>橘子</li>
`;
container.appendChild(newUl);

这种方式虽然可以解决问题,但存在很大的风险:

  1. 性能极差:即使只改一个字,也要重建整个 DOM 树
  2. 状态丢失:输入框内容、滚动位置都会丢失
  3. 浪费资源:创建了大量不必要的 DOM 节点

此时 Diff 算法的重要性就凸显出来了!

Diff 算法的目标

Diff 算法的核心目标可以概括为三点:

  1. 尽可能复用已有节点
  2. 只更新变化的部分
  3. 最小化 DOM 操作

还是以上述 ul 结构为例,理想中的 Diff 操作应该是:

  1. 更新第三个 li 的文本内容:将 <li>橙子</li> 替换成 <li>橘子</li>
  2. 其他节点完全复用,不作任何更改

传统 Diff 算法

function diff(oldList, newList){
  for(let i = 0; i < oldList.length; i++){
    for(let j = 0; j < newList.length; j++){
      if(oldList[i] === newList[j]){
        // 找到相同的节点,进行复用
        console.log('找到了相同的节点', oldList[i]);
        break;
      } else {
        // 没找到相同的节点,进行新增
        console.log('需要新增节点', newList[j]);
      }
    }
  }
}

上述代码的时间复杂度为:O(n²);如果再考虑到移动、删除、新增等操作,其时间复杂度可以达到:O(n³)。这显然是不合理的。

同层比较的核心思想

为了解决传统 Diff 算法的时间复杂度问题,Vue 团队通过两个关键思想,将 Diff 算法的时间复杂降低到了:O(n):

  1. 同层比较,即只比较同一层级的节点
  2. 类型相同,即不同类型节点直接替换

什么是同层比较?

同层比较的意思是:只比较同一层级的节点,不跨层级移动。 我们来看一个简单的例子: 同层比较 上图两个新旧 VNode 树中,对比过程是这样的: 同层比较示例图

为什么不跨层级比较?

我们可以再来一个更复杂的示例:

<!-- 旧列表 -->
<ul>
  <li>li-1</li>
  <li>li-2</li>
  <li>
    <span>
      <a>
        li-3
      </a>
    </span>
  </li>
</ul>

<!-- 新列表 -->
<ul>
  <li>li-1</li>
  <li>li-2</li>
  <li>
    <a>
      li-3
    </a>
  </li>
</ul>

假设新旧两个列表是这样的,如果支持跨层级比较和移动,那么上述列表应该进行如下操作:

  1. 发现旧列表中 a 标签位于 span 标签下,新列表中直接位于 li 标签下;
  2. 记录这个操作差异,保存 a 标签,删除 span 标签,再把 a 标签挂载到 li 标签下;
  3. 更新父子节点关系。

这种操作会让算法变得极其复杂,而且实际开发中,跨层级移动节点的情况非常罕见。所以 Vue 选择简化问题:如果节点跨层级了,就视为不同类型,直接替换。

function patch(oldVNode, newVNode) {
  // 如果节点类型不同,直接替换
  if (oldVNode.type !== newVNode.type) {
    unmount(oldVNode);
    mount(newVNode);
    return;
  }
  
  // 同类型节点,进行深度比较
  patchChildren(oldVNode, newVNode);
}

同层比较的优势

优势 说明 示例
算法简单 只需要比较同一层 树形结构简化为线性比较
性能可控 复杂度O(n) 1000个节点只需比较1000次
实现可靠 边界情况少 不需要处理复杂移动

key在节点复用中的作用

为什么需要key?

我们来看一个简单的代办列表:

<!-- 旧列表 -->
<li>学习Vue</li>
<li>写文章</li>
<li>休息一下</li>

<!-- 新列表(删除了中间项 写文章) -->
<li>学习Vue</li>
<li>休息一下</li>

如果没有 key,Vue 会如何进行 diff 比较呢:

  1. 比较位置0:都是"学习Vue",直接复用;
  2. 比较位置1:旧的是"写文章",新的是"休息一下" ,更新文本进行替换
  3. 比较位置2:旧的有"休息一下",新的没有,则删除

这样操作过程中,更新了一个 li 的文本,删除了一个 li 。 这个过程看起来是没有问题的,但是如果上述列表有状态呢?

<!-- 带输入框的列表 -->
<li>
  <input value="学习Vue" />
  学习Vue
</li>
<li>
  <input value="写文章" />
  写文章
</li>
<li>
  <input value="休息一下" />
  休息一下
</li>

<!-- 删除中间项后 -->
<li>
  <input value="学习Vue" />  <!-- 输入框内容被保留了 -->
  学习Vue
</li>
<li>
  <input value="休息一下" />  <!-- 这里会是"休息一下"吗? -->
  休息一下
</li>

这时候问题就出现了:输入框的内容被错误地复用了!由于没有 key 的情况下,Vue 只按位置比较,最后的实际结果是:

<li>
  <input value="学习Vue" />  <!-- 输入框内容被保留了 -->
  学习Vue
</li>
<li>
  <input value="写文章" />  <!-- label变成了"写文章" -->
  休息一下
</li>

这个例子也同样解释了为什么不推荐,或者说不能用 index 作为 key 的原因。正确的做法是使用唯一的、稳定的标识作为 key。

key的作用图解

key的作用可以这样理解: key的作用图解

手写实现:简单Diff算法

class SimpleDiff {
  constructor(options) {
    this.options = options;
  }
  
  /**
   * 执行diff更新
   * @param {Array} oldChildren 旧子节点数组
   * @param {Array} newChildren 新子节点数组
   * @param {HTMLElement} container 父容器
   */
  diff(oldChildren, newChildren, container) {
    // 1. 创建key到索引的映射(如果有key)
    const oldKeyMap = this.createKeyMap(oldChildren);
    const newKeyMap = this.createKeyMap(newChildren);
    
    // 2. 记录已处理的节点
    const processed = new Set();
    
    // 3. 第一轮:尝试复用有key的节点
    this.patchKeyedNodes(oldChildren, newChildren, oldKeyMap, newKeyMap, processed, container);
    
    // 4. 第二轮:处理剩余节点
    this.processRemainingNodes(oldChildren, newChildren, processed, container);
  }
  
  /**
   * 创建key到索引的映射
   */
  createKeyMap(children) {
    const map = new Map();
    for (let i = 0; i < children.length; i++) {
      const child = children[i];
      if (child.key != null) {
        map.set(child.key, i);
      }
    }
    return map;
  }
  
  /**
   * 处理有key的节点
   */
  patchKeyedNodes(oldChildren, newChildren, oldKeyMap, newKeyMap, processed, container) {
    // 遍历新节点
    for (let i = 0; i < newChildren.length; i++) {
      const newVNode = newChildren[i];
      
      // 如果新节点没有key,跳过第一轮处理
      if (newVNode.key == null) continue;
      
      // 尝试在旧节点中找相同key的节点
      const oldIndex = oldKeyMap.get(newVNode.key);
      
      if (oldIndex !== undefined) {
        const oldVNode = oldChildren[oldIndex];
        
        // 标记为已处理
        processed.add(oldIndex);
        
        // 执行patch更新
        this.patchVNode(oldVNode, newVNode, container);
      } else {
        // 没有找到对应key,说明是新增节点
        this.mountVNode(newVNode, container);
      }
    }
  }
  
  /**
   * 处理剩余节点
   */
  processRemainingNodes(oldChildren, newChildren, processed, container) {
    // 1. 卸载未处理的旧节点
    for (let i = 0; i < oldChildren.length; i++) {
      if (!processed.has(i)) {
        this.unmountVNode(oldChildren[i]);
      }
    }
    
    // 2. 挂载新节点中未处理的节点
    for (let i = 0; i < newChildren.length; i++) {
      const newVNode = newChildren[i];
      
      // 如果没有key或者key不在旧节点中,需要挂载
      if (newVNode.key == null) {
        this.mountVNode(newVNode, container);
      } else {
        const oldIndex = oldChildren.findIndex(old => old.key === newVNode.key);
        if (oldIndex === -1) {
          this.mountVNode(newVNode, container);
        }
      }
    }
  }
  
  /**
   * 更新节点
   */
  patchVNode(oldVNode, newVNode, container) {
    console.log(`更新节点: ${oldVNode.key || '无key'}`);
    
    // 复用DOM元素
    newVNode.el = oldVNode.el;
    
    // 更新属性
    this.updateProps(newVNode.el, oldVNode.props, newVNode.props);
    
    // 更新子节点
    if (newVNode.children !== oldVNode.children) {
      newVNode.el.textContent = newVNode.children;
    }
  }
  
  /**
   * 挂载新节点
   */
  mountVNode(vnode, container) {
    console.log(`挂载新节点: ${vnode.key || '无key'}`);
    
    // 创建DOM元素
    const el = document.createElement(vnode.type);
    vnode.el = el;
    
    // 设置属性
    this.updateProps(el, {}, vnode.props);
    
    // 设置内容
    if (vnode.children) {
      el.textContent = vnode.children;
    }
    
    // 插入到容器
    container.appendChild(el);
  }
  
  /**
   * 卸载节点
   */
  unmountVNode(vnode) {
    console.log(`卸载节点: ${vnode.key || '无key'}`);
    if (vnode.el && vnode.el.parentNode) {
      vnode.el.parentNode.removeChild(vnode.el);
    }
  }
  
  /**
   * 更新属性
   */
  updateProps(el, oldProps = {}, newProps = {}) {
    // 移除不存在的属性
    for (const key in oldProps) {
      if (!(key in newProps)) {
        el.removeAttribute(key);
      }
    }
    
    // 设置新属性
    for (const key in newProps) {
      if (oldProps[key] !== newProps[key]) {
        el.setAttribute(key, newProps[key]);
      }
    }
  }
}

// 创建VNode的辅助函数
function h(type, props = {}, children = '') {
  return {
    type,
    props,
    key: props.key,
    children,
    el: null
  };
}

结语

理解 Diff 算法的基础原理,就像掌握了Vue 更新 DOM 的"思维模式"。知道它如何思考、如何决策,才能写出与框架配合最好的代码。

对于文章中错误的地方或有任何疑问,欢迎在评论区留言讨论!

patch算法:新旧节点的比对与更新

在前面的文章中,我们深入探讨了虚拟 DOM 的创建和组件的挂载过程。当数据变化时,Vue 需要高效地更新 DOM。这个过程的核心就是 patch 算法——新旧虚拟 DOM 的比对与更新策略。本文将带你深入理解 Vue3 的 patch 算法,看看它如何以最小的代价完成 DOM 更新。

前言:为什么需要patch?

想象一下,你有一个展示用户列表的页面。当某个用户的名字改变时,我们会怎么做?

  • 粗暴方式:重新渲染整个列表(性能差)
  • 聪明方式:只更新那个改变的用户名(性能好)

patch 算法就是 Vue 采用的"聪明方式"。它的核心思想是:找出新旧 VNode 的差异,只更新变化的部分,而不是重新渲染整个 DOM 树:

patch 过程图

patch函数的核心逻辑

patch的整体架构

patch 函数是整个更新过程的总调度器,它根据节点类型分发到不同的处理函数:

function patch(oldVNode, newVNode, container, anchor = null) {
  // 如果是同一个引用,无需更新
  if (oldVNode === newVNode) return;
  
  // 如果类型不同,直接替换
  if (oldVNode && !isSameVNodeType(oldVNode, newVNode)) {
    unmount(oldVNode);
    oldVNode = null;
  }
  
  const { type, shapeFlag } = newVNode;
  
  // 根据类型分发处理
  switch (type) {
    case Text:
      processText(oldVNode, newVNode, container, anchor);
      break;
    case Comment:
      processComment(oldVNode, newVNode, container, anchor);
      break;
    case Fragment:
      processFragment(oldVNode, newVNode, container, anchor);
      break;
    case Static:
      processStatic(oldVNode, newVNode, container, anchor);
      break;
    default:
      if (shapeFlag & ShapeFlags.ELEMENT) {
        processElement(oldVNode, newVNode, container, anchor);
      } else if (shapeFlag & ShapeFlags.COMPONENT) {
        processComponent(oldVNode, newVNode, container, anchor);
      } else if (shapeFlag & ShapeFlags.TELEPORT) {
        processTeleport(oldVNode, newVNode, container, anchor);
      } else if (shapeFlag & ShapeFlags.SUSPENSE) {
        processSuspense(oldVNode, newVNode, container, anchor);
      }
  }
}

patch 的分发流程图

patch的分发流程图

判断节点类型的关键:isSameVNodeType

function isSameVNodeType(n1, n2) {
  // 比较类型和key
  return n1.type === n2.type && n1.key === n2.key;
}

为什么需要key?

我们看看下面的例子:

<!-- 旧列表 -->
<li key="a">A</li>
<li key="b">B</li>
<li key="c">C</li>

<!-- 新列表 -->
<li key="a">A</li>
<li key="c">C</li>
<li key="b">B</li>

<!-- 有key: 只移动节点,不重新创建 -->
<!-- 无key: 全部重新创建,性能差 -->

不同类型节点的处理策略

文本节点的处理

文本节点是最简单的节点类型,处理逻辑也最直接:

function processText(oldVNode, newVNode, container, anchor) {
  if (oldVNode == null) {
    // 首次挂载
    const textNode = document.createTextNode(newVNode.children);
    newVNode.el = textNode;
    container.insertBefore(textNode, anchor);
  } else {
    // 更新
    const el = (newVNode.el = oldVNode.el);
    if (newVNode.children !== oldVNode.children) {
      // 只有文本变化时才更新
      el.nodeValue = newVNode.children;
    }
  }
}

文本节点更新过程

文本节点更新过程

注释节点的处理

注释节点基本不需要更新,因为用户通常不关心注释的变化:

function processComment(oldVNode, newVNode, container, anchor) {
  if (oldVNode == null) {
    const commentNode = document.createComment(newVNode.children);
    newVNode.el = commentNode;
    container.insertBefore(commentNode, anchor);
  } else {
    // 注释节点很少变化,直接复用
    newVNode.el = oldVNode.el;
  }
}

元素节点的处理

元素节点的更新是最复杂的,需要处理属性和子节点:

function processElement(oldVNode, newVNode, container, anchor) {
  if (oldVNode == null) {
    // 首次挂载
    mountElement(newVNode, container, anchor);
  } else {
    // 更新
    patchElement(oldVNode, newVNode);
  }
}

function patchElement(oldVNode, newVNode) {
  const el = (newVNode.el = oldVNode.el);
  
  // 1. 更新props
  patchProps(el, oldVNode.props, newVNode.props);
  
  // 2. 更新children
  patchChildren(oldVNode, newVNode, el);
}

function patchProps(el, oldProps, newProps) {
  oldProps = oldProps || {};
  newProps = newProps || {};
  
  // 移除旧props中不存在于新props的属性
  for (const key in oldProps) {
    if (!(key in newProps)) {
      patchProp(el, key, oldProps[key], null);
    }
  }
  
  // 添加或更新新props
  for (const key in newProps) {
    const old = oldProps[key];
    const next = newProps[key];
    if (old !== next) {
      patchProp(el, key, old, next);
    }
  }
}

子节点的比对策略

子节点的比对是 patch 算法中最复杂、也最关键的部分。Vue3 根据子节点的类型,采用不同的策略。

子节点类型组合的处理策略

下表总结了所有可能的子节点类型组合及对应的处理方式:

旧子节点 新子节点 处理策略 示例
文本 文本 直接替换文本内容 "old" → "new"
文本 数组 清空文本,挂载数组 "text" → [vnode1, vnode2]
文本 清空文本 "text" → null
数组 文本 卸载数组,设置文本 [vnode1, vnode2] → "text"
数组 数组 执行核心diff [a,b,c] → [a,d,e]
数组 卸载所有子节点 [a,b,c] → null
文本 设置文本 null → "text"
数组 挂载数组 null → [a,b,c]

当新旧节点都为数组时,需要执行 diff 算法,diff 算法的内容在后面的文章中会专门介绍。

Fragment和Text节点的特殊处理

Fragment的处理

Fragment 是 Vue3 新增的节点类型,用于支持多根节点:

function processFragment(oldVNode, newVNode, container, anchor) {
  if (oldVNode == null) {
    // 首次挂载
    mountFragment(newVNode, container, anchor);
  } else {
    // 更新
    patchFragment(oldVNode, newVNode, container, anchor);
  }
}

function mountFragment(vnode, container, anchor) {
  const { children, shapeFlag } = vnode;
  
  if (shapeFlag & ShapeFlags.TEXT_CHILDREN) {
    // 文本子节点:挂载为文本节点
    const textNode = document.createTextNode(children);
    vnode.el = textNode;
    container.insertBefore(textNode, anchor);
  } else if (shapeFlag & ShapeFlags.ARRAY_CHILDREN) {
    // 数组子节点:挂载所有子节点
    mountChildren(children, container, anchor);
    
    // 设置el和anchor
    vnode.el = children[0]?.el;
    vnode.anchor = children[children.length - 1]?.el;
  }
}

function patchFragment(oldVNode, newVNode, container, anchor) {
  const oldChildren = oldVNode.children;
  const newChildren = newVNode.children;
  
  // Fragment本身没有DOM,直接patch子节点
  patchChildren(oldVNode, newVNode, container);
  
  // 更新el和anchor
  if (Array.isArray(newChildren)) {
    newVNode.el = newChildren[0]?.el || oldVNode.el;
    newVNode.anchor = newChildren[newChildren.length - 1]?.el || oldVNode.anchor;
  }
}

文本节点的优化

Vue3 对纯文本节点做了特殊优化,避免不必要的 VNode 创建:

// 模板:<div>{{ message }}</div>
// 编译后:
function render(ctx) {
  return h('div', null, ctx.message, PatchFlags.TEXT);
}

// 在patch过程中:
if (newVNode.patchFlag & PatchFlags.TEXT) {
  // 只需要更新文本内容,不需要比较其他属性
  const el = oldVNode.el;
  if (newVNode.children !== oldVNode.children) {
    el.textContent = newVNode.children;
  }
  newVNode.el = el;
  return;
}

手写实现:完整的patch函数基础版本

基础工具函数

// 类型标志
const ShapeFlags = {
  ELEMENT: 1,
  FUNCTIONAL_COMPONENT: 1 << 1,
  STATEFUL_COMPONENT: 1 << 2,
  TEXT_CHILDREN: 1 << 3,
  ARRAY_CHILDREN: 1 << 4,
  SLOTS_CHILDREN: 1 << 5,
  TELEPORT: 1 << 6,
  SUSPENSE: 1 << 7,
  COMPONENT_SHOULD_KEEP_ALIVE: 1 << 8,
  COMPONENT_KEPT_ALIVE: 1 << 9
};

// 特殊节点类型
const Text = Symbol('Text');
const Comment = Symbol('Comment');
const Fragment = Symbol('Fragment');

// 判断是否同类型节点
function isSameVNodeType(n1, n2) {
  return n1.type === n2.type && n1.key === n2.key;
}

完整的patch函数

class Renderer {
  constructor(options) {
    this.options = options;
  }
  
  patch(oldVNode, newVNode, container, anchor = null) {
    if (oldVNode === newVNode) return;
    
    // 处理不同类型的节点
    if (oldVNode && !isSameVNodeType(oldVNode, newVNode)) {
      this.unmount(oldVNode);
      oldVNode = null;
    }
    
    const { type, shapeFlag } = newVNode;
    
    // 根据类型分发
    switch (type) {
      case Text:
        this.processText(oldVNode, newVNode, container, anchor);
        break;
      case Comment:
        this.processComment(oldVNode, newVNode, container, anchor);
        break;
      case Fragment:
        this.processFragment(oldVNode, newVNode, container, anchor);
        break;
      default:
        if (shapeFlag & ShapeFlags.ELEMENT) {
          this.processElement(oldVNode, newVNode, container, anchor);
        } else if (shapeFlag & ShapeFlags.COMPONENT) {
          this.processComponent(oldVNode, newVNode, container, anchor);
        } else if (shapeFlag & ShapeFlags.TELEPORT) {
          this.processTeleport(oldVNode, newVNode, container, anchor);
        }
    }
  }
  
  processElement(oldVNode, newVNode, container, anchor) {
    if (oldVNode == null) {
      // 挂载
      this.mountElement(newVNode, container, anchor);
    } else {
      // 更新
      this.patchElement(oldVNode, newVNode);
    }
  }
  
  mountElement(vnode, container, anchor) {
    const { type, props, children, shapeFlag } = vnode;
    
    // 创建元素
    const el = this.options.createElement(type);
    vnode.el = el;
    
    // 设置属性
    if (props) {
      for (const key in props) {
        this.options.patchProp(el, key, null, props[key]);
      }
    }
    
    // 处理子节点
    if (shapeFlag & ShapeFlags.TEXT_CHILDREN) {
      this.options.setElementText(el, children);
    } else if (shapeFlag & ShapeFlags.ARRAY_CHILDREN) {
      this.mountChildren(children, el);
    }
    
    // 插入
    this.options.insert(el, container, anchor);
  }
  
  patchElement(oldVNode, newVNode) {
    const el = (newVNode.el = oldVNode.el);
    const oldProps = oldVNode.props || {};
    const newProps = newVNode.props || {};
    
    // 更新属性
    this.patchProps(el, oldProps, newProps);
    
    // 更新子节点
    this.patchChildren(oldVNode, newVNode, el);
  }
  
  patchChildren(oldVNode, newVNode, container) {
    const oldChildren = oldVNode.children;
    const newChildren = newVNode.children;
    
    const oldShapeFlag = oldVNode.shapeFlag;
    const newShapeFlag = newVNode.shapeFlag;
    
    // 新子节点是文本
    if (newShapeFlag & ShapeFlags.TEXT_CHILDREN) {
      if (oldShapeFlag & ShapeFlags.ARRAY_CHILDREN) {
        this.unmountChildren(oldChildren);
      }
      if (oldChildren !== newChildren) {
        this.options.setElementText(container, newChildren);
      }
    }
    // 新子节点是数组
    else if (newShapeFlag & ShapeFlags.ARRAY_CHILDREN) {
      if (oldShapeFlag & ShapeFlags.TEXT_CHILDREN) {
        this.options.setElementText(container, '');
        this.mountChildren(newChildren, container);
      } else if (oldShapeFlag & ShapeFlags.ARRAY_CHILDREN) {
        this.patchKeyedChildren(oldChildren, newChildren, container);
      }
    }
    // 新子节点为空
    else {
      if (oldShapeFlag & ShapeFlags.ARRAY_CHILDREN) {
        this.unmountChildren(oldChildren);
      } else if (oldShapeFlag & ShapeFlags.TEXT_CHILDREN) {
        this.options.setElementText(container, '');
      }
    }
  }
  
  processText(oldVNode, newVNode, container, anchor) {
    if (oldVNode == null) {
      const textNode = this.options.createText(newVNode.children);
      newVNode.el = textNode;
      this.options.insert(textNode, container, anchor);
    } else {
      const el = (newVNode.el = oldVNode.el);
      if (newVNode.children !== oldVNode.children) {
        this.options.setText(el, newVNode.children);
      }
    }
  }
  
  processFragment(oldVNode, newVNode, container, anchor) {
    if (oldVNode == null) {
      this.mountFragment(newVNode, container, anchor);
    } else {
      this.patchFragment(oldVNode, newVNode, container, anchor);
    }
  }
  
  mountFragment(vnode, container, anchor) {
    const { children, shapeFlag } = vnode;
    
    if (shapeFlag & ShapeFlags.TEXT_CHILDREN) {
      const textNode = this.options.createText(children);
      vnode.el = textNode;
      this.options.insert(textNode, container, anchor);
    } else if (shapeFlag & ShapeFlags.ARRAY_CHILDREN) {
      this.mountChildren(children, container, anchor);
      vnode.el = children[0]?.el;
      vnode.anchor = children[children.length - 1]?.el;
    }
  }
  
  mountChildren(children, container, anchor) {
    for (let i = 0; i < children.length; i++) {
      this.patch(null, children[i], container, anchor);
    }
  }
  
  unmount(vnode) {
    const { shapeFlag, el } = vnode;
    
    if (shapeFlag & ShapeFlags.COMPONENT) {
      this.unmountComponent(vnode);
    } else if (shapeFlag & ShapeFlags.FRAGMENT) {
      this.unmountFragment(vnode);
    } else if (el) {
      this.options.remove(el);
    }
  }
}

Vue2 与 Vue3 的 patch 差异

核心差异对比表

特性 Vue2 Vue3 优势
数据劫持 Object.defineProperty Proxy Vue3可以监听新增/删除属性
编译优化 全量比较 静态提升 + PatchFlags Vue3跳过静态节点比较
diff算法 双端比较 最长递增子序列 Vue3移动操作更少
Fragment 不支持 支持 多根节点组件
Teleport 不支持 支持 灵活的DOM位置控制
Suspense 不支持 支持 异步依赖管理
性能 中等 优秀 Vue3更新速度提升1.3-2倍

PatchFlags 带来的优化

Vue3 通过 PatchFlags 标记动态内容,减少比较范围:

const PatchFlags = {
  TEXT: 1,           // 动态文本
  CLASS: 2,          // 动态class
  STYLE: 4,          // 动态style
  PROPS: 8,          // 动态属性
  FULL_PROPS: 16,    // 全量props
  HYDRATE_EVENTS: 32, // 事件
  STABLE_FRAGMENT: 64, // 稳定Fragment
  KEYED_FRAGMENT: 128, // 带key的Fragment
  UNKEYED_FRAGMENT: 256, // 无key的Fragment
  NEED_PATCH: 512,   // 需要非props比较
  DYNAMIC_SLOTS: 1024, // 动态插槽
  
  HOISTED: -1,       // 静态节点
  BAIL: -2           // 退出优化
};

结语

理解 patch 算法,就像是掌握了 Vue 更新 DOM 的"手术刀"。知道它如何精准地找到需要更新的部分,以最小的代价完成更新,这不仅能帮助我们写出更高效的代码,还能在遇到性能问题时快速定位和优化。

对于文章中错误的地方或有任何疑问,欢迎在评论区留言讨论!

前端调试实战:基于 chrome://webrtc-internals/ 高效排查WebRTC问题

在WebRTC前端开发过程中,「连接失败」「视频黑屏/卡顿」「音频异常」是最常见的三类问题,严重影响产品体验。Chrome浏览器内置的 chrome://webrtc-internals/ 页面,是前端开发者排查这类问题的核心利器——它无需额外安装任何工具,可实时捕获WebRTC连接全链路的关键指标,帮助开发者快速定位问题根源、高效解决调试难题。本文将从前端专家视角,结合实际调试实操步骤,详细讲解如何利用该页面排查WebRTC问题,全程保留所有核心知识点,聚焦“问题定位”核心需求,摒弃单纯的指标堆砌,突出实操性和实用性。

一、前置准备:进入调试页面并明确核心模块

作为WebRTC调试的第一步,需先正确进入调试页面,并熟练掌握页面核心模块的定位与功能,为后续高效排查奠定基础:

  1. 进入页面:打开Chrome浏览器,在地址栏直接输入 chrome://webrtc-internals/ 并按下回车键,页面会自动捕获当前浏览器中所有运行的WebRTC连接(如视频通话、实时流渲染等场景),无需进行任何额外配置,开箱即用。

  2. 核心模块认知(前端排查的核心抓手):页面顶部固定显示3个核心模块,所有WebRTC问题的排查均围绕这3个模块展开,前端开发者需牢记各模块的核心定位,避免盲目排查:

  • PeerConnections:WebRTC连接的核心载体,主要记录连接状态、ICE服务器配置等关键信息,是排查「连接失败」类问题的首选模块;

  • Stats graphs:媒体流全量统计面板,包含音频、视频轨的丢包率、帧率、网络抖动等核心指标,是排查「视频黑屏/卡顿」「音频异常」类问题的核心模块;

  • Event:WebRTC连接全流程事件日志,按时间顺序完整记录所有操作行为,可用于回溯流程异常(如信令协商失败、候选收集异常等)。

二、前端核心排查逻辑:从“连接”到“媒体”,层层递进

WebRTC的正常运行,依赖「连接建立→网络穿透→媒体传输」三个核心环节,任一环节出现问题,都会导致WebRTC无法正常工作。前端排查需遵循“先确认连接,再排查媒体”的逻辑,由浅入深、层层递进,避免盲目定位浪费时间。以下结合页面各项指标,拆解每个环节的具体排查步骤及问题定位方法,将所有正确知识点融入实际调试场景,确保可直接落地实操。

(一)第一步:排查连接状态(PeerConnections模块)—— 解决“连不上”问题

WebRTC若无法建立连接,后续媒体流传输便无从谈起。PeerConnections模块会自动列出当前浏览器中所有WebRTC连接实例(每一个实例对应前端代码中创建的一个RTCPeerConnection对象),点击实例名称即可展开详细信息,重点检查3个核心状态字段,可快速定位连接异常原因:

  1. Connection state(连接状态)
  • 查看路径:展开PeerConnection实例后,在顶部显眼位置可直接看到「connectionState」字段,字段后标注具体状态;

  • 状态解读与排查方向:

  • 正常状态:connected(表示RTCPeerConnection连接已成功建立,连接环节无任何问题);

  • 异常状态:

  • connecting:正在建立连接,前端需结合Event模块检查信令是否正常交互,或耐心等待ICE候选收集完成;

  • failed:连接失败,优先排查ICE服务器配置(如STUN/TURN服务器不可用、地址错误),其次检查信令协商流程是否异常;

  • disconnected/closed:连接断开或已关闭,需排查前端代码是否主动调用close()方法,或当前网络是否出现突然中断的情况。

  1. ICE connection state(ICE网络穿透状态)
  • 查看路径:与connectionState字段相邻,紧邻显示「iceConnectionState」,可快速找到;

  • 状态解读与排查方向:

  • 正常状态:completed(表示ICE候选已全部收集完成,网络穿透成功,已找到可用的网络通信通道);

  • 异常状态:

  • checking:正在检查ICE候选,若长期处于该状态,前端需检查当前网络是否通畅、ICE服务器配置是否正确;

  • failed:ICE连接失败,大概率是网络环境限制(如企业内网防火墙拦截ICE候选传输)或ICE服务器配置错误,可尝试切换网络(如从企业内网切换到个人热点)或检查STUN/TURN服务器地址。

  1. Signaling state(信令协商状态)
  • 查看路径:在PeerConnection实例展开后的基础信息中,找到「signalingState」字段;

  • 状态解读与排查方向:

  • 正常状态:stable(表示信令协商已完成,offer/answer交换正常,前端信令逻辑无问题);

  • 异常状态:显示have-local-offer、have-remote-offer等,说明信令协商未完成,前端需检查信令发送、接收逻辑(如offer发送后未收到对端返回的answer)。

(二)第二步:排查网络穿透(ICE候选与配对)—— 解决“能连上但媒体不通”问题

若PeerConnections模块显示连接状态正常,但媒体流无法正常传输(如视频黑屏、无声音),需重点排查ICE候选收集与配对情况,相关指标仍在PeerConnection实例展开后查看,核心关注2个关键部分:

  1. ICE gathering state(ICE候选收集状态)
  • 查看路径:在PeerConnection实例展开后的信息中,找到「iceGatheringState」字段;

  • 状态解读与排查方向:

  • 正常状态:complete(表示ICE候选已全部收集完成,无需继续等待,可进入配对阶段);

  • 异常状态:gathering(正在收集候选),若长期处于该状态,前端需检查设备网络权限、ICE服务器配置,或确认设备网络是否能正常访问公网。

  1. ICE candidate grid 与 Candidate Pairs(ICE候选配对)
  • 查看路径:在PeerConnection实例展开后,找到「ICE candidate grid」和「Candidate Pairs」两个可展开项,点击展开即可查看详细内容;

  • 状态解读与排查方向:

  • 正常状态:

① ICE candidate grid 展开后,会显示多个候选地址(包含本地IP、公网IP等),无“无效地址”“连接失败”等红色报错提示,说明候选收集正常;

② Candidate Pairs 展开后,列表中存在状态为 succeededconnected 的候选对,说明已找到可用的网络通道,网络穿透无问题。

  • 异常状态:无succeeded/connected候选对,前端需优先检查ICE服务器配置(优先使用TURN服务器解决NAT穿透问题),或切换网络环境(如从企业内网切换到个人热点)重新测试。

(三)第三步:排查媒体流传输(Stats graphs模块)—— 解决“视频黑屏/卡顿”问题

若连接状态和网络穿透均正常,但出现视频黑屏、卡顿或音频异常,需核心排查Stats graphs模块——该模块按媒体轨分类,清晰展示每一条音频、视频轨的详细统计数据,前端重点关注视频轨(解决黑屏/卡顿问题),音频轨可参考相同逻辑排查,具体操作步骤及指标排查如下:

  1. 定位目标媒体轨
  • 查看路径:在「Stats graphs」模块下,滚动页面即可找到对应媒体轨条目,按类型区分如下:

  • 视频接收端:标注 inbound-rtp(kind-video) 的条目;

  • 视频播放端:标注 media-playout(kind-video) 的条目;

  • 音频相关:标注 inbound-rtp(kind-audio)media-playout(kind-audio) 的条目。

  • 操作步骤:上述条目均为蓝色可点击文字,点击任意一条,页面会弹出独立的统计面板,以折线图形式直观展示该媒体轨的各项指标变化趋势,便于快速观察异常。

  1. 核心指标排查(前端重点关注视频轨,音频轨可参考)

(1)丢包相关指标(视频黑屏/花屏的核心诱因)

  • packetsReceived(接收数据包数):

  • 正常:折线持续平稳上升(表示前端正在持续接收视频流,无断流情况);

  • 异常:折线停滞不动(无数据接收,前端需检查对端是否正确推送媒体流、是否调用addTrack方法添加媒体轨)、突然下降(出现断流,需排查网络波动或ICE连接断开)。

  • packetsLost(丢包数):

  • 正常:数值接近0或小幅波动,丢包率(丢包数/接收数据包数)控制在5%以内(实时视频可接受范围);

  • 异常:数值持续走高、大幅跳变(丢包率过高),前端需排查当前网络环境稳定性,或调整视频码率以适配网络带宽。

(2)帧率相关指标(视频卡顿的核心诱因)

  • 核心指标:framesPerSecond(视频帧率)、framesReceived(接收帧数)、framesDecoded(解码帧数);

  • 正常:

① framesReceived 折线持续上升(说明视频源正常发帧,前端无断帧情况);

② framesDecoded 与 framesReceived 趋势基本一致(说明前端解码正常,无编解码不兼容问题);

③ framesPerSecond 稳定在25fps~30fps(常规视频帧率),无大幅波动,确保视频播放流畅。

  • 异常:framesDropped(丢弃帧数)持续上升(前端解码性能不足,需优化解码逻辑或降低视频分辨率)、帧率大幅波动(网络不稳定或视频源异常)。

(3)网络抖动相关指标(视频卡顿的辅助诱因)

  • 核心指标:jitter(网络抖动)、jitterBufferDelay(抖动缓冲延迟);

  • 正常:数值波动幅度小,jitterBufferDelay 维持低数值(无明显延迟积累,不会导致视频卡顿);

  • 异常:jitter 大幅波动、jitterBufferDelay 持续上升(前端需优化缓冲策略,或切换更稳定的网络环境)。

(四)第四步:回溯流程异常(Event模块)—— 解决“流程错乱”问题

若上述三步排查均未发现异常,但WebRTC仍无法正常工作,需通过Event模块回溯连接全流程,定位前端逻辑或信令交互的异常问题:

  1. 查看路径:页面顶部「Event」模块,按时间顺序完整记录所有WebRTC相关事件,清晰呈现连接全流程;

  2. 排查重点:

  • 事件顺序:WebRTC正常连接流程应遵循「setLocalDescription(offer)→ setRemoteDescription(answer)→ icecandidate(候选收集)→ iceConnectionStatechange(ICE连接完成)」,若事件顺序错乱,说明前端信令逻辑或PeerConnection调用顺序存在异常;

  • 异常报错:事件列表中若出现红色报错(如“setLocalDescription failed”“icecandidate error”),点击报错条目可查看详细错误信息,前端需根据报错提示修正代码(如SDP格式错误、媒体轨添加失败等)。

三、前端排查总结:快速定位问题的核心口诀

结合上述排查步骤,前端开发者可牢记“先连后媒,先状态后细节”的排查口诀,高效定位WebRTC问题,提升调试效率:

  1. 先确认连接:PeerConnections模块3个核心状态(connected、completed、stable)均正常,说明连接环节无问题;

  2. 再确认网络:ICE候选收集完成(iceGatheringState=complete),且Candidate Pairs中存在succeeded候选对,说明网络穿透无问题;

  3. 最后查媒体:Stats graphs模块中,视频轨收包、帧率正常,无明显丢包和抖动,说明媒体传输无问题;

  4. 异常回溯:若以上均正常,通过Event模块查看流程和报错,定位前端代码或信令逻辑问题。

补充说明:本文所有核心知识点均完整保留,所有排查步骤均贴合前端开发实际场景,无需关注非前端相关的底层实现,专注于“利用chrome://webrtc-internals/页面指标,快速定位前端代码/配置问题”,助力前端开发者高效解决WebRTC调试难题、提升开发效率。

四、WebRTC前端常见报错及对应排查方案(结合chrome://webrtc-internals/)

前端开发WebRTC时,遇到的各类报错,均可在 chrome://webrtc-internals/ 页面找到对应异常线索。以下整理前端高频报错、页面观察要点及具体排查解决方法,均贴合前文排查逻辑,可直接用于实操定位,快速解决调试痛点。

(一)连接类报错(对应PeerConnections模块)

  1. 报错1:setLocalDescription failed(SDP格式错误)
  • 页面观察:Event模块出现红色报错「setLocalDescription failed」,PeerConnections模块中signalingState异常(多为have-local-offer且无法切换到stable状态);

  • 前端排查方向:

① 检查前端创建offer时的约束配置(如音频/视频轨道是否正确设置),避免出现约束参数冲突的情况;

② 确认SDP格式是否正确,排查前端在发送、接收SDP时,是否出现格式篡改(如字符串截取、转义错误);

③ 检查PeerConnection初始化时的ICE服务器配置,若配置错误,可能导致SDP生成失败,进而触发该报错。

  1. 报错2:ICE connection state: failed(ICE连接失败)
  • 页面观察:PeerConnections模块中iceConnectionState始终为failed,ICE gathering state可能长期处于gathering状态,Candidate Pairs中无succeeded候选对;

  • 前端排查方向:

① 检查STUN/TURN服务器配置是否正确(如服务器地址、端口是否可达),可临时替换为谷歌公共STUN服务器(stun:stun.l.google.com:19302)测试,排除服务器本身问题;

② 排查网络环境,企业内网通常会拦截ICE候选传输,可切换到个人热点测试,确认是否为网络环境限制;

③ 检查前端是否正确监听icecandidate事件,并将收集到的候选信息成功发送给对端,避免因候选丢失导致连接失败。

(二)媒体流类报错(对应Stats graphs模块)

  1. 报错1:媒体轨解码失败(framesDecoded持续为0)
  • 页面观察:Stats graphs模块中,inbound-rtp(kind-video)的framesReceived持续上升(说明有视频数据接收),但framesDecoded始终为0,表现为视频黑屏;

  • 前端排查方向:

① 检查推流端视频编码格式,浏览器对H.265编码支持度较低,优先切换为H.264编码,确保浏览器可正常解码;

② 排查前端是否正确将媒体流绑定到video标签(确认srcObject赋值正确,且标签添加autoplay、muted属性,避免浏览器自动播放策略拦截);

③ 检查浏览器是否启用硬件加速,若解码异常,可在chrome://settings/system中关闭“使用硬件加速模式”后重试。

  1. 报错2:packetsReceived持续为0(无媒体流接收)
  • 页面观察:Stats graphs模块中,inbound-rtp(kind-video/audio)的packetsReceived折线长期停滞为0,其他相关指标无任何变化,表现为无视频、无声音;

  • 前端排查方向:

① 检查对端是否正确调用addTrack方法,将媒体轨添加到PeerConnection中,确保媒体流正常推送;

② 排查信令交互是否正常,确认offer/answer交换完成后,媒体轨相关信息是否正确同步;

③ 检查Candidate Pairs是否有succeeded候选对,若无则按ICE连接失败相关逻辑排查,大概率是网络穿透问题导致媒体流无法传输。

(三)流程类报错(对应Event模块)

  1. 报错1:offer发送后未收到answer(信令协商停滞)
  • 页面观察:Event模块中只有setLocalDescription(offer)事件,无setRemoteDescription(answer)事件,PeerConnections模块中signalingState始终为have-local-offer;

  • 前端排查方向:

① 检查前端信令发送逻辑,通过浏览器控制台打印信令消息,确认offer是否成功发送到对端;

② 排查对端信令接收逻辑,确认对端是否正确处理offer消息,并返回answer响应;

③ 检查PeerConnection调用顺序,避免在offer未发送完成时,提前调用其他相关方法,导致流程错乱。

  1. 报错2:icecandidate error(ICE候选收集异常)
  • 页面观察:Event模块出现红色报错「icecandidate error」,ICE gathering state长期处于gathering状态,ICE candidate grid中无任何候选地址;

  • 前端排查方向:

① 检查设备网络权限,确认浏览器已获取网络访问权限,无权限会导致无法收集本地ICE候选;

② 排查ICE服务器配置,若STUN服务器不可用,会导致无法收集公网ICE候选,进而触发该报错;

③ 检查前端是否正确监听icecandidate事件,避免事件绑定错误,导致候选无法正常收集。

补充:所有报错排查均需结合 chrome://webrtc-internals/ 页面指标,先通过对应模块定位异常点,再聚焦前端代码、配置进行修正,无需关注底层实现细节,可高效解决WebRTC调试难题、提升开发效率。

Tanstack Start 的天才创新之处——基于实际使用体验

最近正在使用 Tanstack Start 写一个 YouTube 视频转技术文章的 AI 应用。这是我第一次使用该框架,缘起是阅读了一篇文章我用 10 种框架开发了同款应用:移动端性能框架评估,其中一个结论:如果你需要使用 React,即 React 包体积没法避免的情况下,选择 TanStack Start 优于 Next.js。

接下来基于实际用体验我们聊一聊 Tanstack Start 的创新之处

按照哇哦程度从小到大排序。

创新一:路由类型提示 ⭐⭐⭐

Link 和 navigate 均可,这在其他框架目前是没有做到的。原理是根据路由文件自动生成路由类型文件 src/routeTree.gen.ts

但是 search 和 location.state 目前还没有,这个有点遗憾。

创新二:文件自动生成 ⭐⭐⭐⭐

要将新路由添加到应用中,只需在 ./src/routes 目录下新建一个文件。

TanStack 将自动为您生成该路由文件的内容

以前大家做模板生成是怎么做的?命令行手动执行 foo-cli gen new-page 然后生成模板文件,容易忘记。Tanstack 更高级或更智能的一点是你只要按照你自己的习惯去生成文件,内容自动给你填充好,这完全贴切我们的开发流程,一比较手动执行 cli 弱爆了,而且还可以做到内容动态生成,因为它知道你正在哪一个目录新增文件。

比如你在 routes 下则给你上传路由文件,在 services 则给你生成 service 代码,在 components 下则生成组件模板,……。真得太妙了,Next.js 得学我们也得学,学这种不违背自然规律“大音希声大象无形”的思想。

出自《道德经》“大方无隅,...,大音希声,大象无形。”这是由老子提出的中国古代文学理论中的一种美学观念,意在推崇自然的、而非人为的美。

—— 百度百科

foo-cli gen new-page 是人为的美,新增文件后自动生成根据目录而变化的模板内容是自然的美。

创新三:代码定位“一键打开源码” ⭐⭐⭐⭐⭐

先剧透下,最后效果绝对惊艳!宛如第一次看“一剑开天门”的震撼感。

比如我想要修改以下 header 样式,需要复制长长的 class 然后全局搜索,但有时候类名是动态拼接的,不一定能搜索到,这时候只能去除一部分 class,逐次删除尝试,是不是很麻烦?现在好了 Tanstack Start 直接在每一个元素增加了 data-tsd-source 复制到编辑器如 VSCode Ctrl+PCtrl + P 直接精确到行列打开,直捣黄龙!

到这里 Tanstack 就停止了它的“美学追求”了吗?并没有!还有更厉害的绝对惊艳你,你看到后面一定会发出当初和我一样“哇哦 AMAZING”的惊叹 🤩。

代码实例:

<header
  class="p-4 flex items-center bg-gray-800 text-white shadow-lg"
  data-tsd-source="/src/components/Header.tsx:23:7"
>
  <button
    class="p-2 hover:bg-gray-700 rounded-lg transition-colors"
    data-tsd-source="/src/components/Header.tsx:24:9"
  >
    <svg data-tsd-source="/src/components/Header.tsx:29:11">
      <path d="M4 5h16"></path>
      <path d="M4 12h16"></path>
      <path d="M4 19h16"></path>
    </svg>
  </button>
  <h1 data-tsd-source="/src/components/Header.tsx:31:9">
    <a data-tsd-source="/src/components/Header.tsx:32:11" href="/">
      <img
        src="/tanstack-word-logo-white.svg"
        alt="TanStack Logo"
        data-tsd-source="/src/components/Header.tsx:33:13"
      />
    </a>
  </h1>
</header>

image.png

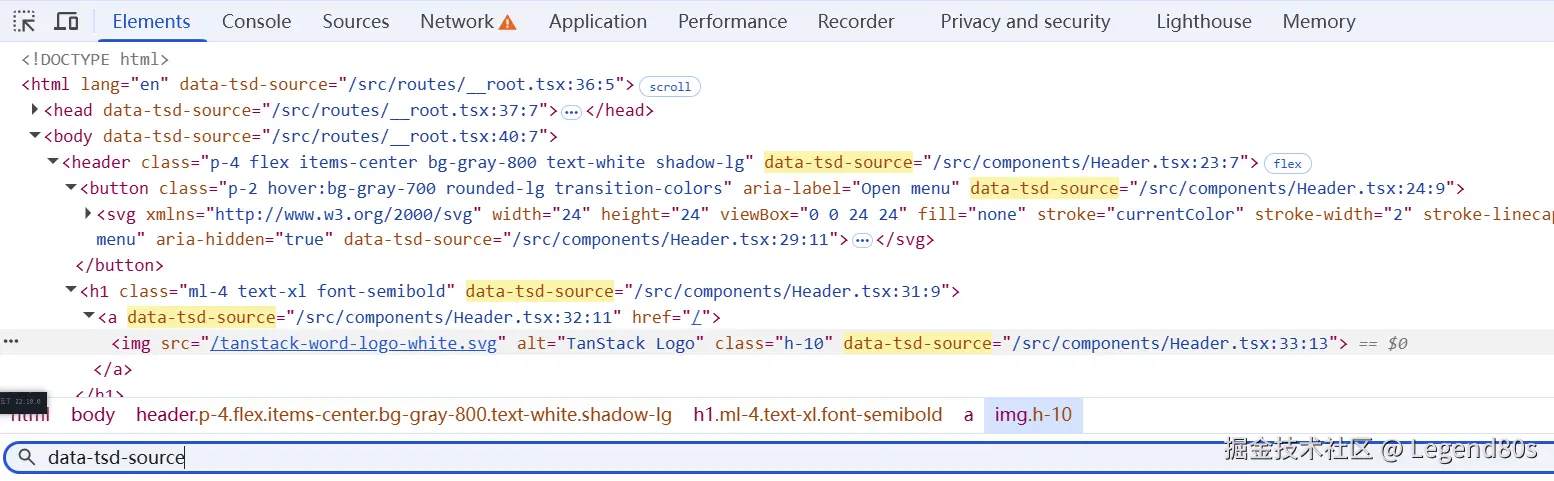
生成的每一个html 元素都有 data-tsd-source,已经非常方便定位源码了,唯一不方便是得删除开头的 / 否则直接输入 data-tsd-source 路径无法定位到具体文件。能否有编译设置?

我们来一步步了解。

首先 data-tsd-source 是 Tanstack Start 的特色,通过 @tanstack/devtools-vite injectSource 控制引入:

// vite.config.ts
import { devtools } from "@tanstack/devtools-vite"

const config = defineConfig({
  plugins: [
    devtools({
      injectSource: {
        enabled: false,
      },
    }),
  ]
});

我们可以用 enabled: false 关闭。当然这里只是说明其确实是被 devtools 引入的。接下来我们要配置达到删除开头 /,在翻阅文档和 issue 我们发现关键词“Click-to-code”,难道 Tanstack devtool 支持点击即可打开源码!

文档 Go to source,证实我们确实可以点击即打开源码!

Go to source  前往源代码

Allows you to open the source location on anything in your browser by clicking on it.
允许您通过点击在浏览器中打开任何内容的源代码位置

To trigger this behavior you need the Devtools Vite plugin installed and configured and the Panel available on the page. Simply click on any element while holding down the Shift and Ctrl (or Meta) keys.
要触发此行为,您需要安装并配置 Devtools Vite 插件,并且页面上需要有面板可用。只需在按住 Shift 和 Ctrl(或 Meta)键的同时点击任何元素即可。

触发方式:Ctrl+Shift+ClickCtrl + Shift + Click(Windows)点击你想要定位的 HTML 元素,哇哦简直 AMAZING。

也就是我们无需配置删除开头 / 了,Tanstack Devtool 将体验再拔高一个档次!之前:

  1. Ctrl + Shift + P Chrome Devtool 定位到 HTML 元素
  2. 复制 data-tsd-source 属性内容
  3. 打开你常用编辑器(trae 或 VSCode):输入删除开头 / 的 path

现在我们可以一步到位:

Ctrl+Shift+ClickCtrl + Shift + Click 点击 HTML 元素“一剑开天门”。

https://image.baidu.com/search/detail?adpicid=0&b_applid=8600553881827950046&bdtype=0&commodity=&copyright=&cs=232301967%2C4287296332&di=7565560840087142401&fr=click-pic&fromurl=http%253A%252F%252Fnew.qq.com%252Fomn%252F20220228%252F20220228a0bwqe00.html&gsm=0&hd=&height=0&hot=&ic=&ie=utf-8&imgformat=&imgratio=&imgspn=0&is=0%2C0&isImgSet=&latest=&lid=&lm=&objurl=https%253A%252F%252Finews.gtimg.com%252Fnewsapp_bt%252F0%252F14571654986%252F1000&os=2777311845%2C3505696742&pd=image_content&pi=0&pn=1&rn=1&simid=4258744905%2C700113141&tn=baiduimagedetail&width=0&word=%E4%B8%80%E5%89%91%E5%BC%80%E5%A4%A9%E9%97%A8&z=&extParams=%7B%22fromPn%22%3A21%2C%22fromCs%22%3A%222395995045%2C1582987340%22%7D

接下来是见证奇迹的时刻:一点自动打开源码。

但是实际上并没有,啥也没发生!等会讲原因。

还是回到这个 issue Click-to-code does not work when command run from different directory #281

我们尝试修改下 issue 内提供代码,将其改成我常用的 Trae

// vite.config.ts

// 改编自 https://github.com/TanStack/devtools/issues/281#issuecomment-3607468808
const open = async (filePath, lineNumber, columnNumber) => {
  const filePathString = `${filePath.replaceAll("$", "\\$")}${
    lineNumber ? `:${lineNumber}` : ""
  }${columnNumber ? `:${columnNumber}` : ""}`;

  const launch = (await import("launch-editor")).default;

  // if trae is available, use it otherwise use the default editor
  const editorCli: string | undefined = await (async () => {
    try {
      // trae is global command use which to check if it is available use execSync
      const { exec } = await import("node:child_process");
      const { promisify } = await import("node:util");
      const execPromise = promisify(exec);
      const { stdout } = await execPromise("which trae1");

      console.log("stdout", stdout)

      if (stdout) {
        return "trae";
      }

      return undefined; // use default editor
    } catch (error) {
      console.error("Error checking for trae:", error);
      console.error("Error checking for trae fallback to default editor");
      return undefined;
    }
  })();

  console.log("launch-editor", {
    filePath,
    editorCli,
    lineNumber,
    columnNumber,
  });

  // https://bgithub.xyz/yyx990803/launch-editor?tab=readme-ov-file#usage
  launch(filePathString, editorCli, (filename, err) => {
    console.warn(`Failed to open ${filename} in editor: ${err}`);
  });
};

日志:

stdout { stdout: '/e/app2/TraeCN/bin/trae\n', stderr: '' }
launch-editor {
  filePath: 'F:/workspace/github/my-tanstack-app-pnpm/src/routes/index.tsx',
  editorCli: 'trae',
  lineNumber: '97',
  columnNumber: '15'
}

https://inews.gtimg.com/newsapp_bt/0/14571655004/1000

这下成功了,点击元素后 Trae 自动打开源码具体到行号和列号 🎉。

现在我也知道为什么刚开始不行因为我们还没打开 VSCode 呢(但 Trae 是打开)。当然前提条件必须将 codetrae 安装成全局命令。

如果你常用编辑器是 VSCode,那么这段配置也无需,不过首先你得打开 VSCode,后续 Ctrl+Shift+ClickCtrl + Shift + Click 才会起作用。因为我用 Trae 故仍需配置。

完整配置文件如下:

// vite.config.ts
import tailwindcss from "@tailwindcss/vite"
import { devtools } from "@tanstack/devtools-vite"
import { tanstackStart } from "@tanstack/react-start/plugin/vite"
import viteReact from "@vitejs/plugin-react"

import { nitro } from "nitro/vite"
import { defineConfig } from "vite"
import viteTsConfigPaths from "vite-tsconfig-paths"

const config = defineConfig({
  plugins: [
    devtools({
      editor: {
        name: "Shift + Ctrl + Click to open element src in editor",
        open: async (filePath, lineNumber, columnNumber) => {
          const filePathString = `${filePath}${[
            lineNumber && `:${lineNumber}`,
            columnNumber && `:${columnNumber}`,
          ]
            .filter(Boolean)
            .join("")}`

          const launch = (await import("launch-editor")).default
          const { exec } = await import("node:child_process")
          const { promisify } = await import("node:util")
          const execPromise = promisify(exec)
          const myEditor = "trae"

          // if trae is available, use it otherwise use the default editor
          const editorCli: string | undefined = await (async () => {
            try {
              // trae is global command use which to check if it is available use execSync
              await execPromise(`which ${myEditor}`)

              return myEditor
            } catch (_error) {
              // console.warn(`Error checking for ${myEditor}:`, error)
              console.warn(
                `Error checking for ${myEditor} fallback to default editor`,
              )
              return undefined
            }
          })()

          console.info("launch-editor", editorCli, {
            filePath,
            lineNumber,
            columnNumber,
            filePathString,
          })

          // https://bgithub.xyz/yyx990803/launch-editor?tab=readme-ov-file#usage
          launch(filePathString, editorCli, (filename, err) => {
            throw new Error(`Failed to open ${filename} in editor: ${err}`)
          })
        },
      },
    }),
    nitro(),
    // this is the plugin that enables path aliases
    viteTsConfigPaths({
      projects: ["./tsconfig.json"],
    }),
    tailwindcss(),
    tanstackStart(),
    viteReact(),
  ],
})

export default config

这是最佳解决办法了吗?并非!

配置又长又臭,还能有别的办法让其在 trae 打开吗?

我们仔细阅读 launch-editor 这个 600 万周下载量的包,作者 yyx 尤雨溪,从 react-dev-utils 抽离成单独包:

从 Node.js 中在编辑器中打开带行号的文件。

主要功能是从 react-dev-utils 中提取的,经过轻微修改,以便可以作为独立包使用。原始源代码遵循 MIT 许可证。

也增加了列号支持。

—— github.com/yyx990803/l…

yyx 还提到:

然而,其他包需要设置环境变量如 EDITOR 才能打开文件。该包在回退到环境变量之前,会检查当前运行进程以推断要打开的编辑器。

这就解释了,当我们并未打开 VSCode(进程未运行),且未设置环境变量 launch-editor 自然无法打开编辑器。

image.png

“一些漫不经心的说话,将我疑惑解开。一种莫名其妙的冲动,叫我继续追寻”,到这里恍然大悟 💡,除了通过“又长又臭的”配置强制切换编辑器,还可以通过环境变量来指定

环境配置存在两种方式:

  1. 私人环境变量
// ~/.zshrc
export LAUNCH_EDITOR=trae
echo $LAUNCH_EDITOR
trae

点击页面元素,确实可以通过环境变量指定的编辑器打开源码。

  1. 项目环境变量

我们再试试 .env 文件。.env 的好处是动态修改动态生效,无需重启 Terminal 以及 dev server。

// 项目根目录 .env
LAUNCH_EDITOR=trae

Trae 成功打开。

切换 LAUNCH_EDITOR

// 项目根目录 .env
LAUNCH_EDITOR=code

VSCode 成功打开。

.env 缺点是放到工程里面如果其他同事常用编辑器和你不一样就会有问题了。故我们还是选择放到 ~/.zshrc 因为它是私人的 ~ 表示个人目录。

故最终配置:出于尊重同事习惯,我们删除了 vite.config.ts 的 devtools editor:

// vite.config.ts

import tailwindcss from "@tailwindcss/vite"
import { devtools } from "@tanstack/devtools-vite"
import { tanstackStart } from "@tanstack/react-start/plugin/vite"
import viteReact from "@vitejs/plugin-react"

import { nitro } from "nitro/vite"
import { defineConfig } from "vite"
import viteTsConfigPaths from "vite-tsconfig-paths"

const config = defineConfig({
  plugins: [
    devtools(),
    nitro(),
    // this is the plugin that enables path aliases
    viteTsConfigPaths({
      projects: ["./tsconfig.json"],
    }),
    tailwindcss(),
    tanstackStart(),
    viteReact(),
  ],
})

export default config

还以清爽的 vite.config.ts,在私人环境变量中配置:

// ~/.zshrc

export LAUNCH_EDITOR=trae

这样配置代码量最少,又能尊重他人习惯,“和而不同”。

🔬 探究 TanStack Ctrl+Shift+Click 源码跳转功能

如果我们要做自己一个类似功能,应该怎么做呢。

元素点击后我们看到这样一个网络请求:

http://localhost:3000/__tsd/open-source?source=%2Fsrc%2Froutes%2Fyoutube-article-generator%2Farticles%2F%24id.tsx%3A429%3A15

简化:

GET /src/routes/youtube-article-generator/articles/$id.tsx:429:15

很简单其实就是点击的那一刻发送了一个 GET 请求,服务端接收到后调用 launch-editor 利用 Node.js 本地能力打开编辑器,我猜的。看看源码吧。

TanStack Start React 项目通过 @tanstack/devtools-vite 插件实现 Ctrl+Shift+Click 点击元素打开源码的功能。该功能包含两个核心部分:源码注入和点击处理。

1. 源码注入

Vite 插件在开发模式下为 JSX 元素注入 data-tsd-source 属性:

// 转换前
<div>Hello World</div>

// 转换后  
<div data-tsd-source="src/App.tsx:5:1">Hello World</div>

插件通过 AST 转换实现,使用 Babel 解析 JSX 并添加位置信息。

2. 点击事件处理

DevTools 组件监听全局点击事件,检测 Ctrl+Shift 组合键:

const openSourceHandler = (e) => {
  const isShiftHeld = e.shiftKey
  const isCtrlHeld = e.ctrlKey || e.metaKey
  if (!isShiftHeld || !isCtrlHeld) return
  
  if (e.target instanceof HTMLElement) {
    const dataSource = e.target.getAttribute('data-tsd-source')
    if (dataSource) {
      // 发送请求到开发服务器
      fetch(`${location.origin}/__tsd/open-source?source=${encodeURIComponent(dataSource)}`)
    }
  }
}

3. 服务器端处理

Vite 插件的服务器中间件处理 __tsd/open-source 请求,调用编辑器打开文件。

默认使用 launch-editor 库打开 VS Code。

配置使用

vite.config.ts 中启用插件:

import { devtools } from '@tanstack/devtools-vite'

export default defineConfig({
  plugins: [
    devtools({
      injectSource: { enabled: true }, // 启用源码注入
      editor: { // 自定义编辑器配置
        name: 'VSCode',
        open: async (path, lineNumber, columnNumber) => {
          // 自定义打开逻辑
        }
      }
    })
  ]
})

[!NOTE]

  • 该功能仅在开发模式下工作,生产构建时会自动移除相关代码
  • 插件会跳过包含 {...props} 属性展开的 JSX 元素,避免冲突
  • 支持自定义编辑器配置,可适配 WebStorm、Cursor 等其他编辑器

如果对你有所启发,不妨关注公众号“JavaScript与编程艺术”。

源码摘要

File: packages/devtools-vite/src/inject-source.ts (L110-152)

const transformJSX = (
  element: NodePath<t.JSXOpeningElement>,
  propsName: string | null,
  file: string,
) => {
  const loc = element.node.loc
  if (!loc) return
  const line = loc.start.line
  const column = loc.start.column
  const nameOfElement = getNameOfElement(element.node.name)

  if (nameOfElement === 'Fragment' || nameOfElement === 'React.Fragment') {
    return
  }
  const hasDataSource = element.node.attributes.some(
    (attr) =>
      attr.type === 'JSXAttribute' &&
      attr.name.type === 'JSXIdentifier' &&
      attr.name.name === 'data-tsd-source',
  )
  // Check if props are spread
  const hasSpread = element.node.attributes.some(
    (attr) =>
      attr.type === 'JSXSpreadAttribute' &&
      attr.argument.type === 'Identifier' &&
      attr.argument.name === propsName,
  )

  if (hasSpread || hasDataSource) {
    // Do not inject if props are spread
    return
  }

  // Inject data-source as a string: "<file>:<line>:<column>"
  element.node.attributes.push(
    t.jsxAttribute(
      t.jsxIdentifier('data-tsd-source'),
      t.stringLiteral(`${file}:${line}:${column + 1}`),
    ),
  )

  return true
}

File: packages/devtools/src/devtools.tsx (L162-188)

  createEffect(() => {
    // this will only work with the Vite plugin
    const openSourceHandler = (e: Event) => {
      const isShiftHeld = (e as KeyboardEvent).shiftKey
      const isCtrlHeld =
        (e as KeyboardEvent).ctrlKey || (e as KeyboardEvent).metaKey
      if (!isShiftHeld || !isCtrlHeld) return

      if (e.target instanceof HTMLElement) {
        const dataSource = e.target.getAttribute('data-tsd-source')
        window.getSelection()?.removeAllRanges()
        if (dataSource) {
          e.preventDefault()
          e.stopPropagation()
          fetch(
            `${location.origin}/__tsd/open-source?source=${encodeURIComponent(
              dataSource,
            )}`,
          ).catch(() => {})
        }
      }
    }
    window.addEventListener('click', openSourceHandler)
    onCleanup(() => {
      window.removeEventListener('click', openSourceHandler)
    })
  })

File: packages/devtools-vite/src/plugin.ts (L120-131)

        server.middlewares.use((req, res, next) =>
          handleDevToolsViteRequest(req, res, next, (parsedData) => {
            const { data, routine } = parsedData
            if (routine === 'open-source') {
              return handleOpenSource({
                data: { type: data.type, data },
                openInEditor,
              })
            }
            return
          }),
        )

File: packages/devtools-vite/src/editor.ts (L26-38)

export const DEFAULT_EDITOR_CONFIG: EditorConfig = {
  name: 'VSCode',
  open: async (path, lineNumber, columnNumber) => {
    const launch = (await import('launch-editor')).default
    launch(
      `${path.replaceAll('$', '\\$')}${lineNumber ? `:${lineNumber}` : ''}${columnNumber ? `:${columnNumber}` : ''}`,
      undefined,
      (filename, err) => {
        console.warn(`Failed to open ${filename} in editor: ${err}`)
      },
    )
  },
}

一周重写 Next.js?Cloudflare 和 AI 做到了😍😍😍

我正在开发 DocFlow,它是一个完整的 AI 全栈协同文档平台。该项目融合了多个技术栈,包括基于 Tiptap 的富文本编辑器、NestJs 后端服务、AI 集成功能和实时协作。在开发过程中,我积累了丰富的实战经验,涵盖了 Tiptap 的深度定制、性能优化和协作功能的实现等核心难点。

如果你对 AI 全栈开发、Tiptap 富文本编辑器定制或 DocFlow 项目的完整技术方案感兴趣,欢迎加我微信 yunmz777 进行私聊咨询,获取详细的技术分享和最佳实践。

上周,一名工程师和一套 AI 模型从零重写了最流行的前端框架。产物叫 vinext(读作 "vee-next"),是基于 Vite 的 Next.js 替代实现,一条命令就能部署到 Cloudflare Workers。早期基准测试里,生产构建快至多约 4 倍,客户端包体积最多小约 57%。已有客户在生产环境跑它。整件事大约花了一千一百美元左右的 token 成本。

Next.js 的部署难题

Next.js 是最流行的 React 框架,数百万开发者在用,也支撑着大量线上站点,原因很简单:开发体验很好。

但在更广的 serverless 生态里,Next.js 的部署是个问题。工具链完全是自成一派的:Next.js 在 Turbopack 上投入很大,可如果你要部署到 Cloudflare、Netlify 或 AWS Lambda,就得把构建产物再"捏"成目标平台能跑的样子。

你可能会想:"OpenNext 不就是干这个的吗?"没错。OpenNext 就是为解决这个问题而生的,包括 Cloudflare 在内的多家厂商都往里投了不少工程资源。它能用,但很快就会撞到各种限制,变成打地鼠游戏。

在 Next.js 的构建产物之上再建一层,被证明既难又脆。OpenNext 需要反推 Next.js 的构建输出,结果就是版本之间难以预测的变动,修起来很费劲。

Next.js 一直在做一等公民的 adapters API,Cloudflare 也在和他们协作。但这仍是早期工作,而且即便有了 adapters,你依然建立在 Turbopack 这套专属工具链上。Adapters 只覆盖构建和部署;开发阶段里,next dev 只在 Node.js 里跑,没法插别的运行时。如果你的应用用了 Durable Objects、KV、AI bindings 这类平台能力,在开发环境里想测这些代码,就得搞一堆变通。

vinext 是什么

换个思路:与其去适配 Next.js 的产出,不如在 Vite 上直接重写一套 Next.js 的 API。Vite 是 Next.js 之外大多数前端生态用的构建工具,Astro、SvelteKit、Nuxt、Remix 等都基于它。要的是干净的重实现,而不是包一层或写个 adapter。他们一开始也没把握能成,但现在是 2026 年,造软件的成本已经彻底变了。

结果比预期走得远得多。

把脚本里的 next 换成 vinext,其余基本不用动。现有的 app/pages/next.config.js 都能直接用。安装方式如下:

npm install vinext

常用命令和 Next 类似,只是把 next 换成 vinext

vinext dev    # 开发服务器,带 HMR
vinext build  # 生产构建
vinext deploy # 构建并部署到 Cloudflare Workers

这不是包在 Next.js 和 Turbopack 输出外面的一层皮,而是对同一套 API 的另一种实现:路由、服务端渲染、React Server Components、server actions、缓存、中间件,全部作为 Vite 插件搭在 Vite 之上。更重要的是,借助 Vite Environment API,Vite 的产出可以在任意平台上跑。

数据表现

早期基准测试看起来不错。他们用一套共 33 个路由的 App Router 应用,对比了 vinext 和 Next.js 16。两边做的是同一类事:编译、打包、准备服务端渲染路由。在 Next.js 的构建里关掉了 TypeScript 类型检查和 ESLint(Vite 构建阶段本来也不跑这些),并对 Next.js 使用了 force-dynamic,避免多花时间预渲染静态路由,否则会不公平地拉低 Next 的数字。目标只衡量打包和编译速度。

生产构建时间大致如下(原文表格,此处保留结构):

框架 平均耗时 相对 Next.js
Next.js 16.1.6 (Turbopack) 7.38s 基线
vinext (Vite 7 / Rollup) 4.64s 约 1.6 倍快
vinext (Vite 8 / Rolldown) 1.67s 约 4.4 倍快

客户端包体积(gzip 后):

框架 Gzip 后 相对 Next.js
Next.js 16.1.6 168.9 KB 基线
vinext (Rollup) 74.0 KB 约小 56%
vinext (Rolldown) 72.9 KB 约小 57%

这些数字测的是编译和打包速度,不是线上服务性能;测试用例是单个 33 路由应用,不能代表所有生产场景。他们预期三个项目继续演进后数字会变。完整方法论和历史结果 是公开的,可以当作方向性参考,而非定论。

方向是令人鼓舞的。Vite 的架构,尤其是 Rolldown(Vite 8 里即将到来的 Rust 打包器),在构建性能上有结构性优势,在这里已经能看出来。

部署到 Cloudflare Workers

vinext 把 Cloudflare Workers 当作首选部署目标。一条命令从源码到线上 Worker:

在项目里执行即可完成构建、自动生成 Worker 配置并完成部署:

vinext deploy

App Router 和 Pages Router 都能在 Workers 上跑,包括完整的客户端注水、交互组件、客户端导航和 React 状态。

生产缓存方面,vinext 自带 Cloudflare KV 的缓存处理器,开箱即用 ISR(增量静态再生成)。在代码里设置一次即可:

import { KVCacheHandler } from "vinext/cloudflare";
import { setCacheHandler } from "next/cache";
setCacheHandler(new KVCacheHandler(env.MY_KV_NAMESPACE));

对多数应用来说 KV 就够用了,但缓存层设计成可插拔的。setCacheHandler 意味着你可以换成任何合适的后端,例如大缓存体或不同访问模式更适合用 R2。他们也在改进 Cache API,目标是少配置也能有强缓存能力。总之是尽量灵活,按应用选策略。

当前已有线上示例:App Router Playground、Hacker News 克隆、App Router 与 Pages Router 最小示例等,见 vinext 文档与仓库。还有一例 Cloudflare Agents 在 Next 风格应用里跑,不再需要 getPlatformProxy 之类的变通,因为整个应用在开发与部署阶段都跑在 workerd 里,Durable Objects、AI bindings 等 Cloudflare 能力都可以直接使用,示例见 vinext-agents-example

框架是团队协作的事

当前部署目标是 Cloudflare Workers,但这只占一小部分。vinext 里大约 95% 是纯 Vite:路由、模块 shim、SSR 管线、RSC 集成,没有 Cloudflare 专属逻辑。

Cloudflare 希望和其他托管方一起,让这套工具链也能服务他们的用户(迁移成本很低,他们在 Vercel 上不到 30 分钟就跑通了一个 PoC)。这是开源项目,长期看需要和生态里的伙伴一起投入。欢迎其他平台的 PR;若要加部署目标,可以 提 issue 或直接联系。

状态:实验性

vinext 目前是实验性的。诞生不到一周,还没有经过有规模的流量验证。若你要在生产应用里评估,请保持适当谨慎。

另一方面,测试覆盖面不小:超过 1,700 个 Vitest 用例和 380 个 Playwright E2E,包括从 Next.js 和 OpenNext 的 Cloudflare 一致性套件移植的测试。他们对照 Next.js App Router Playground 做过验证,对 Next.js 16 API 的覆盖约 94%。已有真实客户在试,反馈不错;例如 National Design Studio 在 beta 站点 CIO.gov 上已经用 vinext 跑生产,构建时间和包体积都有明显改善。

README 里老实写了 不打算支持以及不会支持的内容已知限制,尽量坦诚、少过度承诺。

预渲染呢?

vinext 已经支持增量静态再生成(ISR),首访某页后会被缓存并在后台再验证,和 Next.js 行为一致。这部分已经可用。

vinext 目前还不支持构建时静态预渲染。Next.js 里没有动态数据的页面会在 next build 时渲染成静态 HTML;有动态路由时用 generateStaticParams() 枚举要提前构建的页面。vinext 暂时不做这件事。

这是发布时的刻意取舍,路线图上有计划。若你的站是 100% 预生成静态 HTML,眼下从 vinext 获益可能有限。反过来说,若一名工程师花一千多美元 token 就能重写一版 Next.js,你大概也能花很少成本迁到 Astro 这类为静态内容设计的 Vite 系框架(Astro 也能部署到 Cloudflare Workers)。

对非纯静态站点,他们想做得比"构建时全量预渲染"更好一点。

流量感知预渲染(TPR)

Next.js 会在构建时把 generateStaticParams() 列出的页面都预渲染一遍。一万个商品页就意味着构建时渲染一万次,哪怕其中 99% 可能永远不会被请求。构建时间随页面数近似线性增长,这也是为什么大型 Next.js 站点的构建会拖到三十分钟级别。

于是他们做了"流量感知预渲染"(Traffic-aware Pre-Rendering,TPR)。目前是实验性的,计划在更多真实场景验证后作为默认选项。

思路很简单。Cloudflare 已经是站点的反向代理,拥有流量数据,知道哪些页面真的被访问。所以既不必全预渲染,也不必完全不预渲染:在部署时查 Cloudflare 的 zone 分析,只预渲染真正重要的页面。

使用方式是在部署时打开实验开关:

vinext deploy --experimental-tpr

输出会包含类似:分析最近 24 小时流量、统计独立路径数、按流量覆盖(例如 90%)选出要预渲染的页面数量、预渲染耗时并写入 KV 缓存等。

对于十万级商品页的站点,幂律分布下往往 50~200 个页面就覆盖了 90% 的流量。这些页面几秒内预渲染完,其余走按需 SSR,首访后再通过 ISR 缓存。每次部署都会根据当前流量重新算一遍集合,突然爆红的页面会被自动纳入。全程不需要 generateStaticParams(),也不用把构建和线上数据库绑死。

用 AI 再挑战一次 Next.js

这类项目通常要一个团队做几个月甚至几年。多家公司都试过,范围实在太大。Cloudflare 自己也试过一次。两套路由、三十多个模块 shim、服务端渲染管线、RSC 流式、文件系统路由、中间件、缓存、静态导出……没人做成是有原因的。

这次他们在一周内做到了。一名工程师(头衔是工程经理)带着 AI 一起干。

首笔提交在 2 月 13 日。当晚 Pages Router 和 App Router 都有了基础 SSR,中间件、server actions 和流式也跑通了。第二天下午,App Router Playground 已经能渲染 11 个路由里的 10 个。第三天,vinext deploy 能把应用完整部署到 Cloudflare Workers,包括客户端注水。后面几天主要是收口:修边界情况、扩测试、把 API 覆盖拉到约 94%。

和以前几次尝试相比,变的是 AI 强了很多。

为什么这个问题适合交给 AI

不是所有项目都适合这么搞。这次能成,是因为几件事同时满足。

Next.js 有清晰、成文的规范:文档多、用户多、Stack Overflow 和教程里到处都是,API 表面在训练数据里很常见。让 Claude 实现 getServerSideProps 或解释 useRouter 怎么用,它不会乱编,因为它"见过" Next 是怎么工作的。

Next.js 有庞大的测试套件。Next.js 仓库 里有大量 E2E,覆盖各种功能和边界。他们直接移植了其中的测试(代码里有注明来源),等于拿到一份可以机械验证的规格。

Vite 是很好的底座。Vite 解决了前端工具里最难的那块:快 HMR、原生 ESM、清晰的插件 API、生产打包。不需要从零做打包器,只要教它"说" Next.js。@vitejs/plugin-rsc 还在早期,但已经能提供 React Server Components 支持,不必自己实现一整套 RSC。

模型能力跟上了。他们认为哪怕早几个月都很难做成。以前的模型在这么大代码库上很难保持连贯;新模型能把整体架构放在上下文里,推理模块间关系,并经常写出正确代码,让迭代能持续下去。有时会看到它钻进 Next、Vite、React 内部去查 bug。当前最好的模型已经足够好用,而且还在变好。

这几条必须同时成立:目标 API 文档好、测试全、底层构建工具靠谱、模型真的能驾驭这种复杂度。少一条,效果都会打折扣。

实际是怎么做的

vinext 里几乎每一行都是 AI 写的。但更关键的是,每一行都过同样的质量关:人类写的代码也会走的那些门。项目里有 1,700+ Vitest、380 Playwright E2E、通过 tsgo 的完整 TypeScript 检查、通过 oxlint 的 lint,CI 在每个 PR 上全跑一遍。定好这些护栏,是让 AI 在代码库里高效的前提。

流程从规划开始。作者在 OpenCode 里和 Claude 花了几小时来回推敲架构:建什么、什么顺序、用什么抽象。那份计划成了北极星。之后就是固定循环:

  1. 定义一个任务(例如"实现 next/navigation 的 shim,包含 usePathnameuseSearchParamsuseRouter")。
  2. 让 AI 写实现和测试。
  3. 跑测试。
  4. 过了就合并,不过就把错误输出给 AI 继续改。
  5. 重复。

他们还接了 AI 做 Code Review:PR 打开后有 agent 审,审完的评论由另一个 agent 改。反馈环大部分是自动的。

并不是每次都对。有些 PR 就是错的,AI 会很有把握地实现一个"看起来对"但和 Next.js 实际行为不一致的东西。作者经常要纠偏。架构决策、优先级、判断什么时候 AI 在走死胡同,都是人在做。给 AI 好的方向、上下文和护栏,它可以很出活,但掌舵的还得是人。

浏览器级测试用了 agent-browser,用来验证真实渲染结果、客户端导航和注水行为。单测会漏掉很多浏览器侧的细节,这样能补上。

整个项目在 OpenCode 里跑了超过 800 次会话,总成本大约一千一百美元(Claude API token)。

对软件意味着什么

我们为什么有这么多层?这个项目逼着作者认真想这个问题,以及 AI 会怎么改变答案。

软件里大多数抽象的存在,是因为人需要帮忙。我们没法把整个系统装进脑子,于是用一层层东西来管理复杂度,每一层让下一个人的工作轻松一点。框架叠框架、包装库、成千上万行胶水代码,就是这么来的。

AI 没有同样的限制。它可以把整个系统放在上下文里,直接写代码,不需要中间框架来"帮人类理清思路",只需要规格和一块可建的底座。

哪些抽象是真正的基础设施,哪些只是人类认知的拐杖,现在还不清楚。这条线未来几年会大幅移动。但 vinext 是一个数据点:他们拿了一份 API 契约、一个构建工具和一个 AI 模型,中间全是 AI 写的,没有额外的中间框架。他们认为这种模式会在很多软件上重演,我们多年来叠上去的层,不会全部留下。

致谢

感谢 Vite 团队。Vite 是整个项目的基础。@vitejs/plugin-rsc 虽还在早期,但提供了 RSC 支持,否则要从零实现 RSC 会直接卡死。作者把插件推到以前没人测过的场景时,Vite 维护者响应很快、帮了很多忙。

也感谢 Next.js 团队。他们用多年把 React 开发的标杆拉高,API 文档和测试套件如此完善,是 vinext 能做成的重要前提。没有他们立下的标准,就没有 vinext。

试试看

vinext 提供 Agent Skill,可以帮你做迁移,支持 Claude Code、OpenCode、Cursor、Codex 等。安装后打开 Next.js 项目,让 AI 执行迁移即可。

安装 vinext 的 Agent Skill(在支持的工具里执行):

npx skills add cloudflare/vinext

然后在任意支持的工具里打开 Next.js 项目,对 AI 说:

"把这个项目迁移到 vinext"

Skill 会做兼容检查、依赖安装、配置生成和开发服务器启动,并标出需要人工处理的部分。

若想手动迁移,可以用:

npx vinext init   # 从现有 Next.js 项目迁移
npx vinext dev    # 启动开发服务器
npx vinext deploy # 部署到 Cloudflare Workers

源码在 github.com/cloudflare/…,欢迎提 issue、PR 和反馈。

BEM、OOCSS、SMACSS、ITCSS、AMCSS、SUITCSS:CSS命名规范简介

本来是希望讲一下CSS组件化发展历史上的技术,但所有内容放到一个文章中描述太长了,因此对各类技术分开写一下。这篇文章讲一下CSS命名规范。

在前端开发中,不同组件/模块的class类名都是公用的,假设两个组件中起了同样的类名,那么就会出现样式污染。既然问题出在名字,那么让不同组件的类名不同就能解决问题了。因此,社区中出现了一些CSS命名规范,希望使用规范将CSS的冲突污染减少,同时通过命名起到和HTML标签关系更紧密,封装公共CSS样式,以及一些其它作用。

BEM

BEM介绍

BEM是最知名的CSS命名规范,由Yandex团队开发。BEM的全称为Block Element Modifier,翻译成和中文就是块,元素和修饰符。BEM使用这三种层级来规范CSS的命名:

  • Block 区块 表示页面中一个独立可复用的模块或者组件
  • Element 元素 表示区块中的一个组成元素
  • Modifier 修饰符 修饰元素的状态或者行为

每个层级内部使用串行命名法(kebab-case),中间分隔单词使用单连字符-。元素前的分隔符为双下划线__,修饰符前的分隔符为双连字符--。元素不能独立存在,必须依附于区块内。修饰符则必须跟在元素或者区块后面。因此可以这样组合命名:

  • block 单区块
  • block__element 区块+元素
  • block--modifier 区块+修饰符
  • block__element--modifier 区块+元素
<div class="container">
  <input class="container__input" />
  <button class="container__button--primary">提交<button>
</div>

<style>
.container {}
.container__input {}
.container__button--primary {}
</style>

在上面的例子中,container是区块,input和button是元素,primary则是修饰符。这样每个元素都有自己的类型,不需要考虑名称冲突的问题,而且这样命名是有页面结构含义在的,即通过命名就知道这个元素属于哪个组件,有什么用处。因此,BEM也不推荐使用嵌套选择器。

BEM的应用和优缺点

BEM的应用比较广泛,很多项目都是使用它来命名class,还有一些项目利用了他的命名思路。这里我们以Vue3的组件库Element-Plus为例,来看一下BEM的应用:

css-name-1.png

这里是一个复合型输入框组件,名称叫做el-input-group。组件包含左边的前置展示元素和右边的输入框,其中组件结构和以BEM方式命名的class如下:

  • el-input-group--prepend: 区块 el-input-group 修饰符 prepend
    • el-input-group__prepend: 区块 el-input-group 元素 prepend
    • el-input__wrapper: 区块 el-input 元素 wrapper
      • el-input__inner: 区块 el-input 元素 inner

通过这种方式,Element-Plus有着清晰的元素class名,不仅组件内部开发使用,使用组件库的用户也可以使用这些类名来覆盖组件库样式。下面我们来总结一下BEM命名规范的优缺点:

  • 优点
    • 清晰的类名,只看class就能知道元素的作用和归属,不会发生混淆
    • 组件和组件之间的名称是独立的,不会样式污染
    • 提供了命名规范,团队协作开发时命名不会混乱,也可以提供给外部使用
  • 缺点
    • 对于包含很多元素的复杂组件,仅仅三个层级,命名可能并不够用
    • 组件名称太长,对开发者并不方便

这些优缺点不仅仅是BEM的优缺点,也是大部分CSS命名规范的优缺点了。

OOCSS

面对对象简介

OOCSS的全称为Object Oriented CSS,即为面对对象的CSS。接触过编程的同学大多知道,Object Oriented即面对对象,是一种编程模式,是将一些数据属性和对应的方法结合起来,抽象成一个类,类可以生成实例对象。面对对象还有继承,封装,多态等特性。这里举个简单的例子:

类别 类名 属性 方法
基类 水果 名称 重量 体积 切开水果
子类 继承水果 苹果 甜度 做苹果派
子类 继承水果 橘子 酸度 作陈皮

每一种类都封装了属性和方法。苹果和橘子都是水果的子类,继承了水果的属性和方法。子类可以有自己独立的方法,也能调用父类的方法。调用父类的方法时,可以有子类自己的实现,这是多态。例如苹果和橘子都可以使用切开水果这个方法,但切开的效果不一样。一个类可以生成很多个实例对象,每个对象可以有不同的数据。

JavaScript中也有面对对象相关的方法,老方法有原型链,ES6中直接提供了class关键字,并且在逐渐完善面对对象相关的语法。但CSS并不是编程语言,无法提供直接提供面对对象语法,只能在概念上简单模拟一下。OOCSS就是利用CSS,对面对对象的概念进行了简单的模拟。

分离结构和皮肤

按照OOCSS的设想,CSS样式可以分为结构structure和皮肤skin。结构表示它的尺寸/位置/边距等内容;皮肤表示颜色,字体,背景等。因为皮肤可能会根据不同的场景变化,而且皮肤可能被多个组件所公用,因此分开作为两个类来处理。这里我们举个例子,首先是不使用OOCSS的做法,两个CSS类独立互相没有依赖:

<div>
  <button class="btn-small">jzplp按钮1</button>
  <button class="btn-large">jzplp按钮2</button>
<div>
<style>
.btn-small {
  width: 20px;
  height: 20px;
  Padding: 5px;
  color: red;
  background: blue;
}
.btn-large {
  width: 200px;
  height: 200px;
  Padding: 50px;
  color: red;
  background: blue;
}
</style>

这样写会造成一些重复属性存在,例如这里的skin相关属性就是重复的,我们将他抽象出来作为单独的skin共享:

<div>
  <button class="btn-small btn-skin">jzplp按钮1</button>
  <button class="btn-large btn-skin">jzplp按钮2</button>
<div>
<style>
.btn-skin {
  color: red;
  background: blue;
}
.btn-small {
  width: 20px;
  height: 20px;
  Padding: 5px;
}
.btn-large {
  width: 200px;
  height: 200px;
  Padding: 50px;
}
</style>

这样皮肤的样式就可以在不同的元素中复用了。如果要修改皮肤,修改一个位置就统一修改了所有元素的皮肤。

分离容器和内容

很多人在写CSS时,遇到容器和内容这样组合的HTML结构,经常会把CSS也写为组合的样式,例如与HTML一样也保持了父子的结构。但OOCSS认为,这样限制了这些CSS的引用场景,不利于其它元素复用这些CSS代码。需要将它们分开撰写。这里举个例子,首先依然是嵌套CSS的场景:

<div class="container">
  <div>jzplp内容1</div>
  <div>jzplp内容2</div>
<div>
<style>
.container {
  width: 100%;
  height: 200px;
  div {
      width: 30px;
      margin-right: 10px;
      height: 100%;
  }
}
</style>

假设有其它场景只希望复用内部div的CSS代码,是没有办法的,因为嵌套的结构限制了这里的使用场景。因此按照OOCSS的设想,应该不使用嵌套结构,将CSS代码解耦:

<div class="container">
  <div class="content">jzplp内容1</div>
  <div class="content">jzplp内容2</div>
<div>
<style>
.container {
  width: 100%;
  height: 200px;
}
.content {
  width: 30px;
  margin-right: 10px;
  height: 100%;
}
</style>

OOCSS的优缺点

除了上面OOCSS的两个原则“分离结构和皮肤/分离容器和内容”之外,OOCSS最核心的原则其实是:拆开元素的CSS样式,变为更方便复用,更独立的样式。上面两个原则是这个核心原则的部分具体做法。

这时候有些同学会问,这些原则和面对对象有什么关系?实话说我也觉得关系确实不大。但按照OOCSS的说法,我们定义的类选择器就是面对对象中的类。将这个类的提供给HTML元素,就相当于将这个类实例化。使用OOCSS的原则,拆开的可复用CSS样式相当于基类,那些拆开后依然无法复用的CSS样式称为子类。(例如前面btn-small是子类,btn-skin是父类)。

如果这样抽象的话,即使不了解OOCSS的开发者,肯定也无意间使用过OOCSS的原则,也用过“面对对象方法”组织过CSS。这里我们总结一下OOCSS的优缺点:

  • 优点
    • 复用已有的CSS规则更方便(这也是OOCSS的核心原则)
    • CSS文件更少,可提高页面加载速度(这也是复用程度高造成的)
    • 有利于CSS规则更新和扩展(只改一个CSS规则,所有位置都可以生效)
  • 缺点
    • 一个元素上可能挂多个类名,可能造成属性混乱
    • 如何拆分抽象公共CSS规则需要根据业务设计与平衡
    • 结构和皮肤有时候时互相关联的,有时候并不容易区分
    • 部分CSS本身就要求父子有联系,例如flex,grid布局等等,必须要求父子元素独立可能并不适合

总之,OOCSS只是一个组织CSS的思路,我们不需要教条化的拆分,而是根据具体场景拆分和抽象公共CSS规则。

SMACSS

SMACSS的全称叫做Scalable and Modular Architecture for CSS,意思是可扩展和模块化的CSS结构。他与OOCSS类似,也是制定了一些CSS组织的规范,但比OOCSS更细致。这两个命名规范的思想上有很多相似之处。SMACSS将页面的CSS规则分为五种类型,下面我们将分别介绍:

  • Base 基础样式
  • Layout 布局样式
  • Module 模块样式
  • State 状态样式
  • Theme 主题样式

Base基础样式

基础样式是整个页面通用的公共样式。一个常用的例子是CSS reset样式表。在CSS优先级,没有想的那么简单!全面介绍影响CSS优先级的各类因素中我们介绍过,浏览器会提供一些预置的默认样式,叫做“用户代理样式表”。但是很多用户不希望使用这些默认样式,因此使用一个全局的CSS reset样式表处理这些默认样式。

除了reset样式表之外,基础样式还可以包含一些对于所有元素通用的样式,例如标题样式,默认链接样式,页面背景等。SMACSS不推荐在基础样式中使用类或者ID选择器。例如:

body, form {
  margin: 0;
  padding: 0;
}
a {
  color: #039;
}
a:hover {
  color: #03F;    
}
body {
  background-color: red;
}

Layout布局样式

布局指的是将页面划分为几个大部分,这几个部分的样式作为布局样式。例如页面可以划分为头部、主内容区、底部、侧边栏等。这些样式通常是全局样式,一个布局元素中可以包含很多个模块。如果布局元素确定只出现一次,甚至可以使用ID选择器。可以使用l-或者layout-前缀来表示是布局样式,但也可以不使用。这里举几个例子:

#header, #article, #footer {
    width: 960px;
    margin: auto;
}
.sidebar {
    float: right;
}

Module模块样式

SMACSS中的模块和其它CSS命名规范中模块的含义一致,都是页面中独立可复用的模块,也就是组件。模块中的规则避免使用ID选择器或者元素选择器,而使用类名。为了规则不发生冲突,每个模块内部可以用模块名称本身作为前缀,例如.module-。

.card { padding: 5px; }
.card-top { font-size: 10px; }

State状态样式

SMACSS中的状态类似于BEM中的修饰符modifier,它表示模块或者布局在某些状态下的外观或者行为。但SMACSS中的状态样式倾向于是全局使用的,即多个模块和布局都可以使用。状态样式也可以是依赖JavaScript驱动的,例如点击或者其它操作展示的效果。状态样式可以用is-作为前缀。因为要覆盖元素本身的默认样式,因此允许使用!important。

.is-collapsed {
  width: 10px;
}
.is-selected {
  color: red !important;
}
/* 仅供模块使用的状态规则,可以添加模块前缀 */
.is-card-selected {
  color: yellow !important;
}

Theme主题样式

主题描述了模块或布局的外观样式,一些小的页面不要求主题样式,但有些页面有特殊要求,甚至要求换肤。将皮肤抽象出来作为的独立样式,方便抽象和更改。这里和OOCSS的皮肤规则有点像。

.normal {
  color: blue;
  background: grey;
}

.primary {
  color: red;
  background: white;
}

SMACSS的优缺点

SMACSS不仅描述了五种CSS规则类型,还包含很多规范说明,比如:类名规范、选择器使用规范和性能优化、字体、页面状态变化、嵌套选择器、与HTML5集成,与CSS预处理器集成、特殊CSS规则、甚至是CSS代码缩进等等。这里我们总结一下SMACSS的优缺点:

  • 优点
    • 提供了比较详尽的CSS组织规范
    • 考虑到了各种类型的公共样式,组件/模块的独立样式,可复用和隔离能力相对平衡
    • 由于比较详尽,更有利于团队协作开发
  • 缺点
    • 规范比较落后,没有适应现在前端框架的发展,有些想法也过时了
    • Layout也经常以模块/组件的形式组织
    • 规范太详尽,导致经常出现不符合实际情况的场景
    • 虽然说了不要死板套用,但如果不符合的场景太多,那还是需要重新定义自己的规范

ITCSS

ITCSS的全称为Inverted Triangle Cascading Style Sheets,翻译成中文为倒三角CSS。ITCSS把CSS规则分成了七层,并且把这七层展示为了一个倒三角的形式。

css-name-2.png

倒三角的形式指的是从上到下CSS规则的普遍性减少,特殊性增加,即越往下,影响范围和可复用性越低。这里我们说明一下每一层的内容:

  • Settings 预先定义的颜色变量,数值变量等
  • Tools 全局使用的mixins和函数等
  • Generic 全局标准化样式,例如CSS reset样式表
  • Elements HTML元素的通用样式
  • Objects 整个工程的布局样式,但不包含外观属性
  • Components 具体的组件样式
  • Trumps 可以覆盖的辅助样式,可以接受!important

可以看到,前两层都没有真正的CSS规则代码;三四层是不带类选择器的CSS规则。ITCSS利用了CSS预处理的特性,例如mixins和函数等。

AMCSS

AMCSS的全称为Attribute Modules for CSS,即使用属性作为模块的CSS。它与其它CSS命名规范都不相同:其它命名规范主要使用HTML的class属性作为选择器,而它则采用自定义HTML属性作为选择器。

  • Modules 模块
    • 类似于BEM中区块和元素的概念
    • 使用HTML属性描述,属性名称采用大驼峰命名法BlockName,如果嵌套子模块名使用连字符-
  • Variations 变体
    • 类似于BEM中的修饰符,表示模块中变化的部分,用来新增和覆盖部分属性
    • 使用HTML属性值描述,多个用空格分隔
  • Traits 特征
    • 一组某个用途的CSS规则,可以用来描述一些公共的CSS
    • 同一组特征的HTMl属性相同,值不同。特征的属性名采用小驼峰式命名法featureName

上面讲的有点晦涩,这里还是要用实际例子说明一下。AMCSS要求属性名添加前缀,推荐am-,其它前缀也可以。

<div am-MainCard>
</div>
<div am-Card>
  <div am-Card-Container> jzplp1 </div>
</div>
<div am-Card="sp1 primary"> 
  <div am-textType="title"> jzplp2 </div>
</div>

<style>
  /* 仅模块名 */
  [am-Card] { color: red; }
  /* 模块名采用大驼峰命名法 */
  [am-MainCard] { color: red; }
  /* 子模块名使用连字符- */
  [am-Card-Container] { color: red; }
  /* 变体使用属性 */
  [am-Card~="primary"] { color: red; }
  /* 特征名使用小驼峰式命名法 */
  [am-textType] { color: red; }
  /* 特征名和限制特征值 */
  [am-textType~="title"] { color: red; }
</style>

可以看到,AMCSS实际上就是将类选择器的那一套用法搬到了属性选择器上面,属性选择器的~=符号同样支持多个属性值。而且由于属性有属性名和属性值两种,因此相比于class名更灵活也更清晰。这种属性命名方式并不是推荐的HTML规范,但也可以正常使用。

SUITCSS

SUITCSS是一套组件化的样式工具。它不仅包含CSS命名规范,而且也提供了一些CSS预设包,构建工具,预处理器(实际上是PostCSS的插件集合),测试工具等。这里我们主要描述一下命名规范:

  • 公共样式: 表示一些公共样式
    • 命名规则 u-[sm-|md-|lg-]<utilityName>
    • 使用-u开头,后面跟骆驼命名法。中间也可以加响应式规则sm-|md-|lg-
  • 组件样式:描述独立组件内部的样式
    • 命名规则 [<namespace>-]<ComponentName>[-descendentName][--modifierName]
    • namespace 可选的命名空间,例如组件库中的组件避免与业务组件冲突,可以加前缀,例如 el-label, el-tag等。
    • ComponentName 组件名称,用Pascal命名法。组件名称需要与其他组件不同。
    • descendentName 组件内后代的名称,即为组件内部组成元素的类名,使用骆驼命名法。
    • modifierName 组件修饰符,修饰元素的状态或者行为。使用骆驼命名法,且前面有两个连字符。

SUITCSS命名规范中还规定了组件的设计原则,CSS变量名的命名方式,预置公共样式,甚至是代码风格等。

总结

即使没有了解过这些命名方案,其中的部分思想在我们的开发中也不知不觉会用到一些。这些命名规范确实能够解决很多问题,在前端发展的历史中起到过很多作用,也引导和启发了后续CSS组件化和工程化的发展。

但这些命名规范需要“手工处理”:手工定义各种名称,手工抽象CSS文件等。一个人开发还好,如果是多人协作团队开发,还要让每个人遵守规则,检查代码,这就成了一个麻烦的问题(少量规范有工具)。另外规范给出的类名大多很长,虽然更容易识别代码含义,但也造成了代码冗长,代码传输速度慢。

另外很多命名规范都有这样一个冲突:如果规范将CSS代码分类和组织的太过明确,这会造成应用范围小,很多工程根本不适用。如果规范将CSS代码分类和组织的太模糊,那代码就太随心所欲了,与没定义差不多。因此我们最好根据每个工程的具体实际情况定义合适的规范和抽象。

还有很多CSS命名规范比较老,跟不上时代发展。有些老旧的规范并不适应部分新内容:例如新的CSS布局方案,CSS变量,前端框架,CSS Modules,CSS代码格式规范(有自动化工具)等。CSS命名规范也存在互相吸收想法和思路的,晚出的方案相对更完善一些,但没有早出的方案更知名。

参考

常见的内存泄漏有哪些?

在 JavaScript 中,内存泄漏指的是应用程序不再需要某块内存,但由于某种原因,垃圾回收机制(GC, Garbage Collection)无法将其回收,导致内存占用持续升高,最终可能引发性能下降或崩溃。

以下是 JavaScript 中导致内存泄漏的最常见情况及示例:

1. 意外的全局变量

在 JavaScript 中,如果未声明的变量被赋值,它会自动成为全局对象的属性(浏览器中是 window,Node.js 中是 global)。全局变量在页面关闭前永远不会被垃圾回收。

function leak() {
  // 忘记了使用 let/const/var
  secretData = "这是一段敏感数据"; // 变成了 window.secretData
}
leak();

解决方案:

  • 使用严格模式 ('use strict') 来避免意外的全局变量。
  • 使用完后手动设置为 null

2. 被遗忘的定时器或回调函数

如果代码中设置了 setIntervalsetTimeout,但忘记清除(clear),且定时器内部引用了外部变量,那么这些变量无法被释放。

const someResource = hugeData(); // 很大的数据

setInterval(function() {
  // 这个回调引用了 someResource
  console.log(someResource);
}, 1000);

// 如果没有调用 clearInterval,someResource 会一直留在内存中

解决方案:

  • 在组件卸载或页面关闭时,清除定时器:clearInterval(id)

3. 闭包(Closures)的不当使用

闭包是 JavaScript 的强大特性,但如果闭包长期持有父函数的变量,而这些变量又很大,就会造成泄漏。

function outer() {
  const largeArray = new Array(1000000).fill('data');

  return function inner() {
    // inner 函数引用了 outer 作用域的 largeArray
    // 只要 inner 函数还存在,largeArray 就无法被回收
    console.log(largeArray.length);
  };
}

const innerFunc = outer(); // largeArray 被保留
// 如果后续没有释放 innerFunc,内存就会泄漏

解决方案:

  • 确保不再需要的函数被释放(innerFunc = null)。
  • 在闭包外尽量避免引用大对象。

4. DOM 引用未被清理

当把 DOM 元素存储为 JavaScript 对象或数据结构时,即使该元素已从 DOM 树中移除,只要 JS 中还有引用,该 DOM 元素连同其事件监听器就不会被释放。

const elements = {
  button: document.getElementById('button')
};

function removeButton() {
  document.body.removeChild(document.getElementById('button'));
  // 注意:elements.button 仍然指向那个 DOM 对象,所以它无法被回收
}

解决方案:

  • 移除 DOM 节点后,同时将变量设置为 null

5. 事件监听器未移除

向 DOM 元素添加了事件监听器,但在移除该元素前没有移除监听器。现代浏览器(尤其是针对原生 DOM 的监听器)处理得比以前好,但在单页应用(SPA, Single Page Application)中,如果频繁添加和移除元素,累积的监听器仍会导致泄漏。

const element = document.getElementById('button');
element.addEventListener('click', onClick);

// 如果后来 element 被移除了,但没有 removeEventListener
// 并且 onClick 函数引用了外部变量,就会造成泄漏

解决方案:

  • 在移除元素前调用 removeEventListener
  • 使用框架(如 React、Vue)时,框架的生命周期通常会自动处理,但要注意在 useEffect 的清理函数中移除原生监听器。

6. 脱离 DOM 树的引用(DOM 树内部引用)

这通常发生在给 DOM 元素添加自定义属性时。如果两个 DOM 元素相互引用,即使从文档流中移除,也可能因为循环引用导致泄漏(在老版本 IE 中常见,现代浏览器有所改进,但仍需注意)。

7. Map 或 Set 的不当使用

使用对象作为 MapSet 的 key,如果只把 key 置为 null,而没有从 Map 中删除它,key 依然被 Map 引用着,无法被回收。

let obj = {};
const map = new Map();
map.set(obj, 'some value');

obj = null; // 这里 obj 被置为 null
// 但 map 里仍然有对原对象的引用,所以原对象无法被回收

解决方案:

  • 使用 WeakMapWeakSet。它们的 key 是弱引用,不会阻止垃圾回收。

8. console.log 的影响

在开发环境调试时打印对象,如果线上环境忘记删除 console.log,控制台会一直持有对象的引用(特别是打印复杂对象时),导致对象无法被回收。现代浏览器在处理 console.log 时有所优化,但仍需注意。

建议:

  • 生产环境打包时移除所有 console.log

总结:如何避免内存泄漏?

  1. 使用 WeakMapWeakSet 存储对象引用。
  2. 及时清理:清除定时器、取消订阅、解绑事件。
  3. 避免全局变量,使用 let/const 和严格模式。
  4. 合理使用闭包,避免在闭包中持有大量数据的引用。
  5. 善用工具
    • 使用 Chrome DevTools 的 Memory 面板拍摄堆快照(Heap Snapshot),分析内存占用。
    • 使用 Performance 面板监控内存变化。

什么是事件循环?调用堆栈和任务队列之间有什么区别?

事件循环 (Event Loop)

事件循环是 JavaScript 运行时处理异步操作的核心机制,它使得 JavaScript 虽然是单线程的,但能够非阻塞地处理 I/O 操作和其他异步任务。

主要组成部分

  1. 调用堆栈 (Call Stack)

    • 一个后进先出(LIFO)的数据结构
    • 用于跟踪当前正在执行的函数
    • 当函数被调用时,会被推入堆栈;执行完毕后弹出
  2. 任务队列 (Task Queue)

    • 一个先进先出(FIFO)的数据结构
    • 存储待处理的消息(异步操作的回调)
    • 包括宏任务队列和微任务队列

调用堆栈 vs 任务队列

特性 调用堆栈 (Call Stack) 任务队列 (Task Queue)
结构 LIFO (后进先出) FIFO (先进先出)
内容 同步函数调用 异步回调函数
执行时机 立即执行 等待调用堆栈为空时才执行
优先级
溢出 可能导致"栈溢出"错误 不会溢出,但可能导致内存问题

事件循环的工作流程

  1. 执行调用堆栈中的同步代码
  2. 当调用堆栈为空时,事件循环检查任务队列
  3. 如果有待处理的任务,将第一个任务移到调用堆栈执行
  4. 重复这个过程

微任务队列 (Microtask Queue)

  • 比普通任务队列优先级更高
  • 包含 Promise 回调、MutationObserver 等
  • 在当前任务完成后、下一个任务开始前执行
  • 会一直执行直到微任务队列为空
console.log('1'); // 同步代码,直接执行

setTimeout(() => console.log('2'), 0); // 宏任务,放入任务队列

Promise.resolve().then(() => console.log('3')); // 微任务,放入微任务队列

console.log('4'); // 同步代码,直接执行

// 输出顺序: 1, 4, 3, 2

理解事件循环和这些队列的区别对于编写高效、无阻塞的 JavaScript 代码至关重要。

处理 I/O 操作的含义

I/O(Input/Output,输入/输出)操作是指程序与外部资源进行数据交换的过程。在JavaScript中,处理I/O操作特别重要,因为JavaScript是单线程的,而I/O操作通常是阻塞的(需要等待响应)。

常见的I/O操作类型

  1. 文件系统操作

    • 读写文件
    • 例如Node.js中的fs.readFile()
  2. 网络请求

    • HTTP/HTTPS请求
    • WebSocket通信
    • 例如fetch()XMLHttpRequest
  3. 数据库操作

    • 查询或更新数据库
    • 例如MongoDB、MySQL等数据库操作
  4. 用户输入

    • 键盘输入
    • 鼠标点击等交互事件

JavaScript如何处理I/O操作

JavaScript通过异步非阻塞方式处理I/O:

  1. 非阻塞特性

    • 发起I/O请求后,不等待结果立即继续执行后续代码
    • 避免线程被阻塞
  2. 回调机制

    • I/O完成后通过回调函数处理结果
    • 例如:
      fs.readFile('file.txt', (err, data) => {
        if (err) throw err;
        console.log(data);
      });
      
  3. Promise/async-await

    • 更现代的异步处理方式
    • 例如:
      async function fetchData() {
        const response = await fetch('https://api.example.com/data');
        const data = await response.json();
        console.log(data);
      }
      

为什么需要特殊处理I/O

  1. 性能考虑:I/O操作通常比CPU操作慢得多

    • 磁盘读取:毫秒级(10^-3秒)
    • 网络请求:可能达到秒级
  2. 单线程限制:JavaScript只有一个主线程

    • 如果同步等待I/O,整个程序会卡住
  3. 用户体验:在浏览器中,阻塞会导致页面无响应

事件循环中的I/O处理

当I/O操作完成时:

  1. 相应的回调函数被放入任务队列
  2. 事件循环在调用栈为空时从队列中取出回调执行
  3. 这使得JavaScript能够高效处理大量并发I/O
console.log('开始请求'); // 同步代码

// 异步I/O操作
fetch('https://api.example.com/data')
  .then(response => response.json())
  .then(data => console.log('收到数据:', data)); // 回调

console.log('请求已发起,继续执行其他代码'); // 立即执行

// 可能的输出顺序:
// 开始请求
// 请求已发起,继续执行其他代码
// 收到数据: {...}

这种机制使得JavaScript特别适合I/O密集型应用(如Web服务器),能够高效处理大量并发请求而不需要创建多个线程。

从 8 个实战场景深度拆解:为什么资深前端都爱柯里化?

你一定见过无数臃肿的 if-else 和重复嵌套的逻辑。在追求 AI-Native 开发的今天,代码的“原子化”程度直接决定了 AI 辅助重构的效率。

柯里化(Currying) 绝不仅仅是面试时的八股文,它是实现逻辑复用、配置解耦的工业级利器。通俗地说,它把一个多参数函数拆解成一系列单参数函数:f(a,b,c)f(a)(b)(c)f(a, b, c) \rightarrow f(a)(b)(c)

以下是 8 个直击前端实战痛点的柯里化应用案例。


1. 差异化日志系统:环境与等级的解耦

在web系统中,我们经常需要根据不同环境输出不同等级的日志。

JavaScript

const logger = (env) => (level) => (msg) => {
  console.log(`[${env.toUpperCase()}][${level}] ${msg} - ${new Date().toLocaleTimeString()}`);
};

const prodError = logger('prod')('ERROR');
const devDebug = logger('dev')('DEBUG');

prodError('支付接口超时'); // [PROD][ERROR] 支付接口超时 - 10:20:00

2. API 请求构造器:预设 BaseURL 与 Header

不用每次请求都传 Token 或域名,通过柯里化提前“锁死”配置。

JavaScript

const request = (baseUrl) => (headers) => (endpoint) => (params) => {
  return fetch(`${baseUrl}${endpoint}?${new URLSearchParams(params)}`, { headers });
};

const apiWithAuth = request('https://api.finance.com')({ 'Authorization': 'Bearer xxx' });
const getUser = apiWithAuth('/user');

getUser({ id: '888' }); 

3. DOM 事件监听:优雅传递额外参数

在 Vue 或 React 模板中,我们常为了传参写出 () => handleClick(id)。柯里化可以保持模板整洁并提高性能。

JavaScript

const handleMenuClick = (menuId) => (event) => {
  console.log(`点击了菜单: ${menuId}`, event.target);
};

// 模板中直接绑定:@click="handleMenuClick('settings')"

4. 复合校验逻辑:原子化验证规则

将复杂的表单校验拆解为可组合的原子。

JavaScript

const validate = (reg) => (tip) => (value) => {
  return reg.test(value) ? { pass: true } : { pass: false, tip };
};

const isMobile = validate(/^1[3-9]\d{9}$/)('手机号格式错误');
const isEmail = validate(/^\w+@\w+.\w+$/)('邮箱格式错误');

console.log(isMobile('13800138000')); // { pass: true }

5. 金融汇率换算:固定基准率

在处理多币种对账时,柯里化能帮你固定变动较慢的参数。

JavaScript

const convertCurrency = (rate) => (amount) => (amount * rate).toFixed(2);

const usdToCny = convertCurrency(7.24);
const eurToCny = convertCurrency(7.85);

console.log(usdToCny(100)); // 724.00

6. 动态 CSS 类名生成器:样式逻辑解耦

配合 CSS Modules 或 Tailwind 时,通过柯里化快速生成带状态的类名。

JavaScript

const createCls = (prefix) => (state) => (baseCls) => {
  return `${prefix}-${baseCls} ${state ? 'is-active' : ''}`;
};

const navCls = createCls('nav')(isActive);
const btnCls = navCls('button'); // "nav-button is-active"

7. 数据过滤管道:可组合的 Array 操作

在处理海量 AI Prompt 列表时,将过滤逻辑函数化,方便链式调用。

JavaScript

const filterBy = (key) => (value) => (item) => item[key].includes(value);

const filterByTag = filterBy('tag');
const prompts = [{ title: 'AI助手', tag: 'Finance' }, { title: '翻译机', tag: 'Tool' }];

const financePrompts = prompts.filter(filterByTag('Finance'));

8. AI Prompt 模板工厂:多层上下文注入

为你正在开发的 AI Prompt Manager 设计一个分层注入器:先注入角色,再注入上下文,最后注入用户输入。

JavaScript

const promptFactory = (role) => (context) => (input) => {
  return `Role: ${role}\nContext: ${context}\nUser says: ${input}`;
};

const financialExpert = promptFactory('Senior Financial Analyst')('Analyzing 2026 Q1 Report');
const finalPrompt = financialExpert('请总结该季报风险点');

不用折腾部署 OpenClaw,我用 MiniMax Agent 一键养「龙虾」,还拍了个短剧

春节假期,帮亲戚朋友们部署 OpenClaw 成了我一份额外的工作。虽然不一定能真正用上,但这只龙虾是不得不拥有。

AI 进入我们的工作流,在 OpenClaw 爆火之后,这种感觉变得更加强烈。在「不用 AI 会被淘汰,用了 AI 也像是能被替代」的悖论下,不错过任何一个能放大自身价值的 AI 工具,让人陷入了无止境的 FOMO。

越来越多的「龙虾变体」也涌现出来,但是当被问到打算怎么把这个部署好的 OpenClaw 融入工作流,答案往往又是个未知数。更不用说光是部署好 OpenClaw,就有两道大关,一是要手动部署和配置复杂的模型 API,二是让人心疼的额外 API 费用。

今天,更新后的 MiniMax Agent 推出了两项新功能。

专业度更高,更会干活的 Expert 智能体社区,涵盖从技术开发、创意写作到音视频图片生成等多模态领域,超过 1.6 万个专家,且还在持续增长。大多数场景下,我们几乎都能直接找到现成可用的专家;即便没有完全匹配的,用几句话还能快速创建一个自己的 Expert。

另一项新增的 MaxClaw 模式,能让我们一键打通 OpenClaw 生态,而且完全不需要自己配置 API,以及承担额外的 API 费用,解决了「不知道 OpenClaw 能做什么」和「怎么部署 OpenClaw」这两个问题。

这也就意味着,即便是纯小白,现在也能拥有开箱即用的专属 AI 专家团队了

APPSO 也实测了一波智能体专家和 MaxClaw 这两项新功能,它确实和一般的智能体 Agent 不同,结合了 Skills 的能力和 OpenClaw 的兼容能力,我们直接就能操作飞书、钉钉等即时通讯软件。

而和市面上不同版本的 OpenClaw 对比,MiniMax Agent 的 MaxClaw 又有了预置的专家智能体,整个体验会更加友好。

体验地址:国内版🔗 
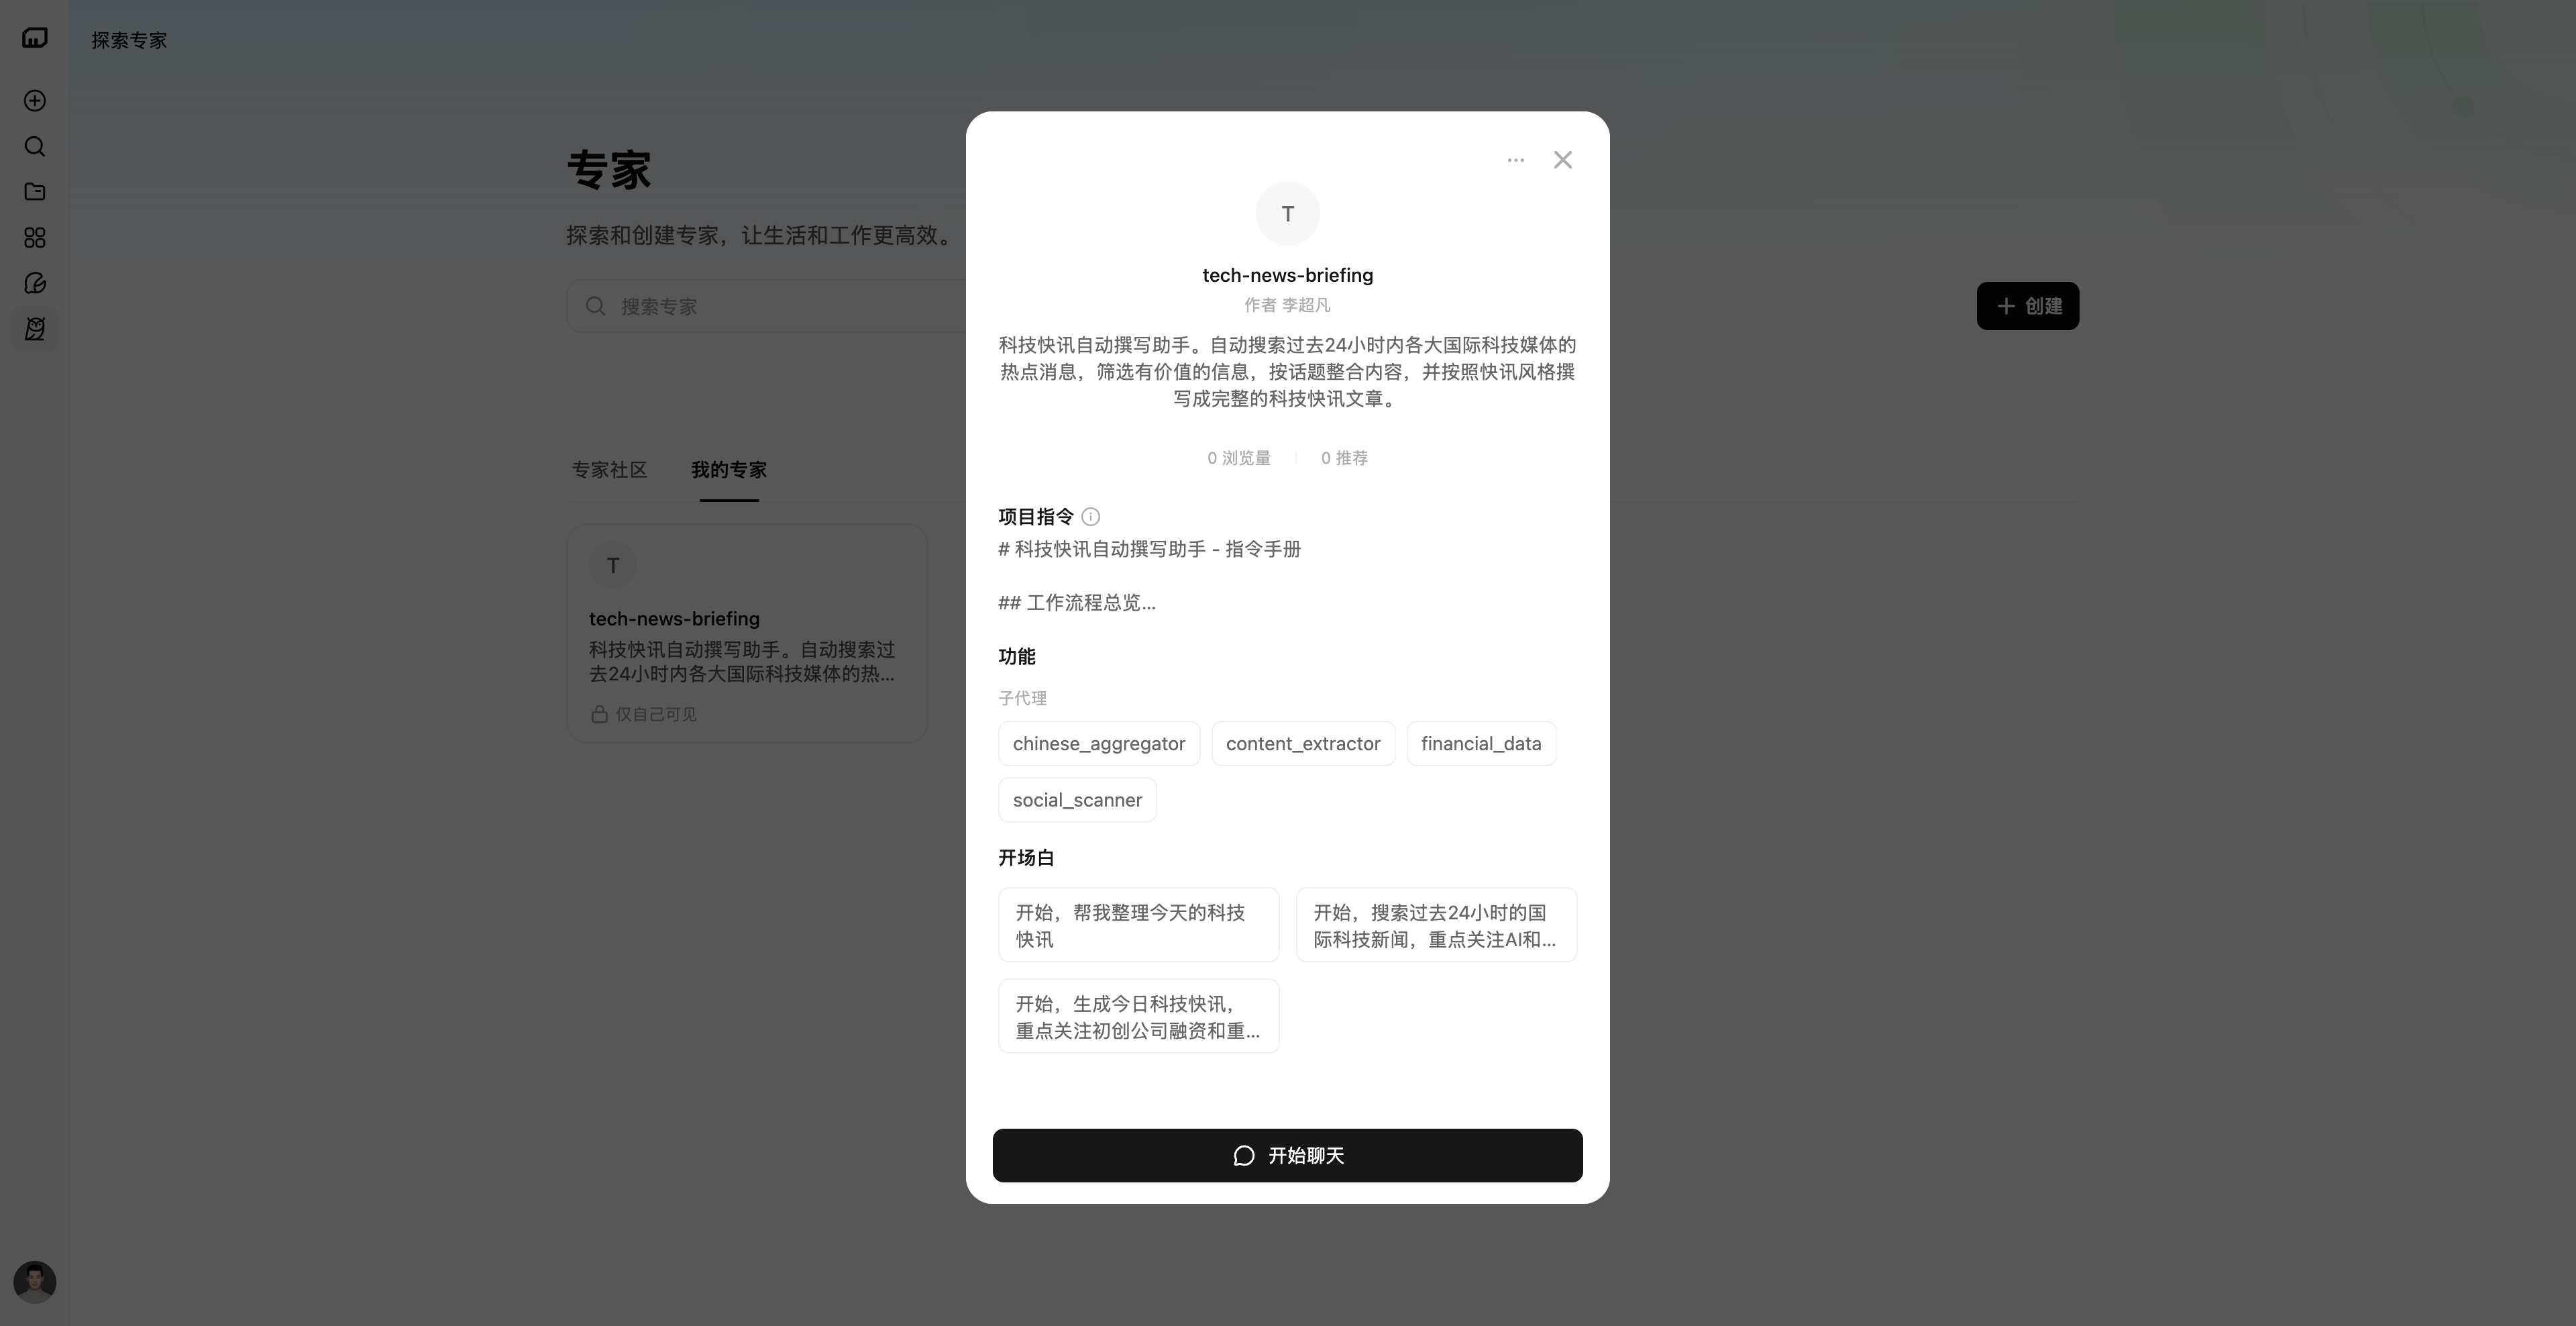
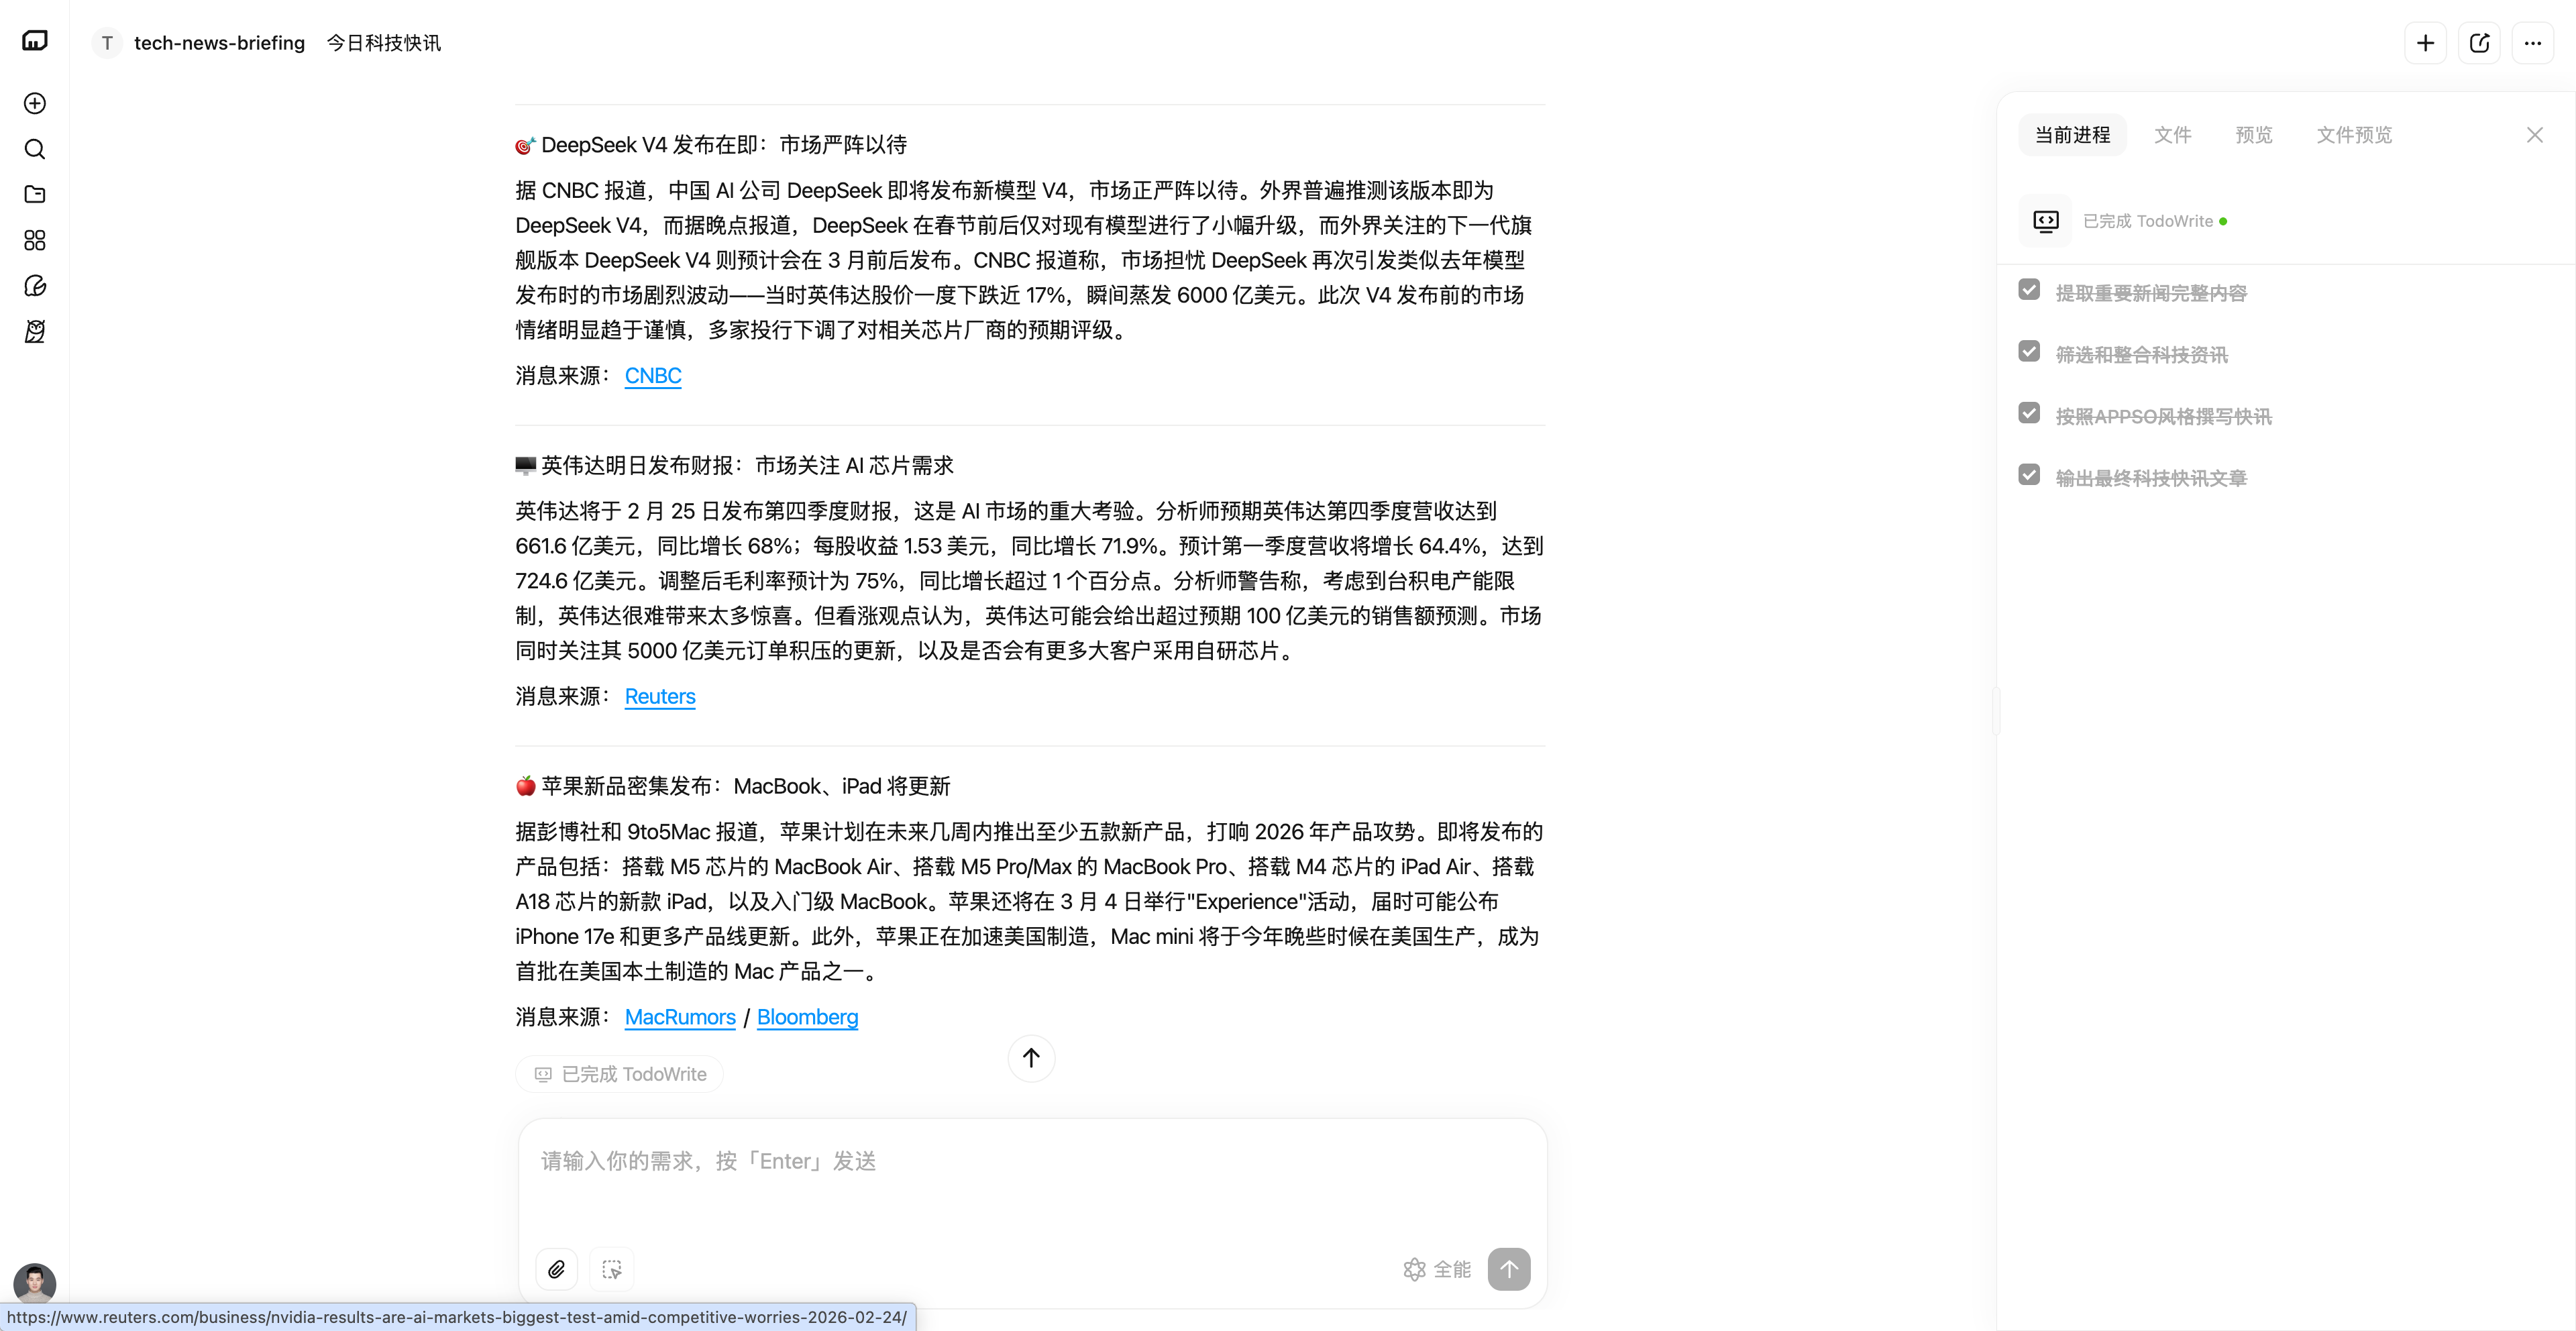
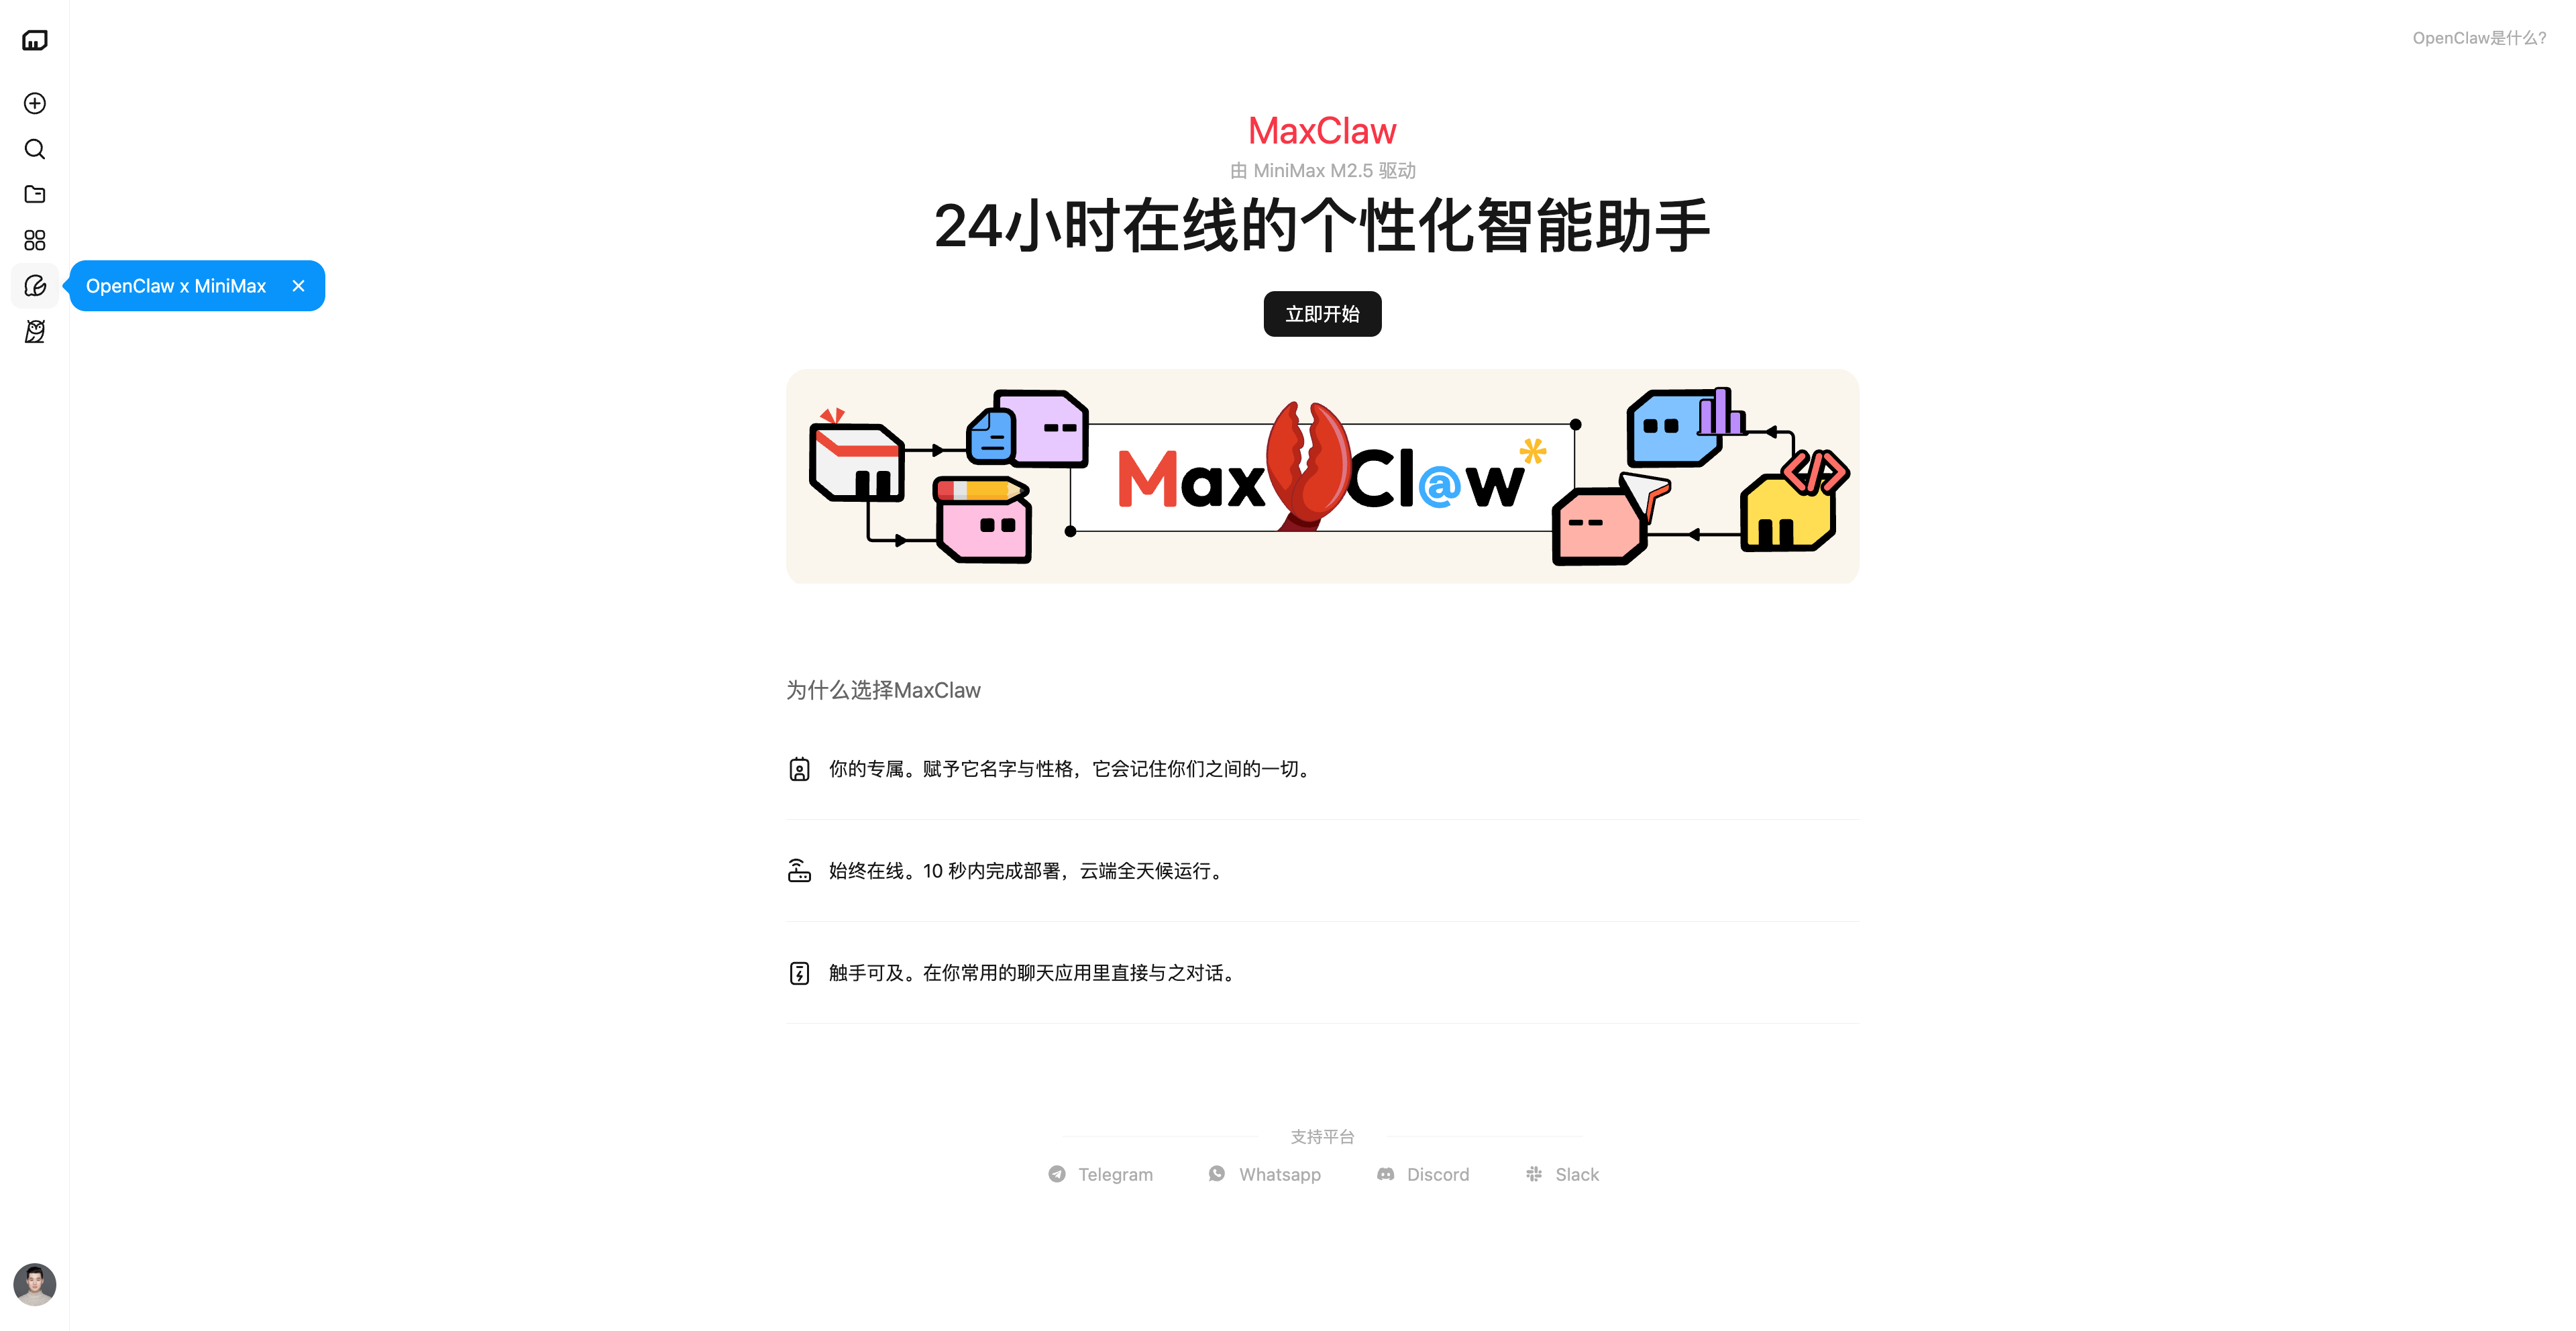
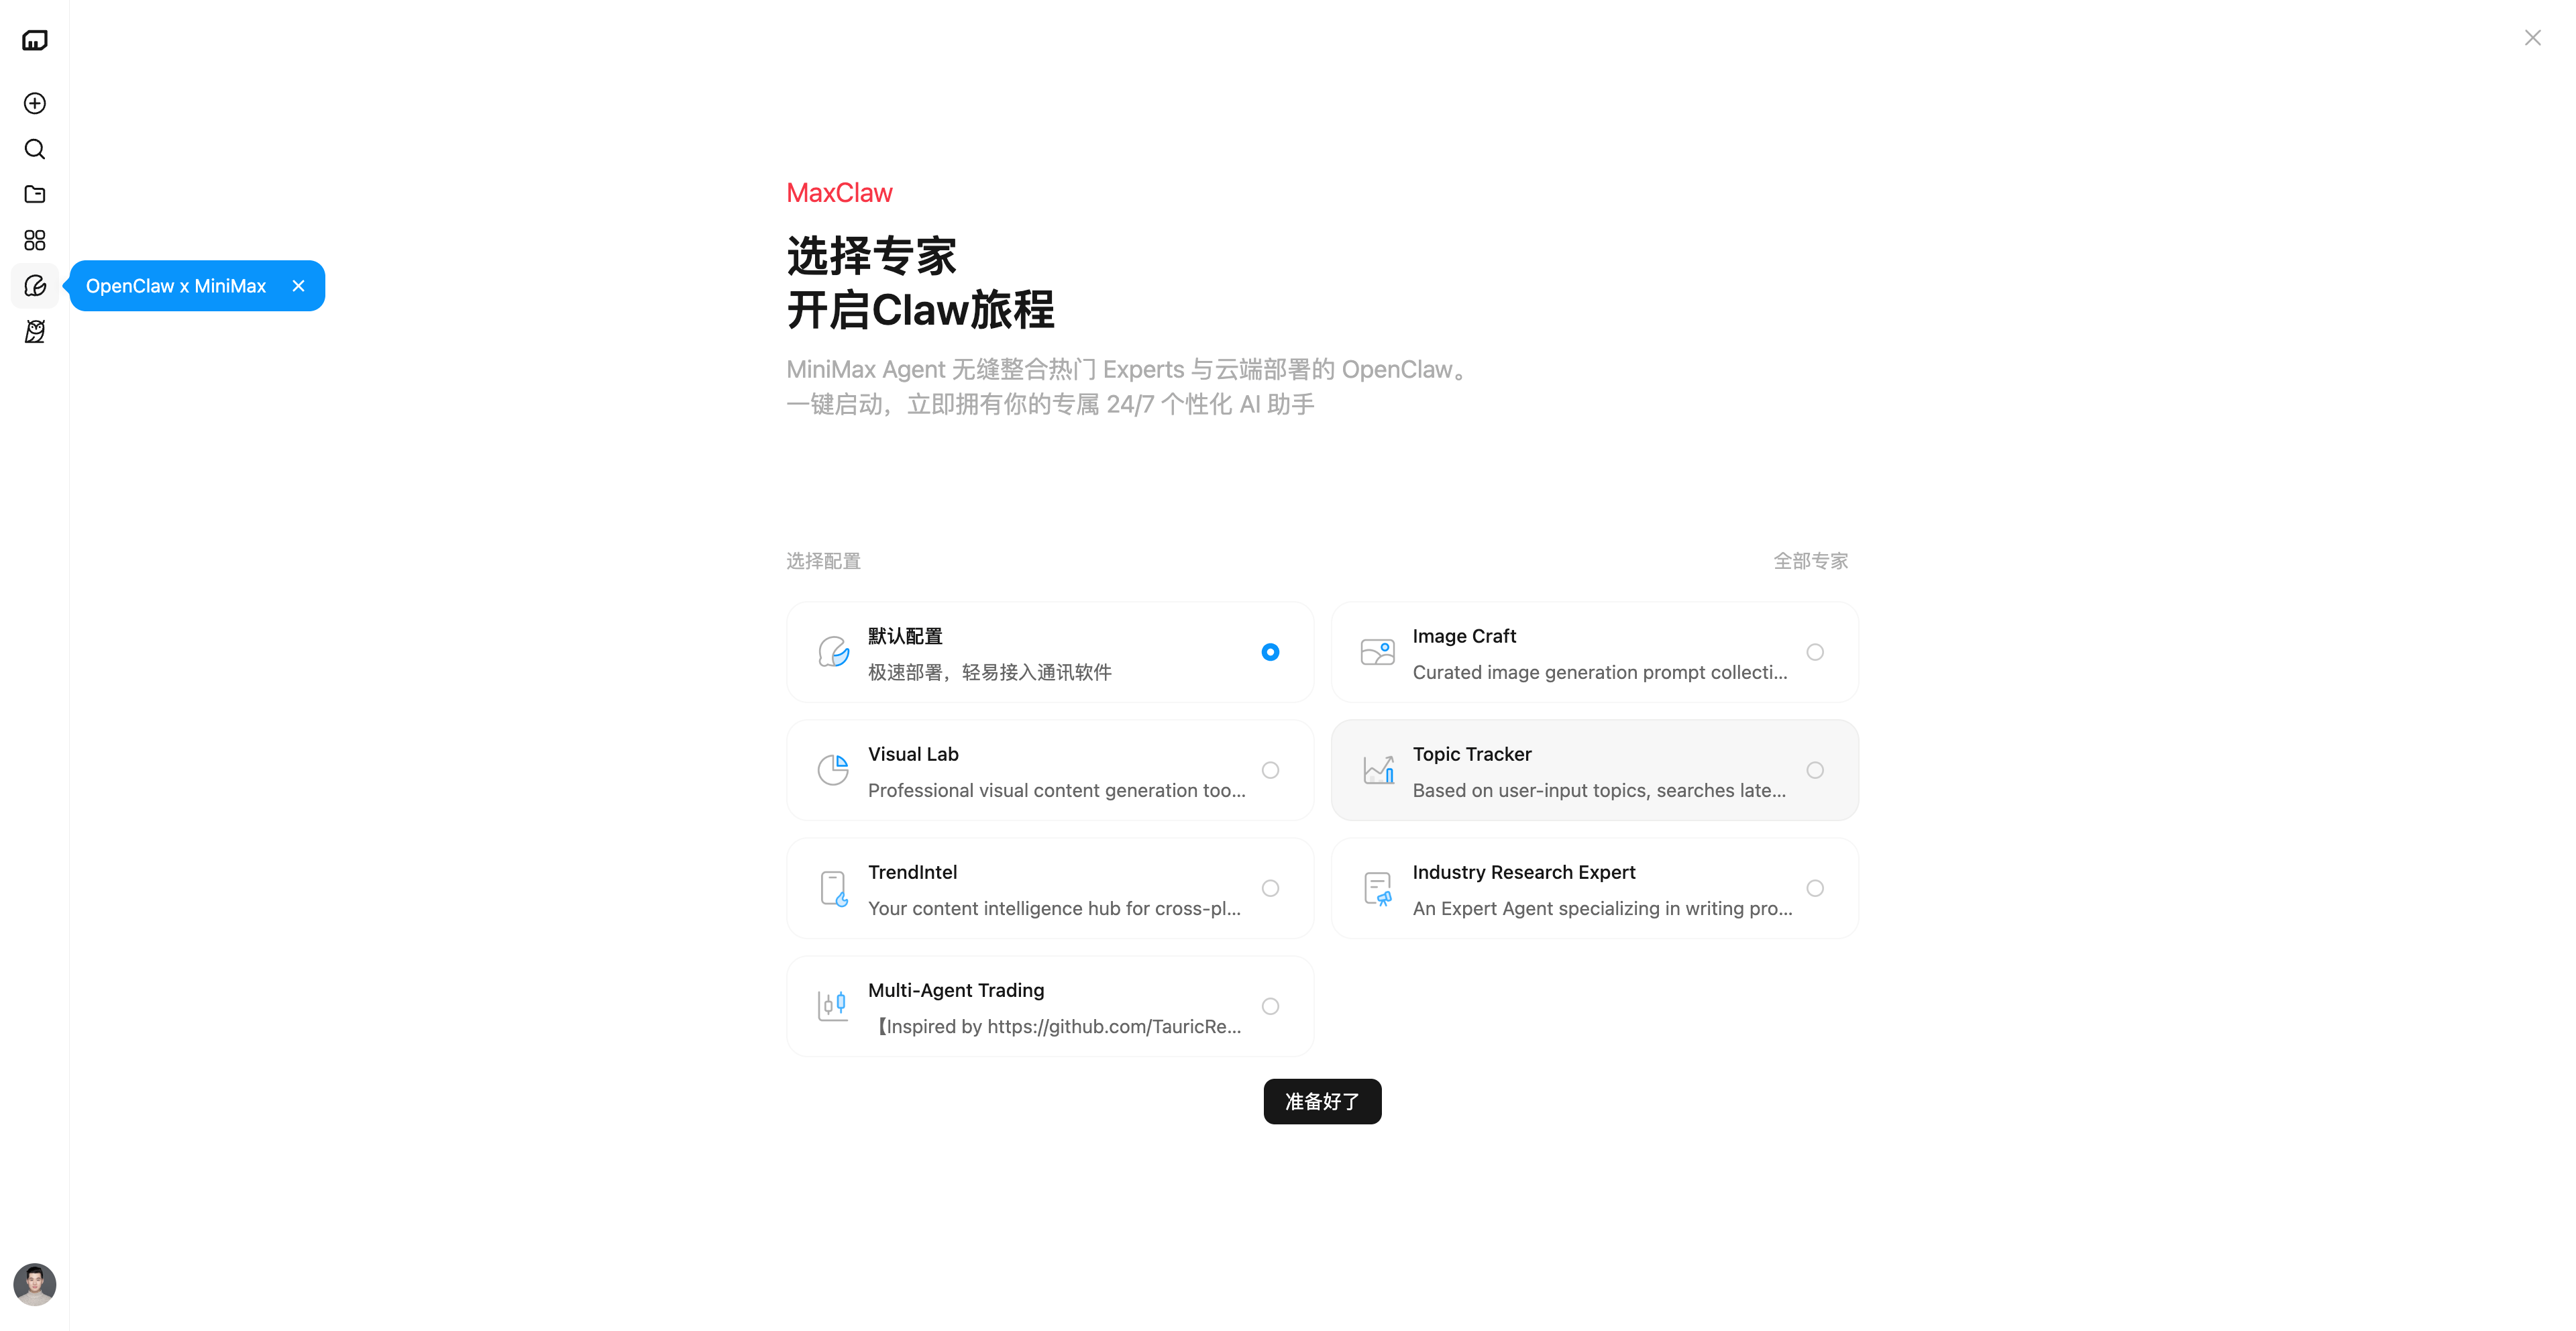
https://agent.minimaxi.com
海外版🔗 https://agent.minimax.io

超过 1.6 万个 Experts 的大社区

对于 AI 创作来说,无论是文本还是多媒体,大多数时候用大模型,最痛苦的就是「AI 味太重」或者「废话连篇」。究其原因,往往是「提示词不当」、「模型不够强」,总结在普通的聊天形式缺乏深度的垂直领域优化。

MiniMax Agent 这次推出的 Expert(专家智能体) 虽然还是在聊天对话里进行,但底层逻辑做了一些改变。它主打即开即用,提供了针对各种深度垂类场景优化的 Agent

▲MiniMax Agent 内提供了办公效率、商业金融、教育学习、生活娱乐等上万个专家

在处理对应垂直领域的任务上,和非专家的单纯对话形式相比,专家能交付更专业、质量更高的结果。为了验证这一点,我们直接从它目前已经 1.6w+公开的 Expert 库(大部分是用户创作)里,挑了几个热门的场景进行实测。

PPT、网页、行业分析,AI 开始按场景分工干活

从目前 Expert 社区的使用热度来看,用户最先跑起来的,往往还是那些直接指向生产力的刚需场景,比如办公制作、内容搭建,以及金融与行业分析。

在 MiniMax Agent 首页,我们点击左侧边栏的「探索专家」,就能进入已经按场景分好类的专家社区。不同专家不仅标注了能力方向,还能看到背后调用的「子代理」和完整项目指令,相当于把一套成熟工作流直接摆在用户面前。

找到合适的专家后,点击「开始聊天」,输入需求,它就会按既定流程自动推进任务。

▲股票价值分析专家介绍

在办公与内容生产场景中,落地页生成和 PPT 制作依然是浏览量最高的一类专家。

我们先测试了 Landing Page Builder 专家。输入需求:「我要给初中生做一个五代十国历史的网页,得让他们真的能听进去,内容翔实有考据,一节课 45 分钟的内容。要解释清楚、配图到位、动效得当、沉浸感强,举的例子能让他们产生共鸣,再加几道题检验下理解程度。」

整个过程中,专家几乎不需要额外干预,而是按照预设流程自动完成结构设计、内容填充和页面生成。

▲预览链接:https://qvwu1nyvju2u.space.minimax.io/

从最终效果来看,这类 Expert 和传统 Agent 最大的区别在于,它从边聊天边拼凑,转成了沿着一条完整生产流程在推进,结果的稳定性和完成度明显更高。

生成的网页不仅信息完整,画面和动效也有一定沉浸感,相比过去一些 vibe coding 产品常见的模板化和渐变紫风格,要更克制也更可用。

在偏专业的分析类任务上,Expert 的优势会更明显。我们选择了 McKinsey PPT(麦肯锡风格演示文稿生成)专家进行测试。按照介绍,它会自动补充数据、图表以及行业洞察。

实际测试中,我们只输入了一句非常简单的需求,「制作一份关于全球机器人市场的10页幻灯片演示文稿」。但最终生成的 PPT,在信息密度、结构完整度和图表配置上都没有明显缩水,基本具备拿来就能用的初稿质量。

这类场景也很能体现 Expert 的定位,它尝试把一整段专业工作流程产品化,从增强单次问答的模式里彻底跳了出来。

有了多模态能力的专家,一句话拍出顾北辰的短剧宇宙

还没听说过有能生成视频的通用 Agent 产品,但现在结合多个不同的 Skills、Agents 的专家,输入一段剧情,直接就能给我们一部短剧。

▲提示词:霸总重生在电子厂打螺丝,宫崎骏动漫风格,1-3分钟视频长度,台词激烈有冲突,剧情跌宕起伏有反转。

我们使用 AI 短剧导演+摄影+剪辑师专家进行测试,和一般的视频生成模型只能产出 5-10s 左右的视频不同,这个专家能自动生成完整的分镜,并且把视频进行剪辑和拼接。

最后生成的视频,完成度很高,虽然没能对口型把台词一字一句说出来,但是也配了一段应景的 BGM。而且大概率是检测到了提示词里面的「宫崎骏」,整个动画的风格,乃至角色和公司名字,都透露着一股日漫的味道。

简单对话,每个人都能创建一个专家

如果觉得官方或别人做的专家,还不够贴合我们的使用习惯和工作场景,MiniMax Agent 也提供了自定义功能,通过简单的一两句话就能创建一个专家。

我们完全不需思考什么是 Skill 或者专家,也不用遵守标准文件的规则设置等,只需要通过自然语言交互,就能更方便地把个性化的工作流、SOP 等集成,创建专属 Expert。

热点追踪是媒体编辑一项非常重要的工作,我们在 MiniMax Agent 的专家社区里,也使用过多次热点追踪的专家。例如当我们要求它基于输入的「春晚被机器人刷屏」这个主题,去搜索最新消息和近期热门话题时;它最后能给我们一份完整详细的长文,但是不够个性化。

于是,我们开始自己来创建一个 APPSO 的热点追踪。

▲在探索专家页面右上角点击「创建专家」,输入自己的需求,MiniMax Agent 会自动帮我们完成创建

创建专家的过程是可以连续对话,如果对目前专家的输出不满意,我们可以继续在对话框内要求 MiniMax Agent 进行更新。

创建完成之后,我们只需要发送一句「开始,帮我整理今天的科技快讯」,专家就会给我们 24h 内最值得关注的 AI 消息,并且以早报的文风和格式要求写好。此外,这些自己创建的专家,MiniMax 还提供了 15 轮免费,即不消耗积分的优惠,体验门槛更低。

▲APPSO 自定义的专家,现在可以自主完成一份快讯早报

除了大量可以直接使用和自定义的 Experts,更值得关注的是即将上线的 Marketplace。用户创建的 Expert,如果被使用,就能获得相应的积分,可以用来在 MiniMax Agent 里完成更多的任务。

而后续 MiniMax 还将开放专家自行定价,这意味着如果你在某个垂直领域有真正的专业积累,封装成 Expert 除了分享自用,还可能是一种新的变现路径。

说白了,一个 Skills 专家的应用商店雏形,已经摆在我们面前了。

一键接入 OpenClaw 的 MaxClaw

如果说 Expert 是强大的大脑,那么 MaxClaw 就是让大脑连接到现实的双手,这也是 MiniMax Agent 这次升级里,玩法最丰富的一个功能。我把它叫做升级版的 OpenClaw。

根据网络上到处都是的 OpenClaw 指南,想要真正好用的OpenClaw生态,我们要先学会手动部署、配置复杂的模型API,还要时刻盯着后台,生怕一不小心跑出天价的 API 账单。

对于绝大多数不懂代码的普通小白来说,这门槛属实是太高了。我只是想把好用的 AI 接入自己的飞书或钉钉,创建一个机器人,但是第一步就困住了。

MiniMax Agent 新增的 MaxClaw 模式,一键打通了 OpenClaw 生态,不需要繁琐的手动部署和配置模型 API,通过MiniMax Agent 网页端就可以快速上手。

目前,它也兼容手机端多个即时通讯交互工具,我们可以在飞书、钉钉、Telegram、WhatsApp、Discord、Slack 中使用。

拿部署到飞书机器人举例,甚至不用额外的部署指南,我们只需要点开首页左侧边栏的 MaxClaw 按钮,点击「立即开始」,我们可以选择使用默认配置,或者其他专家。

这也是 MaxClaw 对比 OpenClaw 的一大亮点,除了能像 OpenClaw 一样连接到不同的聊天应用,在自己常用的 App 里就能指挥 AI 干活;我们在初始配置时,就可以直接选择那些已经有的预置专家 Agent 配置。

创建之后,在对话框里发送消息,「我想连接到飞书」,按照 MaxClaw 回复的消息,我们点击飞书开放平台的链接,登录之后,按照流程,创建一个企业自建应用,获取 App ID 和 App Secret。接着把复制的信息发送给 MaxClaw,它会提示重启,重启之后在飞书的配置事件订阅里选择添加对应的事件就能启用。

不出所料,整个过程肯定会有一些问题。例如我们在拿公司飞书账号测试时,就被提示相关的授权需要审核才能发布,以及在权限管理和事件配置部分,飞书里面的内容太多太杂乱,根本不知道授予哪些权限。

这个时候,直接回到 MaxClaw,把遇到的问题统统发给它,跟着它的提示走,基本上都能解决。

顺利部署之后,我们在自己的飞书里,就能看到一个对应名字的机器人,然后直接开启对话,所有的对话也会同步在 MiniMax Agent 网页里的 MaxClaw 显示。

▲现在,飞书就能指挥你的 MaxClaw

让 MaxClaw 帮我们干活,都只用在飞书里面指挥它。我们直接把之前创建的「热点追踪」专家的指令发给它,然后在飞书里对话,输入一句简单指令,「帮我整理今天的快讯」。

很快,一份结构完整的 AI 早报就直接回到了飞书对话框里,完全按照要求的格式,摘要、关键信息提炼、标题等全部都有。并且还能设置定时任务,让 MaxClaw 在飞书里主动给我们发送消息。

除了热点追踪,之前的股票价值分析等专家,我们现在也可以直接通过飞书聊天的方式,就让 MaxClaw 为我们总结出一份逻辑清晰的完整报告。同时,继续让它为我们监控英伟达最新的动态。

而如果直接在配置的时候,选择对应的专家,我们可以看到它的 Skills 情况,MaxClaw 会自动添加开箱即用的 Skills 来帮助我们更好的上手。

▲在效率工具里面有「博客监控」和「内容摘要」等 Skills 用于「热点追踪」专家

时间一到,MaxClaw 在飞书里,准时给我们推送了最新的资讯。

「Claw」是 Agent 之后一种新的智能阶段

这次更新,真正值得关注的,其实不是又多了一个 Agent 工具。

OpenClaw 的爆火,让我们看到了一个能真正干活的「Agent」是什么样。它是个性化的,部署在自己的电脑上,告别了过去一个网页解决所有用户问题的统一;它是互联互通的,打穿了终端设备上不同应用的壁垒,在 Telegram 也能指挥 AI 帮助我们回复工作邮件……

▲知名博主 Simon Willison 提到 Claw 似乎正在成为像 Agent 一样的专用术语,用来描述一种新的智能体类别|图片来源:https://simonwillison.net/2026/Feb/21/

这本质上是在提醒我们一件事:AI 正在从「辅助回答问题」,走向「直接进入工作流」。当 AI 开始能够调用工具、跨应用执行任务、甚至在后台持续运转,我们原有的工作组织方式,本身就已经在发生变化。

问题只在于,大多数普通用户其实卡在门外。

▲全球 81 亿人中, 84% 的人从未用过 AI,而只有 0.3% 的用户愿意为 AI 付费|图片来源:https://global-ai-adoption.netlify.app/

一边是大家都知道 Agent 很强、OpenClaw 很火;另一边,是复杂的部署流程、看不懂的 API 配置,以及随时可能失控的调用成本。很多人不是不想用,而是很难真正用起来。

MiniMax Agent 这次做的事情,某种程度上就是在把这道门槛往下搬,让普通打工人也能轻松搭建自己的顶级 AI 工作流。

▲MiniMax Agent 会员定价|对比大部分 AI 动辄 20 美元一个月的订阅费用,MiniMax Agent 39 元的价格,大约一杯咖啡的钱,却已经足够能帮我们把写稿、做 PPT、跑多 Agent 工作流一口气打通,让这只「龙虾」多线程干活

Expert 把过去需要反复调 Prompt、反复试错的专业流程,打包成了即开即用的专家社区;MaxClaw 则把原本偏极客向的 OpenClaw 生态,压缩成了一键可用的连接能力。

对于普通用户来说,这种变化的意义很直接,我们不用懂什么是终端,不用让自己费尽力气做个半吊子「工程师」,也能开始搭建自己的 AI 工作流。

▲METR 此前的研究显示 AI 工具对开发人员生产力的影响,导致生产力下降了 20%;但 METR 表示现在这一发现已经过时,生产力提升似乎更有可能|图片来源:https://x.com/METR_Evals/status/2026355544668385373/

当越来越多「Agent」能够被像软件一样使用,AI 对工作方式的影响,才会真正开始外溢。

从这个角度看,MiniMax 推出这些产品,价值或许不只在于功能多了两个按钮,更在于它正在把一套原本属于少数人的先进工作范式,逐步变成更多人可以上手的日常工具。

对普通用户来说,这或许才是 Agent 真正开始变得有用的时刻。

#欢迎关注爱范儿官方微信公众号:爱范儿(微信号:ifanr),更多精彩内容第一时间为您奉上。

爱范儿 | 原文链接 · 查看评论 · 新浪微博


AI 写代码总是半途而废?试试这个免费的工作流工具

作为一个用过多种 IDE 的开发者,我想分享一个让我效率 up up 的小工具。

你有没有遇到过这种情况?

  • 跟 AI 聊了半天需求,代码写了一半,上下文满了,AI "失忆"了
  • 项目做到一半搁置,一周后回来完全忘了做到哪了
  • 想加一个功能,结果 AI 把之前的代码改坏了

这些问题都有一个共同原因:上下文衰减(Context Rot)

简单来说,AI 的"记忆"是有限的。当对话太长时,它会慢慢忘掉之前说过的话,导致代码质量下降。

GSD 是什么?

GSD = Get Shit Done(把事做完)

它是一个开源的 AI 编程工作流框架,核心思路很简单:

把项目信息存到文件里,而不是全部塞给 AI。

就像你写代码会用 Git 做版本控制一样,GSD 帮你做"AI 对话的版本控制"。

GSD for Trae

原版 GSD 是为 Claude Code 设计的。因为我日常用 Trae,所以做了这个适配版本。

安装只需一行命令:

npx gsd-trae

或者:

bash <(curl -s https://raw.githubusercontent.com/Lionad-Morotar/get-shit-done-trae/main/install.sh)

它能帮你做什么?

1. 新项目规划

输入 /gsd:new-project,它会:

  • 问你一系列问题,搞清楚你要做什么
  • 自动研究技术方案(可选)
  • 生成项目路线图

2. 阶段式开发

大项目拆成小阶段:

  • /gsd:plan-phase 1 - 规划第一阶段
  • /gsd:execute-phase 1 - 执行第一阶段
  • /gsd:verify-work - 验证做得对不对

每完成一个阶段,进度都会被记录,随时可以接着做。

3. “断点续传”

关掉电脑、明天再来,输入 /gsd:progress,AI 马上知道:

  • 项目做到哪了
  • 接下来该做什么
  • 之前的决策是什么

实际使用感受

我用了一个月,相比 Trae 的 Plan Build 模式最明显的变化:

以前:一个功能聊到一半,AI 开始"胡言乱语",只能新开对话重来

现在:每个阶段都有清晰的目标和验收标准,AI 一直保持在正确的方向上

以前:同时开多个功能,代码互相冲突

现在:按阶段来,做完一个再做下一个,井井有条(进阶用户也可以选择 Worktree 模式)

以前:Plan 文档随意仍在 .trae 的文档目录,没有管理,很难查找

现在:结构化的目录,GSD 和开发者都能轻松阅读

适合谁用?

  • 用 Trae/Gemini/Claude 写代码的开发者
  • 做独立项目、 side project 的人
  • 觉得 AI 编程"聊不动"的新手

相比其他工具的优势

市面上有不少 AI 编程工作流工具,比如 GitHub 的 Spec Kit、OpenSpec、BMAD 等。GSD 的定位不太一样:

工具 特点 GSD 的区别
Spec Kit 企业级、严格阶段门控、30分钟启动 GSD 更轻量,5分钟上手,没有繁琐的仪式
OpenSpec 灵活快速、Node.js 运行 GSD 额外解决了 Context Rot 问题,支持断点续传
BMAD 21个 AI Agent、完整敏捷流程 GSD 不模拟团队,而是聚焦"让开发者高效完成项目"

简单说:如果你期待快速而结构化的流程,又不想被复杂的企业开发规范束缚的同时,确保 AI 编程能稳定输出,GSD 可能是目前最合适的选择。

它是免费的

开源项目,GitHub 地址: github.com/Lionad-Moro…

MIT 协议,可以随便用、随便改。

最后说一句

AI 编程工具越来越强大,但工具只是工具。

好的工作流能让你事半功倍,而 GSD 就是这样一套经过验证的工作流。

不需要改变你现有的开发习惯,安装后输入 /gsd:new-project 试试看。


如果你试过觉得好用,欢迎点个 Star ⭐

如果发现问题,也欢迎提 Issue

React 状态管理:Easy-Peasy 入门指南

大家好!今天我们来聊聊 React 状态管理中的一个非常简单且高效的库——Easy-Peasy。它可以帮助我们轻松管理应用中的状态,让开发更加高效和清晰。

相关链接

官网 Github仓库 npm

为什么选择 Easy-Peasy?

Easy-Peasy 是对 Redux 的一种抽象。它提供了一个重新构思的 API,专注于开发者体验,使你能够快速轻松地管理状态,同时利用 Redux 强大的架构保障,并与其广泛的生态系统进行集成。

所有功能均已内置,无需配置即可支持一个健壮且可扩展的状态管理解决方案,包括派生状态、API 调用、开发者工具等高级特性,并通过 TypeScript 提供完整的类型支持体验。

它社区活跃、更新稳定,跟随社区的 redux 版本同步更新。

  • Zero configuration 零配置

  • No boilerplate 无冗余代码

  • React hooks based API 基于React Hook的API

  • Extensive TypeScript support 广泛的TypeScript支持

  • Encapsulate data fetching 封装数据获取

  • Computed properties 计算属性

  • Reactive actions 响应式动作

  • Redux middleware support 支持 Redux 中间件

  • State persistence 状态持久性

  • Redux Dev Tools 支持Redux开发工具

  • Global, context, or local stores 全局、上下文或本地存储

  • Built-in testing utils 内置测试工具

  • React Native supported 支持 React Native

  • Hot reloading supported 支持热重载

所有这些功能只需安装一个依赖项即可实现。

创建nextjs项目

(base) pe7er@pe7erdeMacBook-Pro github % npx create-next-app@latest
npm http fetch GET 200 https://mirrors.cloud.tencent.com/npm/create-next-app 1151ms (cache updated)
Need to install the following packages:
create-next-app@14.2.13
Ok to proceed? (y)

npm http fetch GET 200 https://mirrors.cloud.tencent.com/npm/create-next-app 1071ms (cache miss)
npm http fetch POST 200 https://mirrors.cloud.tencent.com/npm/-/npm/v1/security/advisories/bulk 621ms
npm http fetch GET 200 https://mirrors.cloud.tencent.com/npm/create-next-app/-/create-next-app-14.2.13.tgz 1034ms (cache miss)
✔ What is your project named? … nextjs-easy-peasy-template
✔ Would you like to use TypeScript? … No / Yes
✔ Would you like to use ESLint? … No / Yes
✔ Would you like to use Tailwind CSS? … No / Yes
✔ Would you like to use `src/` directory? … No / Yes
✔ Would you like to use App Router? (recommended) … No / Yes
✔ Would you like to customize the default import alias (@/*)? … No / Yes
✔ What import alias would you like configured? … @/*
Creating a new Next.js app in /Users/pe7er/Developer/github/nextjs-easy-peasy-template.
控制台完整输出
            (base) pe7er@pe7erdeMacBook-Pro github % npx create-next-app@latest
npm http fetch GET 200 https://mirrors.cloud.tencent.com/npm/create-next-app 1151ms (cache updated)
Need to install the following packages:
create-next-app@14.2.13
Ok to proceed? (y)
npm http fetch GET 200 https://mirrors.cloud.tencent.com/npm/create-next-app 1071ms (cache miss)
npm http fetch POST 200 https://mirrors.cloud.tencent.com/npm/-/npm/v1/security/advisories/bulk 621ms
npm http fetch GET 200 https://mirrors.cloud.tencent.com/npm/create-next-app/-/create-next-app-14.2.13.tgz 1034ms (cache miss)
✔ What is your project named? … nextjs-easy-peasy-template
✔ Would you like to use TypeScript? … No / YesWould you like to use ESLint? … No / YesWould you like to use Tailwind CSS? … No / YesWould you like to use `src/` directory? … No / YesWould you like to use App Router? (recommended) … No / YesWould you like to customize the default import alias (@/*)? … No / YesWhat import alias would you like configured? … @/*
Creating a new Next.js app in /Users/pe7er/Developer/github/nextjs-easy-peasy-template.
Using npm.
Initializing project with template: app-tw
Installing dependencies:
- react
- react-dom
- next
Installing devDependencies:
- typescript
- @types/node
- @types/react
- @types/react-dom
- postcss
- tailwindcss
- eslint
- eslint-config-next
npm http fetch GET 200 https://mirrors.cloud.tencent.com/npm/react 720ms (cache updated)
npm http fetch GET 200 https://mirrors.cloud.tencent.com/npm/react-dom 1250ms (cache updated)
npm http fetch GET 200 https://mirrors.cloud.tencent.com/npm/next 2449ms (cache updated)
npm http fetch GET 200 https://mirrors.cloud.tencent.com/npm/@opentelemetry%2fapi 591ms (cache updated)
npm http fetch GET 200 https://mirrors.cloud.tencent.com/npm/@playwright%2ftest 1250ms (cache updated)
npm http fetch GET 200 https://mirrors.cloud.tencent.com/npm/sass 422ms (cache updated)
npm http fetch GET 200 https://mirrors.cloud.tencent.com/npm/typescript 2082ms (cache updated)
npm http fetch GET 200 https://mirrors.cloud.tencent.com/npm/@types%2fnode 1414ms (cache updated)
npm http fetch GET 200 https://mirrors.cloud.tencent.com/npm/@types%2freact 742ms (cache updated)
npm http fetch GET 200 https://mirrors.cloud.tencent.com/npm/@types%2freact-dom 566ms (cache updated)
npm http fetch GET 200 https://mirrors.cloud.tencent.com/npm/postcss 309ms (cache updated)
npm http fetch GET 200 https://mirrors.cloud.tencent.com/npm/tailwindcss 1018ms (cache updated)
npm http fetch GET 200 https://mirrors.cloud.tencent.com/npm/eslint 479ms (cache updated)
npm http fetch GET 200 https://mirrors.cloud.tencent.com/npm/eslint-config-next 1234ms (cache updated)
npm http fetch GET 200 https://mirrors.cloud.tencent.com/npm/@eslint-community%2feslint-utils 365ms (cache updated)
npm http fetch GET 200 https://mirrors.cloud.tencent.com/npm/undici-types 370ms (cache updated)
npm http fetch GET 200 https://mirrors.cloud.tencent.com/npm/@types%2fprop-types 487ms (cache updated)
npm http fetch GET 200 https://mirrors.cloud.tencent.com/npm/@eslint-community%2fregexpp 498ms (cache updated)
npm http fetch GET 200 https://mirrors.cloud.tencent.com/npm/csstype 508ms (cache updated)
npm http fetch GET 200 https://mirrors.cloud.tencent.com/npm/@eslint%2fjs 606ms (cache updated)
npm http fetch GET 200 https://mirrors.cloud.tencent.com/npm/@eslint%2feslintrc 685ms (cache updated)
npm http fetch GET 200 https://mirrors.cloud.tencent.com/npm/@humanwhocodes%2fmodule-importer 326ms (cache updated)
npm http fetch GET 200 https://mirrors.cloud.tencent.com/npm/@nodelib%2ffs.walk 331ms (cache updated)
npm http fetch GET 200 https://mirrors.cloud.tencent.com/npm/chalk 329ms (cache updated)
npm http fetch GET 200 https://mirrors.cloud.tencent.com/npm/ajv 629ms (cache updated)
npm http fetch GET 200 https://mirrors.cloud.tencent.com/npm/doctrine 337ms (cache updated)
npm http fetch GET 200 https://mirrors.cloud.tencent.com/npm/@ungap%2fstructured-clone 663ms (cache updated)
npm http fetch GET 200 https://mirrors.cloud.tencent.com/npm/debug 469ms (cache updated)
npm http fetch GET 200 https://mirrors.cloud.tencent.com/npm/@humanwhocodes%2fconfig-array 871ms (cache updated)
npm http fetch GET 200 https://mirrors.cloud.tencent.com/npm/cross-spawn 555ms (cache updated)
npm http fetch GET 200 https://mirrors.cloud.tencent.com/npm/escape-string-regexp 413ms (cache updated)
npm http fetch GET 200 https://mirrors.cloud.tencent.com/npm/esutils 221ms (cache updated)
npm http fetch GET 200 https://mirrors.cloud.tencent.com/npm/eslint-visitor-keys 351ms (cache updated)
npm http fetch GET 200 https://mirrors.cloud.tencent.com/npm/espree 361ms (cache updated)
npm http fetch GET 200 https://mirrors.cloud.tencent.com/npm/eslint-scope 376ms (cache updated)
npm http fetch GET 200 https://mirrors.cloud.tencent.com/npm/file-entry-cache 251ms (cache updated)
npm http fetch GET 200 https://mirrors.cloud.tencent.com/npm/find-up 316ms (cache updated)
npm http fetch GET 200 https://mirrors.cloud.tencent.com/npm/esquery 626ms (cache updated)
npm http fetch GET 200 https://mirrors.cloud.tencent.com/npm/fast-deep-equal 559ms (cache updated)
npm http fetch GET 200 https://mirrors.cloud.tencent.com/npm/graphemer 291ms (cache updated)
npm http fetch GET 200 https://mirrors.cloud.tencent.com/npm/glob-parent 399ms (cache updated)
npm http fetch GET 200 https://mirrors.cloud.tencent.com/npm/globals 422ms (cache updated)
npm http fetch GET 200 https://mirrors.cloud.tencent.com/npm/ignore 384ms (cache updated)
npm http fetch GET 200 https://mirrors.cloud.tencent.com/npm/is-glob 218ms (cache updated)
npm http fetch GET 200 https://mirrors.cloud.tencent.com/npm/is-path-inside 223ms (cache updated)
npm http fetch GET 200 https://mirrors.cloud.tencent.com/npm/imurmurhash 294ms (cache updated)
npm http fetch GET 200 https://mirrors.cloud.tencent.com/npm/js-yaml 262ms (cache updated)
npm http fetch GET 200 https://mirrors.cloud.tencent.com/npm/levn 163ms (cache updated)
npm http fetch GET 200 https://mirrors.cloud.tencent.com/npm/json-stable-stringify-without-jsonify 337ms (cache updated)
npm http fetch GET 200 https://mirrors.cloud.tencent.com/npm/lodash.merge 272ms (cache updated)
npm http fetch GET 200 https://mirrors.cloud.tencent.com/npm/strip-ansi 279ms (cache updated)
npm http fetch GET 200 https://mirrors.cloud.tencent.com/npm/optionator 301ms (cache updated)
npm http fetch GET 200 https://mirrors.cloud.tencent.com/npm/natural-compare 414ms (cache updated)
npm http fetch GET 200 https://mirrors.cloud.tencent.com/npm/minimatch 471ms (cache updated)
npm http fetch GET 200 https://mirrors.cloud.tencent.com/npm/@rushstack%2feslint-patch 296ms (cache updated)
npm http fetch GET 200 https://mirrors.cloud.tencent.com/npm/text-table 470ms (cache updated)
npm http fetch GET 200 https://mirrors.cloud.tencent.com/npm/eslint-import-resolver-node 446ms (cache updated)
npm http fetch GET 200 https://mirrors.cloud.tencent.com/npm/eslint-import-resolver-typescript 567ms (cache updated)
npm http fetch GET 200 https://mirrors.cloud.tencent.com/npm/eslint-plugin-import 519ms (cache updated)
npm http fetch GET 200 https://mirrors.cloud.tencent.com/npm/eslint-plugin-jsx-a11y 598ms (cache updated)
npm http fetch GET 200 https://mirrors.cloud.tencent.com/npm/@next%2feslint-plugin-next 958ms (cache miss)
npm http fetch GET 200 https://mirrors.cloud.tencent.com/npm/eslint-plugin-react 393ms (cache updated)
npm http fetch GET 200 https://mirrors.cloud.tencent.com/npm/@swc%2fhelpers 391ms (cache updated)
npm http fetch GET 200 https://mirrors.cloud.tencent.com/npm/@typescript-eslint%2fparser 1477ms (cache updated)
npm http fetch GET 200 https://mirrors.cloud.tencent.com/npm/busboy 688ms (cache updated)
npm http fetch GET 200 https://mirrors.cloud.tencent.com/npm/postcss 12ms (cache hit)
npm http fetch GET 200 https://mirrors.cloud.tencent.com/npm/graceful-fs 350ms (cache updated)
npm http fetch GET 200 https://mirrors.cloud.tencent.com/npm/eslint-plugin-react-hooks 1006ms (cache updated)
npm http fetch GET 200 https://mirrors.cloud.tencent.com/npm/caniuse-lite 903ms (cache updated)
npm http fetch GET 200 https://mirrors.cloud.tencent.com/npm/@typescript-eslint%2feslint-plugin 1840ms (cache updated)
npm http fetch GET 200 https://mirrors.cloud.tencent.com/npm/@next%2fenv 1474ms (cache updated)
npm http fetch GET 200 https://mirrors.cloud.tencent.com/npm/styled-jsx 723ms (cache updated)
npm http fetch GET 200 https://mirrors.cloud.tencent.com/npm/@next%2fswc-darwin-arm64 831ms (cache updated)
npm http fetch GET 200 https://mirrors.cloud.tencent.com/npm/@next%2fswc-linux-arm64-gnu 728ms (cache updated)
npm http fetch GET 200 https://mirrors.cloud.tencent.com/npm/@next%2fswc-darwin-x64 894ms (cache updated)
npm http fetch GET 200 https://mirrors.cloud.tencent.com/npm/loose-envify 302ms (cache updated)
npm http fetch GET 200 https://mirrors.cloud.tencent.com/npm/@next%2fswc-linux-x64-gnu 1025ms (cache updated)
npm http fetch GET 200 https://mirrors.cloud.tencent.com/npm/nanoid 365ms (cache updated)
npm http fetch GET 200 https://mirrors.cloud.tencent.com/npm/@next%2fswc-win32-x64-msvc 851ms (cache updated)
npm http fetch GET 200 https://mirrors.cloud.tencent.com/npm/@next%2fswc-win32-arm64-msvc 1187ms (cache updated)
npm http fetch GET 200 https://mirrors.cloud.tencent.com/npm/@next%2fswc-linux-x64-musl 1279ms (cache updated)
npm http fetch GET 200 https://mirrors.cloud.tencent.com/npm/source-map-js 269ms (cache updated)
npm http fetch GET 200 https://mirrors.cloud.tencent.com/npm/arg 380ms (cache updated)
npm http fetch GET 200 https://mirrors.cloud.tencent.com/npm/@alloc%2fquick-lru 540ms (cache updated)
npm http fetch GET 200 https://mirrors.cloud.tencent.com/npm/scheduler 1241ms (cache updated)
npm http fetch GET 200 https://mirrors.cloud.tencent.com/npm/chokidar 492ms (cache updated)
npm http fetch GET 200 https://mirrors.cloud.tencent.com/npm/is-glob 1ms (cache hit)
npm http fetch GET 200 https://mirrors.cloud.tencent.com/npm/dlv 235ms (cache updated)
npm http fetch GET 200 https://mirrors.cloud.tencent.com/npm/didyoumean 360ms (cache updated)
npm http fetch GET 200 https://mirrors.cloud.tencent.com/npm/fast-glob 367ms (cache updated)
npm http fetch GET 200 https://mirrors.cloud.tencent.com/npm/micromatch 324ms (cache updated)
npm http fetch GET 200 https://mirrors.cloud.tencent.com/npm/lilconfig 401ms (cache updated)
npm http fetch GET 200 https://mirrors.cloud.tencent.com/npm/jiti 638ms (cache updated)
npm http fetch GET 200 https://mirrors.cloud.tencent.com/npm/normalize-path 479ms (cache updated)
npm http fetch GET 200 https://mirrors.cloud.tencent.com/npm/object-hash 447ms (cache updated)
npm http fetch GET 200 https://mirrors.cloud.tencent.com/npm/@next%2fswc-win32-ia32-msvc 2878ms (cache updated)
npm http fetch GET 200 https://mirrors.cloud.tencent.com/npm/@next%2fswc-linux-arm64-musl 3484ms (cache updated)
npm http fetch GET 200 https://mirrors.cloud.tencent.com/npm/postcss-load-config 302ms (cache updated)
npm http fetch GET 200 https://mirrors.cloud.tencent.com/npm/picocolors 2077ms (cache updated)
npm http fetch GET 200 https://mirrors.cloud.tencent.com/npm/postcss-js 509ms (cache updated)
npm http fetch GET 200 https://mirrors.cloud.tencent.com/npm/picocolors 848ms (cache updated)
npm http fetch GET 200 https://mirrors.cloud.tencent.com/npm/postcss-nested 206ms (cache updated)
npm http fetch GET 200 https://mirrors.cloud.tencent.com/npm/postcss-import 803ms (cache updated)
npm http fetch GET 200 https://mirrors.cloud.tencent.com/npm/postcss-selector-parser 398ms (cache updated)
npm http fetch GET 200 https://mirrors.cloud.tencent.com/npm/resolve 409ms (cache updated)
npm http fetch GET 200 https://mirrors.cloud.tencent.com/npm/sucrase 382ms (cache updated)
npm http fetch GET 200 https://mirrors.cloud.tencent.com/npm/eslint 5ms (cache hit)
npm http fetch GET 200 https://mirrors.cloud.tencent.com/npm/jiti 1ms (cache hit)
npm http fetch GET 200 https://mirrors.cloud.tencent.com/npm/eslint-visitor-keys 7ms (cache hit)
npm http fetch GET 200 https://mirrors.cloud.tencent.com/npm/espree 8ms (cache hit)
npm http fetch GET 200 https://mirrors.cloud.tencent.com/npm/minimatch 9ms (cache hit)
npm http fetch GET 200 https://mirrors.cloud.tencent.com/npm/debug 11ms (cache hit)
npm http fetch GET 200 https://mirrors.cloud.tencent.com/npm/fast-deep-equal 5ms (cache hit)
npm http fetch GET 200 https://mirrors.cloud.tencent.com/npm/import-fresh 207ms (cache updated)
npm http fetch GET 200 https://mirrors.cloud.tencent.com/npm/strip-json-comments 315ms (cache updated)
npm http fetch GET 200 https://mirrors.cloud.tencent.com/npm/fastq 318ms (cache updated)
npm http fetch GET 200 https://mirrors.cloud.tencent.com/npm/json-schema-traverse 352ms (cache updated)
npm http fetch GET 200 https://mirrors.cloud.tencent.com/npm/@nodelib%2ffs.scandir 397ms (cache updated)
npm http fetch GET 200 https://mirrors.cloud.tencent.com/npm/uri-js 208ms (cache updated)
npm http fetch GET 200 https://mirrors.cloud.tencent.com/npm/fast-json-stable-stringify 453ms (cache updated)
npm http fetch GET 200 https://mirrors.cloud.tencent.com/npm/@humanwhocodes%2fobject-schema 493ms (cache updated)
npm http fetch GET 200 https://mirrors.cloud.tencent.com/npm/ansi-styles 206ms (cache updated)
npm http fetch GET 200 https://mirrors.cloud.tencent.com/npm/shebang-command 163ms (cache updated)
npm http fetch GET 200 https://mirrors.cloud.tencent.com/npm/supports-color 268ms (cache updated)
npm http fetch GET 200 https://mirrors.cloud.tencent.com/npm/path-key 365ms (cache updated)
npm http fetch GET 200 https://mirrors.cloud.tencent.com/npm/which 340ms (cache updated)
npm http fetch GET 200 https://mirrors.cloud.tencent.com/npm/ms 363ms (cache updated)
npm http fetch GET 200 https://mirrors.cloud.tencent.com/npm/esrecurse 375ms (cache updated)
npm http fetch GET 200 https://mirrors.cloud.tencent.com/npm/acorn-jsx 352ms (cache updated)
npm http fetch GET 200 https://mirrors.cloud.tencent.com/npm/estraverse 451ms (cache updated)
npm http fetch GET 200 https://mirrors.cloud.tencent.com/npm/acorn 412ms (cache updated)
npm http fetch GET 200 https://mirrors.cloud.tencent.com/npm/locate-path 183ms (cache updated)
npm http fetch GET 200 https://mirrors.cloud.tencent.com/npm/flat-cache 393ms (cache updated)
npm http fetch GET 200 https://mirrors.cloud.tencent.com/npm/path-exists 323ms (cache updated)
npm http fetch GET 200 https://mirrors.cloud.tencent.com/npm/argparse 260ms (cache updated)
npm http fetch GET 200 https://mirrors.cloud.tencent.com/npm/is-extglob 351ms (cache updated)
npm http fetch GET 200 https://mirrors.cloud.tencent.com/npm/estraverse 657ms (cache updated)
npm http fetch GET 200 https://mirrors.cloud.tencent.com/npm/brace-expansion 362ms (cache updated)
npm http fetch GET 200 https://mirrors.cloud.tencent.com/npm/prelude-ls 548ms (cache updated)
npm http fetch GET 200 https://mirrors.cloud.tencent.com/npm/prelude-ls 362ms (cache updated)
npm http fetch GET 200 https://mirrors.cloud.tencent.com/npm/type-fest 661ms (cache updated)
npm http fetch GET 200 https://mirrors.cloud.tencent.com/npm/word-wrap 229ms (cache updated)
npm http fetch GET 200 https://mirrors.cloud.tencent.com/npm/type-check 550ms (cache updated)
npm http fetch GET 200 https://mirrors.cloud.tencent.com/npm/deep-is 461ms (cache updated)
npm http fetch GET 200 https://mirrors.cloud.tencent.com/npm/ansi-regex 287ms (cache updated)
npm http fetch GET 200 https://mirrors.cloud.tencent.com/npm/fast-levenshtein 360ms (cache updated)
npm http fetch GET 200 https://mirrors.cloud.tencent.com/npm/type-check 365ms (cache updated)
npm http fetch GET 200 https://mirrors.cloud.tencent.com/npm/parent-module 269ms (cache updated)
npm http fetch GET 200 https://mirrors.cloud.tencent.com/npm/resolve-from 297ms (cache updated)
npm http fetch GET 200 https://mirrors.cloud.tencent.com/npm/reusify 217ms (cache updated)
npm http fetch GET 200 https://mirrors.cloud.tencent.com/npm/run-parallel 253ms (cache updated)
npm http fetch GET 200 https://mirrors.cloud.tencent.com/npm/@nodelib%2ffs.stat 363ms (cache updated)
npm http fetch GET 200 https://mirrors.cloud.tencent.com/npm/queue-microtask 393ms (cache updated)
npm http fetch GET 200 https://mirrors.cloud.tencent.com/npm/punycode 219ms (cache updated)
npm http fetch GET 200 https://mirrors.cloud.tencent.com/npm/color-convert 261ms (cache updated)
npm http fetch GET 200 https://mirrors.cloud.tencent.com/npm/has-flag 314ms (cache updated)
npm http fetch GET 200 https://mirrors.cloud.tencent.com/npm/color-name 286ms (cache updated)
npm http fetch GET 200 https://mirrors.cloud.tencent.com/npm/isexe 301ms (cache updated)
npm http fetch GET 200 https://mirrors.cloud.tencent.com/npm/shebang-regex 355ms (cache updated)
npm http fetch GET 200 https://mirrors.cloud.tencent.com/npm/eslint 9ms (cache hit)
npm http fetch GET 200 https://mirrors.cloud.tencent.com/npm/eslint-plugin-import-x 371ms (cache miss)
npm http fetch GET 200 https://mirrors.cloud.tencent.com/npm/glob 498ms (cache updated)
npm http fetch GET 200 https://mirrors.cloud.tencent.com/npm/@typescript-eslint%2ftype-utils 856ms (cache updated)
npm http fetch GET 200 https://mirrors.cloud.tencent.com/npm/ts-api-utils 958ms (cache updated)
npm http fetch GET 200 https://mirrors.cloud.tencent.com/npm/@typescript-eslint%2ftypes 1264ms (cache updated)
npm http fetch GET 200 https://mirrors.cloud.tencent.com/npm/@typescript-eslint%2futils 1615ms (cache updated)
npm http fetch GET 200 https://mirrors.cloud.tencent.com/npm/resolve 13ms (cache hit)
npm http fetch GET 200 https://mirrors.cloud.tencent.com/npm/@typescript-eslint%2fvisitor-keys 1670ms (cache updated)
npm http fetch GET 200 https://mirrors.cloud.tencent.com/npm/@typescript-eslint%2fvisitor-keys 1291ms (cache updated)
npm http fetch GET 200 https://mirrors.cloud.tencent.com/npm/is-core-module 518ms (cache updated)
npm http fetch GET 200 https://mirrors.cloud.tencent.com/npm/fast-glob 1ms (cache hit)
npm http fetch GET 200 https://mirrors.cloud.tencent.com/npm/@nolyfill%2fis-core-module 533ms (cache updated)
npm http fetch GET 200 https://mirrors.cloud.tencent.com/npm/@typescript-eslint%2fscope-manager 2208ms (cache updated)
npm http fetch GET 200 https://mirrors.cloud.tencent.com/npm/eslint-module-utils 513ms (cache updated)
npm http fetch GET 200 https://mirrors.cloud.tencent.com/npm/enhanced-resolve 687ms (cache updated)
npm http fetch GET 200 https://mirrors.cloud.tencent.com/npm/@typescript-eslint%2fscope-manager 1509ms (cache updated)
npm http fetch GET 200 https://mirrors.cloud.tencent.com/npm/get-tsconfig 609ms (cache updated)
npm http fetch GET 200 https://mirrors.cloud.tencent.com/npm/array.prototype.findlastindex 180ms (cache updated)
npm http fetch GET 200 https://mirrors.cloud.tencent.com/npm/doctrine 2ms (cache hit)
npm http fetch GET 200 https://mirrors.cloud.tencent.com/npm/eslint-module-utils 2ms (cache hit)
npm http fetch GET 200 https://mirrors.cloud.tencent.com/npm/is-bun-module 458ms (cache updated)
npm http fetch GET 200 https://mirrors.cloud.tencent.com/npm/is-core-module 2ms (cache hit)
npm http fetch GET 200 https://mirrors.cloud.tencent.com/npm/array.prototype.flatmap 249ms (cache updated)
npm http fetch GET 200 https://mirrors.cloud.tencent.com/npm/@rtsao%2fscc 451ms (cache updated)
npm http fetch GET 200 https://mirrors.cloud.tencent.com/npm/hasown 231ms (cache updated)
npm http fetch GET 200 https://mirrors.cloud.tencent.com/npm/array.prototype.flat 381ms (cache updated)
npm http fetch GET 200 https://mirrors.cloud.tencent.com/npm/array-includes 674ms (cache updated)
npm http fetch GET 200 https://mirrors.cloud.tencent.com/npm/object.values 372ms (cache updated)
npm http fetch GET 200 https://mirrors.cloud.tencent.com/npm/object.fromentries 434ms (cache updated)
npm http fetch GET 200 https://mirrors.cloud.tencent.com/npm/object.groupby 481ms (cache updated)
npm http fetch GET 200 https://mirrors.cloud.tencent.com/npm/semver 371ms (cache updated)
npm http fetch GET 200 https://mirrors.cloud.tencent.com/npm/tsconfig-paths 410ms (cache updated)
npm http fetch GET 200 https://mirrors.cloud.tencent.com/npm/aria-query 241ms (cache updated)
npm http fetch GET 200 https://mirrors.cloud.tencent.com/npm/@typescript-eslint%2ftypescript-estree 2575ms (cache updated)
npm http fetch GET 200 https://mirrors.cloud.tencent.com/npm/ast-types-flow 650ms (cache updated)
npm http fetch GET 200 https://mirrors.cloud.tencent.com/npm/emoji-regex 509ms (cache updated)
npm http fetch GET 200 https://mirrors.cloud.tencent.com/npm/es-iterator-helpers 487ms (cache updated)
npm http fetch GET 200 https://mirrors.cloud.tencent.com/npm/damerau-levenshtein 591ms (cache updated)
npm http fetch GET 200 https://mirrors.cloud.tencent.com/npm/axobject-query 623ms (cache updated)
npm http fetch GET 200 https://mirrors.cloud.tencent.com/npm/safe-regex-test 344ms (cache updated)
npm http fetch GET 200 https://mirrors.cloud.tencent.com/npm/estraverse 9ms (cache hit)
npm http fetch GET 200 https://mirrors.cloud.tencent.com/npm/jsx-ast-utils 492ms (cache updated)
npm http fetch GET 200 https://mirrors.cloud.tencent.com/npm/string.prototype.includes 446ms (cache updated)
npm http fetch GET 200 https://mirrors.cloud.tencent.com/npm/axe-core 1117ms (cache updated)
npm http fetch GET 200 https://mirrors.cloud.tencent.com/npm/language-tags 517ms (cache updated)
npm http fetch GET 200 https://mirrors.cloud.tencent.com/npm/array.prototype.findlast 479ms (cache updated)
npm http fetch GET 200 https://mirrors.cloud.tencent.com/npm/array.prototype.tosorted 564ms (cache updated)
npm http fetch GET 200 https://mirrors.cloud.tencent.com/npm/object.entries 458ms (cache updated)
npm http fetch GET 200 https://mirrors.cloud.tencent.com/npm/jsx-ast-utils 482ms (cache updated)
npm http fetch GET 200 https://mirrors.cloud.tencent.com/npm/string.prototype.repeat 345ms (cache updated)
npm http fetch GET 200 https://mirrors.cloud.tencent.com/npm/prop-types 545ms (cache updated)
npm http fetch GET 200 https://mirrors.cloud.tencent.com/npm/string.prototype.matchall 679ms (cache updated)
npm http fetch GET 200 https://mirrors.cloud.tencent.com/npm/foreground-child 164ms (cache updated)
npm http fetch GET 200 https://mirrors.cloud.tencent.com/npm/path-scurry 299ms (cache updated)
npm http fetch GET 200 https://mirrors.cloud.tencent.com/npm/minipass 343ms (cache updated)
npm http fetch GET 200 https://mirrors.cloud.tencent.com/npm/jackspeak 447ms (cache updated)
npm http fetch GET 200 https://mirrors.cloud.tencent.com/npm/eslint 6ms (cache hit)
npm http fetch GET 200 https://mirrors.cloud.tencent.com/npm/typescript 27ms (cache hit)
npm http fetch GET 200 https://mirrors.cloud.tencent.com/npm/semver 2ms (cache hit)
npm http fetch GET 200 https://mirrors.cloud.tencent.com/npm/micromatch 4ms (cache hit)
npm http fetch GET 200 https://mirrors.cloud.tencent.com/npm/brace-expansion 5ms (cache hit)
npm http fetch GET 200 https://mirrors.cloud.tencent.com/npm/glob-parent 6ms (cache hit)
npm http fetch GET 200 https://mirrors.cloud.tencent.com/npm/merge2 320ms (cache updated)
npm http fetch GET 200 https://mirrors.cloud.tencent.com/npm/supports-preserve-symlinks-flag 352ms (cache updated)
npm http fetch GET 200 https://mirrors.cloud.tencent.com/npm/path-parse 617ms (cache updated)
npm http fetch GET 200 https://mirrors.cloud.tencent.com/npm/graceful-fs 8ms (cache hit)
npm http fetch GET 200 https://mirrors.cloud.tencent.com/npm/resolve-pkg-maps 513ms (cache updated)
npm http fetch GET 200 https://mirrors.cloud.tencent.com/npm/tapable 631ms (cache updated)
npm http fetch GET 200 https://mirrors.cloud.tencent.com/npm/call-bind 165ms (cache updated)
npm http fetch GET 200 https://mirrors.cloud.tencent.com/npm/call-bind 186ms (cache updated)
npm http fetch GET 200 https://mirrors.cloud.tencent.com/npm/define-properties 251ms (cache updated)
npm http fetch GET 200 https://mirrors.cloud.tencent.com/npm/is-string 280ms (cache updated)
npm http fetch GET 200 https://mirrors.cloud.tencent.com/npm/get-intrinsic 378ms (cache updated)
npm http fetch GET 200 https://mirrors.cloud.tencent.com/npm/es-object-atoms 511ms (cache updated)
npm http fetch GET 200 https://mirrors.cloud.tencent.com/npm/call-bind 5ms (cache hit)
npm http fetch GET 200 https://mirrors.cloud.tencent.com/npm/define-properties 10ms (cache hit)
npm http fetch GET 200 https://mirrors.cloud.tencent.com/npm/es-errors 288ms (cache updated)
npm http fetch GET 200 https://mirrors.cloud.tencent.com/npm/define-properties 378ms (cache updated)
npm http fetch GET 200 https://mirrors.cloud.tencent.com/npm/es-object-atoms 269ms (cache updated)
npm http fetch GET 200 https://mirrors.cloud.tencent.com/npm/es-shim-unscopables 344ms (cache updated)
npm http fetch GET 200 https://mirrors.cloud.tencent.com/npm/es-abstract 562ms (cache updated)
npm http fetch GET 200 https://mirrors.cloud.tencent.com/npm/es-abstract 271ms (cache updated)
npm http fetch GET 200 https://mirrors.cloud.tencent.com/npm/es-shim-unscopables 420ms (cache updated)
npm http fetch GET 200 https://mirrors.cloud.tencent.com/npm/es-abstract 503ms (cache updated)
npm http fetch GET 200 https://mirrors.cloud.tencent.com/npm/es-shim-unscopables 551ms (cache updated)
npm http fetch GET 200 https://mirrors.cloud.tencent.com/npm/json5 287ms (cache updated)
npm http fetch GET 200 https://mirrors.cloud.tencent.com/npm/function-bind 365ms (cache updated)
npm http fetch GET 200 https://mirrors.cloud.tencent.com/npm/@types%2fjson5 368ms (cache updated)
npm http fetch GET 200 https://mirrors.cloud.tencent.com/npm/strip-bom 296ms (cache updated)
npm http fetch GET 200 https://mirrors.cloud.tencent.com/npm/minimist 481ms (cache updated)
npm http fetch GET 200 https://mirrors.cloud.tencent.com/npm/es-abstract 1950ms (cache updated)
npm http fetch GET 200 https://mirrors.cloud.tencent.com/npm/es-define-property 193ms (cache updated)
npm http fetch GET 200 https://mirrors.cloud.tencent.com/npm/set-function-length 251ms (cache updated)
npm http fetch GET 200 https://mirrors.cloud.tencent.com/npm/has-property-descriptors 283ms (cache updated)
npm http fetch GET 200 https://mirrors.cloud.tencent.com/npm/arraybuffer.prototype.slice 341ms (cache updated)
npm http fetch GET 200 https://mirrors.cloud.tencent.com/npm/data-view-byte-length 133ms (cache updated)
npm http fetch GET 200 https://mirrors.cloud.tencent.com/npm/define-data-property 493ms (cache updated)
npm http fetch GET 200 https://mirrors.cloud.tencent.com/npm/data-view-buffer 272ms (cache updated)
npm http fetch GET 200 https://mirrors.cloud.tencent.com/npm/object-keys 537ms (cache updated)
npm http fetch GET 200 https://mirrors.cloud.tencent.com/npm/available-typed-arrays 358ms (cache updated)
npm http fetch GET 200 https://mirrors.cloud.tencent.com/npm/array-buffer-byte-length 573ms (cache updated)
npm http fetch GET 200 https://mirrors.cloud.tencent.com/npm/function.prototype.name 284ms (cache updated)
npm http fetch GET 200 https://mirrors.cloud.tencent.com/npm/es-set-tostringtag 398ms (cache updated)
npm http fetch GET 200 https://mirrors.cloud.tencent.com/npm/data-view-byte-offset 474ms (cache updated)
npm http fetch GET 200 https://mirrors.cloud.tencent.com/npm/has-property-descriptors 11ms (cache hit)
npm http fetch GET 200 https://mirrors.cloud.tencent.com/npm/gopd 250ms (cache updated)
npm http fetch GET 200 https://mirrors.cloud.tencent.com/npm/es-to-primitive 397ms (cache updated)
npm http fetch GET 200 https://mirrors.cloud.tencent.com/npm/globalthis 409ms (cache updated)
npm http fetch GET 200 https://mirrors.cloud.tencent.com/npm/has-symbols 205ms (cache updated)
npm http fetch GET 200 https://mirrors.cloud.tencent.com/npm/get-symbol-description 534ms (cache updated)
npm http fetch GET 200 https://mirrors.cloud.tencent.com/npm/has-proto 298ms (cache updated)
npm http fetch GET 200 https://mirrors.cloud.tencent.com/npm/is-data-view 185ms (cache updated)
npm http fetch GET 200 https://mirrors.cloud.tencent.com/npm/is-callable 279ms (cache updated)
npm http fetch GET 200 https://mirrors.cloud.tencent.com/npm/is-regex 201ms (cache updated)
npm http fetch GET 200 https://mirrors.cloud.tencent.com/npm/internal-slot 460ms (cache updated)
npm http fetch GET 200 https://mirrors.cloud.tencent.com/npm/is-array-buffer 521ms (cache updated)
npm http fetch GET 200 https://mirrors.cloud.tencent.com/npm/is-negative-zero 332ms (cache updated)
npm http fetch GET 200 https://mirrors.cloud.tencent.com/npm/is-shared-array-buffer 304ms (cache updated)
npm http fetch GET 200 https://mirrors.cloud.tencent.com/npm/is-weakref 378ms (cache updated)
npm http fetch GET 200 https://mirrors.cloud.tencent.com/npm/string.prototype.trim 210ms (cache updated)
npm http fetch GET 200 https://mirrors.cloud.tencent.com/npm/object.assign 365ms (cache updated)
npm http fetch GET 200 https://mirrors.cloud.tencent.com/npm/object-inspect 388ms (cache updated)
npm http fetch GET 200 https://mirrors.cloud.tencent.com/npm/is-typed-array 547ms (cache updated)
npm http fetch GET 200 https://mirrors.cloud.tencent.com/npm/regexp.prototype.flags 435ms (cache updated)
npm http fetch GET 200 https://mirrors.cloud.tencent.com/npm/typed-array-byte-offset 138ms (cache updated)
npm http fetch GET 200 https://mirrors.cloud.tencent.com/npm/typed-array-byte-length 171ms (cache updated)
npm http fetch GET 200 https://mirrors.cloud.tencent.com/npm/safe-array-concat 550ms (cache updated)
npm http fetch GET 200 https://mirrors.cloud.tencent.com/npm/has-proto 3ms (cache hit)
npm http fetch GET 200 https://mirrors.cloud.tencent.com/npm/typed-array-length 204ms (cache updated)
npm http fetch GET 200 https://mirrors.cloud.tencent.com/npm/unbox-primitive 168ms (cache updated)
npm http fetch GET 200 https://mirrors.cloud.tencent.com/npm/string.prototype.trimstart 369ms (cache updated)
npm http fetch GET 200 https://mirrors.cloud.tencent.com/npm/string.prototype.trimend 462ms (cache updated)
npm http fetch GET 200 https://mirrors.cloud.tencent.com/npm/which-typed-array 189ms (cache updated)
npm http fetch GET 200 https://mirrors.cloud.tencent.com/npm/typed-array-buffer 524ms (cache updated)
npm http fetch GET 200 https://mirrors.cloud.tencent.com/npm/has-tostringtag 333ms (cache updated)
npm http fetch GET 200 https://mirrors.cloud.tencent.com/npm/define-data-property 6ms (cache hit)
npm http fetch GET 200 https://mirrors.cloud.tencent.com/npm/is-callable 7ms (cache hit)
npm http fetch GET 200 https://mirrors.cloud.tencent.com/npm/has-tostringtag 9ms (cache hit)
npm http fetch GET 200 https://mirrors.cloud.tencent.com/npm/is-shared-array-buffer 11ms (cache hit)
npm http fetch GET 200 https://mirrors.cloud.tencent.com/npm/which-typed-array 4ms (cache hit)
npm http fetch GET 200 https://mirrors.cloud.tencent.com/npm/possible-typed-array-names 128ms (cache updated)
npm http fetch GET 200 https://mirrors.cloud.tencent.com/npm/is-symbol 179ms (cache updated)
npm http fetch GET 200 https://mirrors.cloud.tencent.com/npm/is-date-object 258ms (cache updated)
npm http fetch GET 200 https://mirrors.cloud.tencent.com/npm/isarray 271ms (cache updated)
npm http fetch GET 200 https://mirrors.cloud.tencent.com/npm/functions-have-names 323ms (cache updated)
npm http fetch GET 200 https://mirrors.cloud.tencent.com/npm/set-function-name 369ms (cache updated)
npm http fetch GET 200 https://mirrors.cloud.tencent.com/npm/for-each 330ms (cache updated)
npm http fetch GET 200 https://mirrors.cloud.tencent.com/npm/side-channel 517ms (cache updated)
npm http fetch GET 200 https://mirrors.cloud.tencent.com/npm/for-each 384ms (cache updated)
npm http fetch GET 200 https://mirrors.cloud.tencent.com/npm/for-each 544ms (cache updated)
npm http fetch GET 200 https://mirrors.cloud.tencent.com/npm/which-boxed-primitive 359ms (cache updated)
npm http fetch GET 200 https://mirrors.cloud.tencent.com/npm/has-bigints 517ms (cache updated)
npm http fetch GET 200 https://mirrors.cloud.tencent.com/npm/for-each 528ms (cache updated)
npm http fetch GET 200 https://mirrors.cloud.tencent.com/npm/language-subtag-registry 438ms (cache updated)
npm http fetch GET 200 https://mirrors.cloud.tencent.com/npm/deep-equal 513ms (cache updated)
npm http fetch GET 200 https://mirrors.cloud.tencent.com/npm/iterator.prototype 516ms (cache updated)
npm http fetch GET 200 https://mirrors.cloud.tencent.com/npm/object-is 334ms (cache updated)
npm http fetch GET 200 https://mirrors.cloud.tencent.com/npm/is-arguments 452ms (cache updated)
npm http fetch GET 200 https://mirrors.cloud.tencent.com/npm/which-collection 508ms (cache updated)
npm http fetch GET 200 https://mirrors.cloud.tencent.com/npm/es-get-iterator 577ms (cache updated)
npm http fetch GET 200 https://mirrors.cloud.tencent.com/npm/is-set 282ms (cache updated)
npm http fetch GET 200 https://mirrors.cloud.tencent.com/npm/is-set 5ms (cache hit)
npm http fetch GET 200 https://mirrors.cloud.tencent.com/npm/is-number-object 376ms (cache updated)
npm http fetch GET 200 https://mirrors.cloud.tencent.com/npm/stop-iteration-iterator 422ms (cache updated)
npm http fetch GET 200 https://mirrors.cloud.tencent.com/npm/is-bigint 449ms (cache updated)
npm http fetch GET 200 https://mirrors.cloud.tencent.com/npm/is-boolean-object 456ms (cache updated)
npm http fetch GET 200 https://mirrors.cloud.tencent.com/npm/is-weakmap 189ms (cache updated)
npm http fetch GET 200 https://mirrors.cloud.tencent.com/npm/is-map 566ms (cache updated)
npm http fetch GET 200 https://mirrors.cloud.tencent.com/npm/is-map 604ms (cache updated)
npm http fetch GET 200 https://mirrors.cloud.tencent.com/npm/is-weakset 434ms (cache updated)
npm http fetch GET 200 https://mirrors.cloud.tencent.com/npm/reflect.getprototypeof 424ms (cache updated)
npm http fetch GET 200 https://mirrors.cloud.tencent.com/npm/set-function-name 5ms (cache hit)
npm http fetch GET 200 https://mirrors.cloud.tencent.com/npm/loose-envify 8ms (cache hit)
npm http fetch GET 200 https://mirrors.cloud.tencent.com/npm/object-assign 156ms (cache updated)
npm http fetch GET 200 https://mirrors.cloud.tencent.com/npm/react-is 1076ms (cache updated)
npm http fetch GET 200 https://mirrors.cloud.tencent.com/npm/picomatch 242ms (cache updated)
npm http fetch GET 200 https://mirrors.cloud.tencent.com/npm/braces 404ms (cache updated)
npm http fetch GET 200 https://mirrors.cloud.tencent.com/npm/rimraf 287ms (cache updated)
npm http fetch GET 200 https://mirrors.cloud.tencent.com/npm/keyv 422ms (cache updated)
npm http fetch GET 200 https://mirrors.cloud.tencent.com/npm/flatted 709ms (cache updated)
npm http fetch GET 200 https://mirrors.cloud.tencent.com/npm/p-locate 430ms (cache updated)
npm http fetch GET 200 https://mirrors.cloud.tencent.com/npm/glob 8ms (cache hit)
npm http fetch GET 200 https://mirrors.cloud.tencent.com/npm/json-buffer 406ms (cache updated)
npm http fetch GET 200 https://mirrors.cloud.tencent.com/npm/signal-exit 220ms (cache updated)
npm http fetch GET 200 https://mirrors.cloud.tencent.com/npm/lru-cache 234ms (cache updated)
npm http fetch GET 200 https://mirrors.cloud.tencent.com/npm/@pkgjs%2fparseargs 296ms (cache updated)
npm http fetch GET 200 https://mirrors.cloud.tencent.com/npm/@isaacs%2fcliui 367ms (cache updated)
npm http fetch GET 200 https://mirrors.cloud.tencent.com/npm/callsites 198ms (cache updated)
npm http fetch GET 200 https://mirrors.cloud.tencent.com/npm/which-builtin-type 496ms (cache updated)
npm http fetch GET 200 https://mirrors.cloud.tencent.com/npm/strip-ansi 13ms (cache hit)
npm http fetch GET 200 https://mirrors.cloud.tencent.com/npm/wrap-ansi 188ms (cache updated)
npm http fetch GET 200 https://mirrors.cloud.tencent.com/npm/wrap-ansi 261ms (cache updated)
npm http fetch GET 200 https://mirrors.cloud.tencent.com/npm/string-width 387ms (cache updated)
npm http fetch GET 200 https://mirrors.cloud.tencent.com/npm/string-width 518ms (cache updated)
npm http fetch GET 200 https://mirrors.cloud.tencent.com/npm/ansi-regex 23ms (cache hit)
npm http fetch GET 200 https://mirrors.cloud.tencent.com/npm/string-width 22ms (cache hit)
npm http fetch GET 200 https://mirrors.cloud.tencent.com/npm/ansi-styles 25ms (cache hit)
npm http fetch GET 200 https://mirrors.cloud.tencent.com/npm/emoji-regex 28ms (cache hit)
npm http fetch GET 200 https://mirrors.cloud.tencent.com/npm/is-fullwidth-code-point 235ms (cache updated)
npm http fetch GET 200 https://mirrors.cloud.tencent.com/npm/eastasianwidth 381ms (cache updated)
npm http fetch GET 200 https://mirrors.cloud.tencent.com/npm/p-limit 321ms (cache updated)
npm http fetch GET 200 https://mirrors.cloud.tencent.com/npm/fill-range 488ms (cache updated)
npm http fetch GET 200 https://mirrors.cloud.tencent.com/npm/to-regex-range 357ms (cache updated)
npm http fetch GET 200 https://mirrors.cloud.tencent.com/npm/is-number 380ms (cache updated)
npm http fetch GET 200 https://mirrors.cloud.tencent.com/npm/concat-map 382ms (cache updated)
npm http fetch GET 200 https://mirrors.cloud.tencent.com/npm/balanced-match 385ms (cache updated)
npm http fetch GET 200 https://mirrors.cloud.tencent.com/npm/react 17ms (cache hit)
npm http fetch GET 200 https://mirrors.cloud.tencent.com/npm/source-map-js 10ms (cache hit)
npm http fetch GET 200 https://mirrors.cloud.tencent.com/npm/nanoid 10ms (cache hit)
npm http fetch GET 200 https://mirrors.cloud.tencent.com/npm/streamsearch 310ms (cache updated)
npm http fetch GET 200 https://mirrors.cloud.tencent.com/npm/@swc%2fcounter 441ms (cache updated)
npm http fetch GET 200 https://mirrors.cloud.tencent.com/npm/tslib 499ms (cache updated)
npm http fetch GET 200 https://mirrors.cloud.tencent.com/npm/client-only 1119ms (cache updated)
npm http fetch GET 200 https://mirrors.cloud.tencent.com/npm/yocto-queue 300ms (cache updated)
npm http fetch GET 200 https://mirrors.cloud.tencent.com/npm/js-tokens 222ms (cache updated)
npm http fetch GET 200 https://mirrors.cloud.tencent.com/npm/is-generator-function 602ms (cache updated)
npm http fetch GET 200 https://mirrors.cloud.tencent.com/npm/is-async-function 812ms (cache updated)
npm http fetch GET 200 https://mirrors.cloud.tencent.com/npm/is-finalizationregistry 844ms (cache updated)
npm http fetch GET 200 https://mirrors.cloud.tencent.com/npm/inherits 249ms (cache updated)
npm http fetch GET 200 https://mirrors.cloud.tencent.com/npm/once 407ms (cache updated)
npm http fetch GET 200 https://mirrors.cloud.tencent.com/npm/path-is-absolute 410ms (cache updated)
npm http fetch GET 200 https://mirrors.cloud.tencent.com/npm/inflight 467ms (cache updated)
npm http fetch GET 200 https://mirrors.cloud.tencent.com/npm/fs.realpath 522ms (cache updated)
npm http fetch GET 200 https://mirrors.cloud.tencent.com/npm/ts-node 1383ms (cache updated)
npm http fetch GET 200 https://mirrors.cloud.tencent.com/npm/@swc%2fcore 659ms (cache updated)
npm http fetch GET 200 https://mirrors.cloud.tencent.com/npm/@swc%2fhelpers 4ms (cache hit)
npm http fetch GET 200 https://mirrors.cloud.tencent.com/npm/@swc%2fwasm 707ms (cache updated)
npm http fetch GET 200 https://mirrors.cloud.tencent.com/npm/@types%2fnode 24ms (cache hit)
npm http fetch GET 200 https://mirrors.cloud.tencent.com/npm/typescript 19ms (cache hit)
npm http fetch GET 200 https://mirrors.cloud.tencent.com/npm/normalize-path 10ms (cache hit)
npm http fetch GET 200 https://mirrors.cloud.tencent.com/npm/postcss-value-parser 243ms (cache updated)
npm http fetch GET 200 https://mirrors.cloud.tencent.com/npm/lilconfig 5ms (cache hit)
npm http fetch GET 200 https://mirrors.cloud.tencent.com/npm/is-binary-path 304ms (cache updated)
npm http fetch GET 200 https://mirrors.cloud.tencent.com/npm/anymatch 308ms (cache updated)
npm http fetch GET 200 https://mirrors.cloud.tencent.com/npm/postcss-selector-parser 6ms (cache hit)
npm http fetch GET 200 https://mirrors.cloud.tencent.com/npm/read-cache 419ms (cache updated)
npm http fetch GET 200 https://mirrors.cloud.tencent.com/npm/camelcase-css 422ms (cache updated)
npm http fetch GET 200 https://mirrors.cloud.tencent.com/npm/cssesc 188ms (cache updated)
npm http fetch GET 200 https://mirrors.cloud.tencent.com/npm/readdirp 554ms (cache updated)
npm http fetch GET 200 https://mirrors.cloud.tencent.com/npm/util-deprecate 276ms (cache updated)
npm http fetch GET 200 https://mirrors.cloud.tencent.com/npm/mz 166ms (cache updated)
npm http fetch GET 200 https://mirrors.cloud.tencent.com/npm/fsevents 745ms (cache updated)
npm http fetch GET 200 https://mirrors.cloud.tencent.com/npm/yaml 523ms (cache updated)
npm http fetch GET 200 https://mirrors.cloud.tencent.com/npm/commander 377ms (cache updated)
npm http fetch GET 200 https://mirrors.cloud.tencent.com/npm/lines-and-columns 322ms (cache updated)
npm http fetch GET 200 https://mirrors.cloud.tencent.com/npm/@jridgewell%2fgen-mapping 449ms (cache updated)
npm http fetch GET 200 https://mirrors.cloud.tencent.com/npm/pirates 463ms (cache updated)
npm http fetch GET 200 https://mirrors.cloud.tencent.com/npm/ts-interface-checker 656ms (cache updated)
npm http fetch GET 200 https://mirrors.cloud.tencent.com/npm/binary-extensions 268ms (cache updated)
npm http fetch GET 200 https://mirrors.cloud.tencent.com/npm/pify 159ms (cache updated)
npm http fetch GET 200 https://mirrors.cloud.tencent.com/npm/@jridgewell%2fsourcemap-codec 256ms (cache updated)
npm http fetch GET 200 https://mirrors.cloud.tencent.com/npm/any-promise 312ms (cache updated)
npm http fetch GET 200 https://mirrors.cloud.tencent.com/npm/@jridgewell%2fset-array 315ms (cache updated)
npm http fetch GET 200 https://mirrors.cloud.tencent.com/npm/thenify-all 467ms (cache updated)
npm http fetch GET 200 https://mirrors.cloud.tencent.com/npm/@jridgewell%2ftrace-mapping 684ms (cache updated)
npm http fetch GET 200 https://mirrors.cloud.tencent.com/npm/@jridgewell%2fresolve-uri 320ms (cache updated)
npm http fetch GET 200 https://mirrors.cloud.tencent.com/npm/thenify 341ms (cache updated)
npm http fetch GET 200 https://mirrors.cloud.tencent.com/npm/minimist 4ms (cache hit)
npm http fetch GET 200 https://mirrors.cloud.tencent.com/npm/wrappy 294ms (cache updated)
npm http fetch GET 200 https://mirrors.cloud.tencent.com/npm/wrappy 345ms (cache updated)
npm http fetch GET 200 https://mirrors.cloud.tencent.com/npm/@next/env/-/env-14.2.13.tgz 411ms (cache miss)
npm http fetch GET 200 https://mirrors.cloud.tencent.com/npm/get-tsconfig/-/get-tsconfig-4.8.1.tgz 412ms (cache miss)
npm http fetch GET 200 https://mirrors.cloud.tencent.com/npm/@nolyfill/is-core-module/-/is-core-module-1.0.39.tgz 428ms (cache miss)
npm http fetch GET 200 https://mirrors.cloud.tencent.com/npm/eslint-config-next/-/eslint-config-next-14.2.13.tgz 462ms (cache miss)
npm http fetch GET 200 https://mirrors.cloud.tencent.com/npm/eslint-import-resolver-typescript/-/eslint-import-resolver-typescript-3.6.3.tgz 520ms (cache miss)
npm http fetch GET 200 https://mirrors.cloud.tencent.com/npm/@typescript-eslint/types/-/types-8.7.0.tgz 522ms (cache miss)
npm http fetch GET 200 https://mirrors.cloud.tencent.com/npm/@next/eslint-plugin-next/-/eslint-plugin-next-14.2.13.tgz 542ms (cache miss)
npm http fetch GET 200 https://mirrors.cloud.tencent.com/npm/@typescript-eslint/parser/-/parser-8.7.0.tgz 564ms (cache miss)
npm http fetch GET 200 https://mirrors.cloud.tencent.com/npm/@typescript-eslint/utils/-/utils-8.7.0.tgz 573ms (cache miss)
npm http fetch GET 200 https://mirrors.cloud.tencent.com/npm/@typescript-eslint/visitor-keys/-/visitor-keys-8.7.0.tgz 581ms (cache miss)
npm http fetch POST 200 https://mirrors.cloud.tencent.com/npm/-/npm/v1/security/advisories/bulk 712ms
npm http fetch GET 200 https://mirrors.cloud.tencent.com/npm/@typescript-eslint/typescript-estree/-/typescript-estree-8.7.0.tgz 676ms (cache miss)
npm http fetch GET 200 https://mirrors.cloud.tencent.com/npm/@types/prop-types/-/prop-types-15.7.13.tgz 675ms (cache miss)
npm http fetch GET 200 https://mirrors.cloud.tencent.com/npm/is-bun-module/-/is-bun-module-1.2.1.tgz 679ms (cache miss)
npm http fetch GET 200 https://mirrors.cloud.tencent.com/npm/@typescript-eslint/type-utils/-/type-utils-8.7.0.tgz 698ms (cache miss)
npm http fetch GET 200 https://mirrors.cloud.tencent.com/npm/@types/react/-/react-18.3.9.tgz 807ms (cache miss)
npm http fetch GET 200 https://mirrors.cloud.tencent.com/npm/@typescript-eslint/eslint-plugin/-/eslint-plugin-8.7.0.tgz 918ms (cache miss)
npm http fetch GET 200 https://mirrors.cloud.tencent.com/npm/@typescript-eslint/scope-manager/-/scope-manager-8.7.0.tgz 927ms (cache miss)
npm http fetch GET 200 https://mirrors.cloud.tencent.com/npm/@types/node/-/node-20.16.7.tgz 1032ms (cache miss)
npm http fetch GET 200 https://mirrors.cloud.tencent.com/npm/next/-/next-14.2.13.tgz 3489ms (cache miss)
added 360 packages, and audited 361 packages in 1m
137 packages are looking for funding
  run `npm fund` for details
found 0 vulnerabilities
Initialized a git repository.
Success! Created nextjs-easy-peasy-template at /Users/pe7er/Developer/github/nextjs-easy-peasy-template


项目创建完成后,应该启动一次项目,确保项目运行无误。

安装easy-peasy

首先,你需要安装easy-Peasy。可以使用 npm

npm install easy-peasy

创建一个简单的状态管理模型

接下来,我们来创建一个简单的状态管理模型。假设我们要管理一个计数器的状态:

import { createStore, action } from 'easy-peasy';

// 定义模型
const model = {
  count: 0,
  increment: action((state) => {
    state.count += 1;
  }),
  decrement: action((state) => {
    state.count -= 1;
  }),
};

// 创建 store
const store = createStore(model);

在组件中使用 Easy-Peasy

接下来,我们可以在 React 组件中使用这个 store:

import React from 'react';
import { StoreProvider, useStoreState, useStoreActions } from 'easy-peasy';

const Counter = () => {
  const count = useStoreState((state) => state.count);
  const { increment, decrement } = useStoreActions((actions) => ({
    increment: actions.increment,
    decrement: actions.decrement,
  }));

  return (
    <div>
      <h1>{count}</h1>
      <button onClick={increment}>增加</button>
      <button onClick={decrement}>减少</button>
    </div>
  );
};

const App = () => {
  return (
    <StoreProvider store={store}>
      <Counter />
    </StoreProvider>
  );
};

export default App;

总结

通过以上步骤,我们实现了一个简单的计数器应用。Easy-Peasy 的使用极其简单,并且能够有效地管理组件间的状态。如果你正在寻找一个轻量级且易于使用的状态管理解决方案,不妨试试 Easy-Peasy!

希望这篇博客能帮助你更好地理解 Easy-Peasy 的使用。如果你有任何问题或想法,欢迎在评论区分享!

journalctl Command in Linux: Query and Filter System Logs

journalctl is a command-line utility for querying and displaying logs collected by systemd-journald, the systemd logging daemon. It gives you structured access to all system logs — kernel messages, service output, authentication events, and more — from a single interface.

This guide explains how to use journalctl to view, filter, and manage system logs.

journalctl Command Syntax

The general syntax for the journalctl command is:

txt
journalctl [OPTIONS] [MATCHES]

When invoked without any options, journalctl displays all collected logs starting from the oldest entry, piped through a pager (usually less). Press q to exit.

Only the root user or members of the adm or systemd-journal groups can read system logs. Regular users can view their own user journal with the --user flag.

Quick Reference

Command Description
journalctl Show all logs
journalctl -f Follow new log entries in real time
journalctl -n 50 Show last 50 lines
journalctl -r Show logs newest first
journalctl -e Jump to end of logs
journalctl -u nginx Logs for a specific unit
journalctl -u nginx -f Follow unit logs in real time
journalctl -b Current boot logs
journalctl -b -1 Previous boot logs
journalctl --list-boots List all boots
journalctl -p err Errors and above
journalctl -p warning --since "1 hour ago" Recent warnings
journalctl -k Kernel messages
journalctl --since "yesterday" Logs since yesterday
journalctl --since "2026-02-01" --until "2026-02-02" Logs in a time window
journalctl -g "failed" Search by pattern
journalctl -o json-pretty JSON output
journalctl --disk-usage Show journal disk usage
journalctl --vacuum-size=500M Reduce journal to 500 MB

For a printable quick reference, see the journalctl cheatsheet .

Viewing System Logs

To view all system logs, run journalctl without any options:

Terminal
journalctl

To show the most recent entries first, use the -r flag:

Terminal
journalctl -r

To jump directly to the end of the log, use -e:

Terminal
journalctl -e

To show the last N lines (similar to tail ), use the -n flag:

Terminal
journalctl -n 50

To disable the pager and print directly to the terminal, use --no-pager:

Terminal
journalctl --no-pager

Following Logs in Real Time

To stream new log entries as they arrive (similar to tail -f), use the -f flag:

Terminal
journalctl -f

This is one of the most useful options for monitoring a running service or troubleshooting an active issue. Press Ctrl+C to stop.

Filtering by Systemd Unit

To view logs for a specific systemd service, use the -u flag followed by the unit name:

Terminal
journalctl -u nginx

You can combine -u with other filters. For example, to follow nginx logs in real time:

Terminal
journalctl -u nginx -f

To view logs for multiple units at once, specify -u more than once:

Terminal
journalctl -u nginx -u php-fpm

To print the last 100 lines for a service without the pager:

Terminal
journalctl -u nginx -n 100 --no-pager

For more on starting and stopping services, see how to start, stop, and restart Nginx and Apache .

Filtering by Time

Use --since and --until to limit log output to a specific time range.

To show logs since a specific date and time:

Terminal
journalctl --since "2026-02-01 10:00"

To show logs within a window:

Terminal
journalctl --since "2026-02-01 10:00" --until "2026-02-01 12:00"

journalctl accepts many natural time expressions:

Terminal
journalctl --since "1 hour ago"
journalctl --since "yesterday"
journalctl --since today

You can combine time filters with unit filters. For example, to view nginx logs from the past hour:

Terminal
journalctl -u nginx --since "1 hour ago"

Filtering by Priority

systemd uses the standard syslog priority levels. Use the -p flag to filter by severity:

Terminal
journalctl -p err

The output will include the specified priority and all higher-severity levels. The available priority levels from highest to lowest are:

Level Name Description
0 emerg System is unusable
1 alert Immediate action required
2 crit Critical conditions
3 err Error conditions
4 warning Warning conditions
5 notice Normal but significant events
6 info Informational messages
7 debug Debug-level messages

To view only warnings and above from the last hour:

Terminal
journalctl -p warning --since "1 hour ago"

Filtering by Boot

The journal stores logs from multiple boots. Use -b to filter by boot session.

To view logs from the current boot:

Terminal
journalctl -b

To view logs from the previous boot:

Terminal
journalctl -b -1

To list all available boot sessions with their IDs and timestamps:

Terminal
journalctl --list-boots

The output will look something like this:

output
-2 abc123def456 Mon 2026-02-24 08:12:01 CET—Mon 2026-02-24 18:43:22 CET
-1 def456abc789 Tue 2026-02-25 09:05:14 CET—Tue 2026-02-25 21:11:03 CET
0 789abcdef012 Wed 2026-02-26 08:30:41 CET—Wed 2026-02-26 14:00:00 CET

To view logs for a specific boot ID:

Terminal
journalctl -b abc123def456

To view errors from the previous boot:

Terminal
journalctl -b -1 -p err

Kernel Messages

To view kernel messages only (equivalent to dmesg ), use the -k flag:

Terminal
journalctl -k

To view kernel messages from the current boot:

Terminal
journalctl -k -b

To view kernel errors from the previous boot:

Terminal
journalctl -k -p err -b -1

Filtering by Process

In addition to filtering by unit, you can filter logs by process name, executable path, PID, or user ID using journal fields.

To filter by process name:

Terminal
journalctl _COMM=sshd

To filter by executable path:

Terminal
journalctl _EXE=/usr/sbin/sshd

To filter by PID:

Terminal
journalctl _PID=1234

To filter by user ID:

Terminal
journalctl _UID=1000

Multiple fields can be combined to narrow the results further.

Searching Log Messages

To search log messages by a pattern, use the -g flag followed by a regular expression:

Terminal
journalctl -g "failed"

To search within a specific unit:

Terminal
journalctl -u ssh -g "invalid user"

You can also pipe journalctl output to grep for more complex matching:

Terminal
journalctl -u nginx -n 500 --no-pager | grep -i "upstream"

Output Formats

By default, journalctl displays logs in a human-readable format. Use the -o flag to change the output format.

To display logs with ISO 8601 timestamps:

Terminal
journalctl -o short-iso

To display logs as JSON (useful for scripting and log shipping):

Terminal
journalctl -o json-pretty

To display message text only, without metadata:

Terminal
journalctl -o cat

The most commonly used output formats are:

Format Description
short Default human-readable format
short-iso ISO 8601 timestamps
short-precise Microsecond-precision timestamps
json One JSON object per line
json-pretty Formatted JSON
cat Message text only

Managing Journal Size

The journal stores logs on disk under /var/log/journal/. To check how much disk space the journal is using:

Terminal
journalctl --disk-usage
output
Archived and active journals take up 512.0M in the file system.

To reduce the journal size, use the --vacuum-size, --vacuum-time, or --vacuum-files options:

Terminal
journalctl --vacuum-size=500M
Terminal
journalctl --vacuum-time=30d
Terminal
journalctl --vacuum-files=5

These commands remove old archived journal files until the specified limit is met. To configure a permanent size limit, edit /etc/systemd/journald.conf and set SystemMaxUse=.

Practical Troubleshooting Workflow

When a service fails, we can use a short sequence to isolate the issue quickly. First, check service state with systemctl :

Terminal
sudo systemctl status nginx

Then inspect recent error-level logs for that unit:

Terminal
sudo journalctl -u nginx -p err -n 100 --no-pager

If the problem started after reboot, inspect previous boot logs:

Terminal
sudo journalctl -u nginx -b -1 -p err --no-pager

To narrow the time window around the incident:

Terminal
sudo journalctl -u nginx --since "30 minutes ago" --no-pager

If you need pattern matching across many lines, pipe to grep :

Terminal
sudo journalctl -u nginx -n 500 --no-pager | grep -Ei "error|failed|timeout"

Troubleshooting

“No journal files were found”
The systemd journal may not be persistent on your system. Check if /var/log/journal/ exists. If it does not, create it with mkdir -p /var/log/journal and restart systemd-journald. Alternatively, set Storage=persistent in /etc/systemd/journald.conf.

“Permission denied” reading logs
Regular users can only access their own user journal. To read system logs, run journalctl with sudo, or add your user to the adm or systemd-journal group: usermod -aG systemd-journal USERNAME.

-g pattern search returns no results
The -g flag uses PCRE2 regular expressions. Make sure the pattern is correct and that your journalctl version supports -g (available on modern systemd releases). As an alternative, pipe the output to grep.

Logs missing after reboot
The journal is stored in memory by default on some distributions. To enable persistent storage across reboots, set Storage=persistent in /etc/systemd/journald.conf and restart systemd-journald.

Journal consuming too much disk space
Use journalctl --disk-usage to check the current size, then journalctl --vacuum-size=500M to trim old entries. For a permanent limit, configure SystemMaxUse= in /etc/systemd/journald.conf.

FAQ

What is the difference between journalctl and /var/log/syslog?
/var/log/syslog is a plain text file written by rsyslog or syslog-ng. journalctl reads the binary systemd journal, which stores structured metadata alongside each message. The journal offers better filtering, field-based queries, and persistent boot tracking.

How do I view logs for a service that keeps restarting?
Use journalctl -u servicename -f to follow logs in real time, or journalctl -u servicename -n 200 to view the most recent entries. Adding -p err will surface only error-level messages.

How do I check logs from before the current boot?
Use journalctl -b -1 for the previous boot, or journalctl --list-boots to see all available boot sessions and then journalctl -b BOOTID to query a specific one.

Can I export logs to a file?
Yes. Use journalctl --no-pager > output.log for plain text, or journalctl -o json-pretty > output.json for structured JSON. You can combine this with any filter flags.

How do I reduce the amount of disk space used by the journal?
Run journalctl --vacuum-size=500M to immediately trim archived logs to 500 MB. For a persistent limit, set SystemMaxUse=500M in /etc/systemd/journald.conf and restart the journal daemon with systemctl restart systemd-journald.

Conclusion

journalctl is a powerful and flexible tool for querying the systemd journal. Whether you are troubleshooting a failing service, reviewing kernel messages, or auditing authentication events, mastering its filter options saves significant time. If you have any questions, feel free to leave a comment below.

❌