阅读视图

发现新文章,点击刷新页面。

How to Install Google Chrome Web Browser on Ubuntu 24.04

Google Chrome is a fast and secure web browser built for the modern web. It is available for all major operating systems and allows you to sync bookmarks, history, and passwords across devices.

This guide explains how to install Google Chrome on Ubuntu 24.04 using the official Google package and repository.

Info
The official Google Chrome .deb package is available for 64-bit x86 (amd64) systems only. On ARM devices, use Chromium or another ARM-compatible browser.

Quick Reference

Task Command
Download package wget https://dl.google.com/linux/direct/google-chrome-stable_current_amd64.deb
Install package sudo apt install ./google-chrome-stable_current_amd64.deb
Start Chrome google-chrome
Set as default browser xdg-settings set default-web-browser google-chrome.desktop
Update Chrome sudo apt update && sudo apt upgrade
Uninstall Chrome sudo apt remove google-chrome-stable
Verify repo file cat /etc/apt/sources.list.d/google-chrome.list

Installing Google Chrome on Ubuntu

Chrome is not open source and is not included in the standard Ubuntu repositories. The official .deb package adds the Google signing key and repository so Chrome stays updated automatically.

Download Google Chrome

Open a terminal and use wget to download the latest stable package:

Terminal
wget https://dl.google.com/linux/direct/google-chrome-stable_current_amd64.deb

Install Google Chrome

Install the package with apt. Running this command requires sudo privileges :

Terminal
sudo apt install ./google-chrome-stable_current_amd64.deb

When prompted, enter your password to complete the installation.

Starting Google Chrome

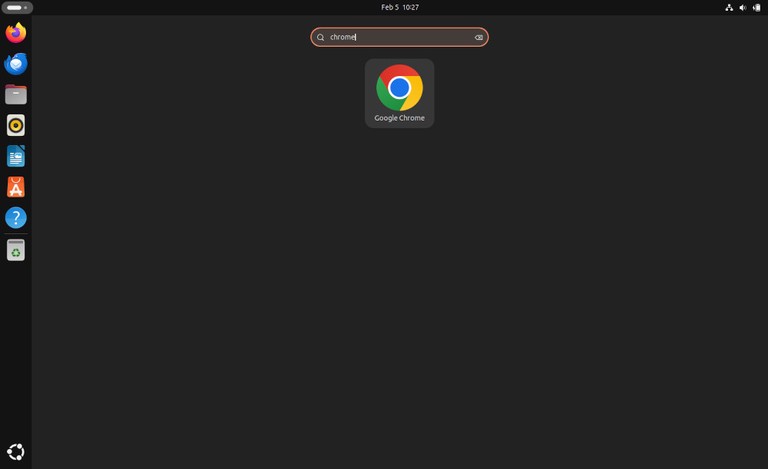
Open the Activities overview by pressing the Super key, search for “Google Chrome”, and launch it:

Open Google Chrome on Ubuntu 24.04

You can also start Chrome from the terminal:
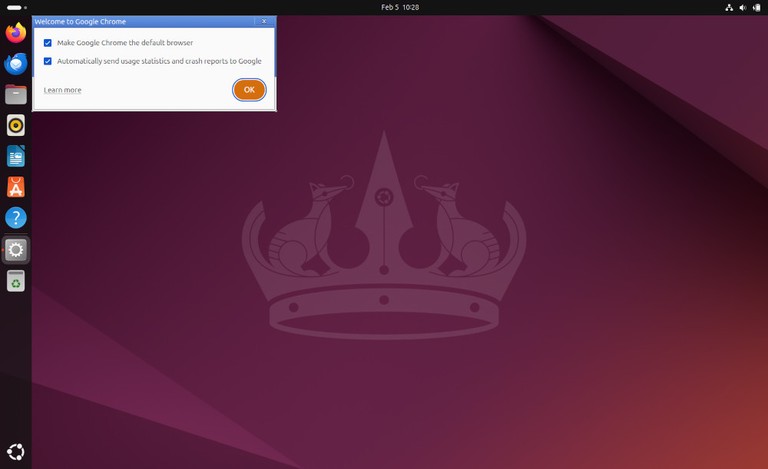
Terminal
google-chrome

When you start Chrome for the first time, you will be asked whether you want to set it as the default browser and enable crash reports:

Google Chrome default browser prompt on Ubuntu 24.04

Chrome then opens the welcome page:

Google Chrome welcome page on Ubuntu 24.04

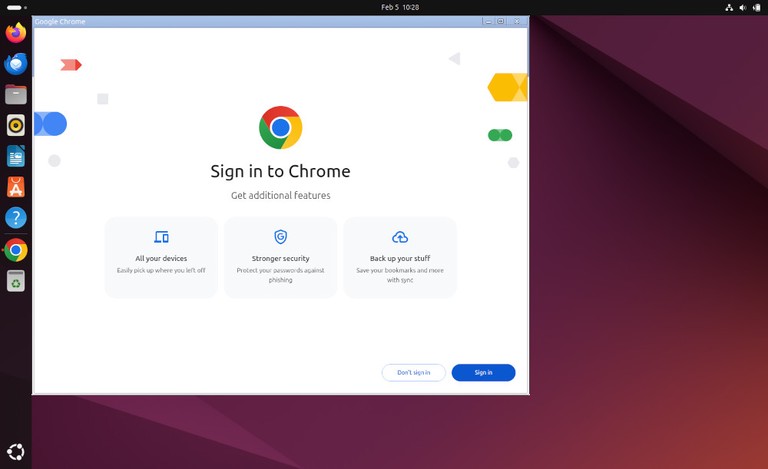
From here, you can sign in with your Google account and sync your settings.

Set Chrome as Default Browser

To set Chrome as the default browser from the command line, run:

Terminal
xdg-settings set default-web-browser google-chrome.desktop

To verify the current default browser:

Terminal
xdg-settings get default-web-browser
output
google-chrome.desktop

Updating Google Chrome

During installation, the official Google repository is added to your system. Verify the repository file with cat :

Terminal
cat /etc/apt/sources.list.d/google-chrome.list

Example output:

output
### THIS FILE IS AUTOMATICALLY CONFIGURED ###
# You may comment out this entry, but any other modifications may be lost.
deb [arch=amd64] https://dl.google.com/linux/chrome/deb/ stable main

Chrome updates are delivered through the standard Ubuntu update process:

Terminal
sudo apt update && sudo apt upgrade

Uninstalling Google Chrome

To remove Google Chrome from your system, run:

Terminal
sudo apt remove google-chrome-stable

Then clean up unused dependencies:

Terminal
sudo apt autoremove

Troubleshooting

The installation fails with dependency errors
Fix broken dependencies and re-run the install:

Terminal
sudo apt --fix-broken install
sudo apt install ./google-chrome-stable_current_amd64.deb

Chrome does not start after installation
Close any running Chrome processes and start it again:

Terminal
pkill -f chrome
google-chrome

Repository file is missing
Reinstall the package to recreate the repository file:

Terminal
sudo apt install ./google-chrome-stable_current_amd64.deb

FAQ

What is the difference between Chrome and Chromium?
Chromium is the open-source project that Chrome is built on. Chrome adds proprietary features such as automatic updates, licensed media codecs (AAC, H.264), and tighter Google account integration.

How do I import bookmarks from another browser?
Open Chrome, go to Settings > Import bookmarks and settings, and select the browser you want to import from.

Can I install Chrome Beta or Dev channels?
Yes. Replace google-chrome-stable with google-chrome-beta or google-chrome-unstable in the download URL and install command.

Conclusion

Google Chrome installs on Ubuntu 24.04 using the official .deb package, which also configures the Google repository for automatic updates.

If you have any questions, feel free to leave a comment below.

How to Install Python on Ubuntu 24.04

Python is one of the most popular programming languages. It is used to build all kinds of applications, from simple scripts to complex machine-learning systems. With its straightforward syntax, Python is a good choice for both beginners and experienced developers.

Ubuntu 24.04 ships with Python 3.12 preinstalled. To check the version on your system:

Terminal
python3 --version
output
Python 3.12.3

If you need a newer Python version such as 3.13 or 3.14, you can install it from the deadsnakes PPA or build it from source. Both methods install the new version alongside the system Python without replacing it. This guide shows how to install Python on Ubuntu 24.04 using both approaches.

Quick Reference

Task Command
Check installed Python version python3 --version
Add deadsnakes PPA sudo add-apt-repository ppa:deadsnakes/ppa
Install Python 3.13 from PPA sudo apt install python3.13
Install Python 3.14 from PPA sudo apt install python3.14
Install venv module sudo apt install python3.13-venv
Build from source (configure) ./configure --enable-optimizations
Build from source (compile) make -j $(nproc)
Install from source sudo make altinstall
Create a virtual environment python3.13 -m venv myproject
Activate virtual environment source myproject/bin/activate
Deactivate virtual environment deactivate

Installing Python from the Deadsnakes PPA

The deadsnakes PPA provides newer Python versions packaged for Ubuntu. This is the easiest way to install a different Python version.

  1. Install the prerequisites and add the PPA:

    Terminal
    sudo apt update
    sudo apt install software-properties-common
    sudo add-apt-repository ppa:deadsnakes/ppa

    Press Enter when prompted to confirm.

  2. Install Python 3.13:

    Terminal
    sudo apt update
    sudo apt install python3.13

    To install Python 3.14 instead, replace python3.13 with python3.14 in the command above.

  3. Verify the installation:

    Terminal
    python3.13 --version
    output
    Python 3.13.11

    You can also confirm the binary location:

    Terminal
    which python3.13
  4. Install the venv module (needed for creating virtual environments):

    Terminal
    sudo apt install python3.13-venv
  5. If you need pip, install the venv package and create a virtual environment, then use pip inside the venv:

    Terminal
    python3.13 -m venv myproject
    source myproject/bin/activate
    python -m pip install --upgrade pip

    If you need a system-level pip for that interpreter, run:

    Terminal
    python3.13 -m ensurepip --upgrade
Info
The system default python3 still points to Python 3.12. To use the newly installed version, run python3.13 or python3.14 explicitly.

Installing Python from Source

Compiling Python from source allows you to install any version and customize the build options. However, you will not be able to manage the installation through the apt package manager.

The following steps show how to compile Python 3.13. If you are installing a different version, replace the version number in the commands below.

  1. Install the libraries and dependencies required to build Python:

    Terminal
    sudo apt update
    sudo apt install build-essential zlib1g-dev libncurses5-dev libgdbm-dev libnss3-dev libssl-dev libreadline-dev libffi-dev libsqlite3-dev wget libbz2-dev liblzma-dev
  2. Download the source code from the Python download page using wget :

    Terminal
    wget https://www.python.org/ftp/python/3.13.11/Python-3.13.11.tgz
  3. Extract the archive :

    Terminal
    tar -xf Python-3.13.11.tgz
  4. Navigate to the source directory and run the configure script:

    Terminal
    cd Python-3.13.11
    ./configure --enable-optimizations

    The --enable-optimizations flag runs profile-guided optimization tests, which makes the build slower but produces a faster Python binary.

  5. Start the build process:

    Terminal
    make -j $(nproc)

    The -j $(nproc) option uses all available CPU cores for a faster build.

  6. Install the Python binaries using altinstall. Do not use install, as it overwrites the system python3 binary and can break system tools that depend on it:

    Terminal
    sudo make altinstall
  7. Verify the installation:

    Terminal
    python3.13 --version
    output
    Python 3.13.11

Setting Up a Virtual Environment

After installing a new Python version, create a virtual environment for your project to keep dependencies isolated:

Terminal
python3.13 -m venv myproject

Activate the virtual environment:

Terminal
source myproject/bin/activate

Your shell prompt will change to show the environment name. Inside the virtual environment, python and pip point to the version you used to create it.

To deactivate the virtual environment:

Terminal
deactivate

For more details, see our guide on how to create Python virtual environments .

Uninstalling the PPA Version (Optional)

To remove the PPA version:

Terminal
sudo apt remove python3.13 python3.13-venv

To remove the PPA itself:

Terminal
sudo add-apt-repository --remove ppa:deadsnakes/ppa

FAQ

Should I use the PPA or build from source?
The deadsnakes PPA is the recommended method for most users. It is easier to install, receives security updates through apt, and does not require build tools. Build from source only if you need a custom build configuration or a version not available in the PPA.

Will installing a new Python version break my system?
No. Both methods install the new version alongside the system Python 3.12. The system python3 command is not affected. You access the new version with python3.13 or python3.14.

How do I make the new Python version the default?
You can use update-alternatives to configure it, but this is not recommended. Many Ubuntu system tools depend on the default python3 being the version that shipped with the OS. Use virtual environments instead.

How do I install pip for the new Python version?
The recommended approach is to use a virtual environment. Install python3.13-venv, create a venv, and use pip inside it. If you need a system-level pip for that interpreter, run python3.13 -m ensurepip --upgrade.

What is the difference between install and altinstall when building from source?
altinstall installs the binary as python3.13 without creating a python3 symlink. install creates the symlink, which overwrites the system Python and can break Ubuntu system tools.

Does Ubuntu 24.04 include pip by default?
Ubuntu 24.04 includes Python 3.12 but does not include pip in the base installation. Install it with sudo apt install python3-pip. For newer Python versions, use python3.13 -m pip inside a virtual environment.

Conclusion

Ubuntu 24.04 ships with Python 3.12. To install a newer version, use the deadsnakes PPA for a simple apt-based installation, or build from source for full control over the build. Use virtual environments to manage project dependencies without affecting the system Python.

For more on Python package management, see our guide on how to use pip .

If you have any questions, feel free to leave a comment below.

❌