阅读视图

发现新文章,点击刷新页面。

iptables Command in Linux: Manage Firewall Rules

When a packet arrives at a Linux machine, the kernel decides what to do with it based on a set of firewall rules. Those rules live in the kernel’s Netfilter framework, and for more than two decades the standard way to edit them from user space has been the iptables command.

iptables controls packet filtering, network address translation, and packet mangling. Higher-level front ends such as ufw and firewalld manage the same Netfilter firewall stack through simpler interfaces, although many modern systems use nftables underneath. Understanding the underlying command is still valuable, especially when you inherit a server that was set up by someone else. This guide walks through the concepts and the commands you need to read, edit, and persist firewall rules.

Tables and Chains

Before you write a rule, you need to know where it goes. iptables is organized into tables, and each table contains chains.

The three tables you will use most often are:

  • filter - the default table, used for allowing and blocking traffic
  • nat - used for network address translation, such as port forwarding and masquerading
  • mangle - used to alter packet headers, for example to set QoS marks

Each table has a set of built-in chains that correspond to moments in the life of a packet. In the filter table:

  • INPUT - packets destined for the local machine
  • OUTPUT - packets originating from the local machine
  • FORWARD - packets routed through the machine

A rule says: for packets that enter this chain and match these criteria, take this action. The action is called a target and is usually ACCEPT, DROP, REJECT, or the name of another chain.

iptables Syntax

The general form of the command is:

txt
iptables [-t TABLE] COMMAND CHAIN [MATCH] [-j TARGET]

If -t is omitted, iptables uses the filter table. Common commands include -A (append a rule), -I (insert), -D (delete), -L (list), -F (flush), and -P (set default policy).

All commands that change the firewall require root privileges. Run them with sudo or as root.

Warning
It is easy to lock yourself out of a remote server with a single wrong rule. Before you apply a restrictive ruleset over SSH, either test on a local machine first or use iptables-apply, which rolls back automatically if you lose access.

List Rules

To print every rule in the filter table, use the -L option:

Terminal
sudo iptables -L

The default output shows service names, resolves IP addresses, and hides packet and byte counters. For real work, add -n to keep numeric output and -v to show counters and interface information:

Terminal
sudo iptables -L -n -v
output
Chain INPUT (policy ACCEPT 0 packets, 0 bytes)
pkts bytes target prot opt in out source destination
1234 98K ACCEPT tcp -- * * 0.0.0.0/0 0.0.0.0/0 tcp dpt:22
0 0 DROP tcp -- * * 0.0.0.0/0 0.0.0.0/0 tcp dpt:23
Chain FORWARD (policy ACCEPT 0 packets, 0 bytes)
pkts bytes target prot opt in out source destination
Chain OUTPUT (policy ACCEPT 0 packets, 0 bytes)
pkts bytes target prot opt in out source destination

To list a single chain, append its name:

Terminal
sudo iptables -L INPUT -n -v

To number the rules so you can reference them by index when deleting, add --line-numbers:

Terminal
sudo iptables -L INPUT -n -v --line-numbers

Add and Remove Rules

New rules are added to the end of a chain with -A (append) or at a specific position with -I (insert). The difference matters because iptables evaluates rules top to bottom and stops at the first match.

To allow incoming SSH connections:

Terminal
sudo iptables -A INPUT -p tcp --dport 22 -j ACCEPT

To allow HTTP and HTTPS:

Terminal
sudo iptables -A INPUT -p tcp --dport 80 -j ACCEPT
sudo iptables -A INPUT -p tcp --dport 443 -j ACCEPT

To insert a rule as the first one in the chain, use -I CHAIN 1:

Terminal
sudo iptables -I INPUT 1 -p tcp --dport 22 -j ACCEPT

This is important when you are working over SSH. If a broad DROP rule already appears earlier in the chain, appending the accept rule after it would not help because the packet would be dropped first.

To delete a rule, either repeat the exact specification with -D:

Terminal
sudo iptables -D INPUT -p tcp --dport 23 -j DROP

Or delete by line number, which is easier when the rule has many options:

Terminal
sudo iptables -D INPUT 3

Allow and Block Specific IPs

To block all traffic from a single IP address:

Terminal
sudo iptables -A INPUT -s 203.0.113.10 -j DROP

To block a range using CIDR notation:

Terminal
sudo iptables -A INPUT -s 203.0.113.0/24 -j DROP

To allow SSH only from a trusted subnet:

Terminal
sudo iptables -A INPUT -p tcp -s 192.168.1.0/24 --dport 22 -j ACCEPT
sudo iptables -A INPUT -p tcp --dport 22 -j DROP

The first rule accepts SSH from the local subnet. The second drops SSH from everywhere else. Order matters: if you reversed the two lines, every SSH attempt would be dropped before the accept rule had a chance to match.

Allow Established Connections

Most firewall setups include a rule that accepts traffic belonging to an already established connection. This lets return traffic through without needing a matching rule for each outbound request:

Terminal
sudo iptables -A INPUT -m conntrack --ctstate ESTABLISHED,RELATED -j ACCEPT

Put this rule near the top of the INPUT chain so it matches early. Without it, the default DROP policy breaks outbound connections that expect responses.

Set a Default Policy

Each built-in chain has a default policy that applies when no rule matches. The -P option changes it:

Terminal
sudo iptables -P INPUT DROP
sudo iptables -P FORWARD DROP
sudo iptables -P OUTPUT ACCEPT

Switching INPUT to DROP is the foundation of a deny-by-default firewall: nothing gets in unless an explicit rule allows it. Before you flip the policy, make sure you have already added the rules that allow SSH, established connections, and anything else you need.

Flush Rules

To remove every rule from every chain in the current table:

Terminal
sudo iptables -F

To flush a specific chain only:

Terminal
sudo iptables -F INPUT

Flushing does not reset the default policies. If you have set INPUT to DROP, flushing will leave it at DROP with no rules, which blocks all inbound traffic. Reset the policy to ACCEPT first if that is not what you want:

Terminal
sudo iptables -P INPUT ACCEPT
sudo iptables -F

Save and Restore Rules

Rules added with iptables live in kernel memory only. They disappear on reboot unless you save them.

On Ubuntu, Debian, and Derivatives, the iptables-persistent package saves rules to /etc/iptables/rules.v4 and reloads them at boot:

Terminal
sudo apt install iptables-persistent

The installer asks whether to save the current rules. To update the saved copy later:

Terminal
sudo netfilter-persistent save

On Fedora, RHEL, and Derivatives, the equivalent service is iptables-services:

Terminal
sudo dnf install iptables-services
sudo systemctl enable --now iptables
sudo service iptables save

Independent of the distribution, you can dump and restore rules manually with iptables-save and iptables-restore:

Terminal
sudo iptables-save -f /etc/iptables/rules.v4
sudo iptables-restore /etc/iptables/rules.v4

This is also the recommended way to edit a large ruleset: save to a file, edit the file, then restore it atomically.

Troubleshooting

Rules disappear after a reboot
iptables rules are not persistent by default. Install iptables-persistent on Debian-based systems or iptables-services on RHEL-based ones, and save the ruleset.

SSH stops working after setting a DROP policy
You switched INPUT to DROP without an ACCEPT rule for port 22, or the ACCEPT rule is positioned after a more general DROP rule. Connect through the console, add the rule with -I INPUT 1, and save.

A rule looks correct but does not match
Check the order. iptables walks the chain top to bottom and stops at the first match, so an earlier accept or drop may be catching the packet first. Use iptables -L INPUT -n -v --line-numbers to inspect the order.

Changes are silently ignored
You may be editing the wrong table. A rule in filter does not affect NAT, and vice versa. Pass -t TABLE explicitly when you are not working in filter.

iptables: command not found
On some modern distributions, only nftables is installed by default. Install iptables with your package manager, or use nft directly.

Quick Reference

For a printable quick reference, see the iptables cheatsheet .

Action Command
List rules (verbose, numeric) iptables -L -n -v --line-numbers
Allow port iptables -A INPUT -p tcp --dport PORT -j ACCEPT
Block IP iptables -A INPUT -s IP -j DROP
Allow established connections iptables -A INPUT -m conntrack --ctstate ESTABLISHED,RELATED -j ACCEPT
Insert rule at top iptables -I INPUT 1 -p tcp --dport 22 -j ACCEPT
Delete rule by number iptables -D INPUT N
Set default policy iptables -P INPUT DROP
Flush all rules iptables -F
Save rules iptables-save -f /etc/iptables/rules.v4
Restore rules iptables-restore /etc/iptables/rules.v4

FAQ

Is iptables still relevant in 2026?
It is still installed and widely used, but it is being replaced by nftables, which offers a cleaner syntax and better performance. On recent distributions, the iptables command is often a compatibility front end that writes nftables rules underneath.

Should I use iptables, ufw, or firewalld?
If you are managing rules by hand on Debian or Ubuntu, ufw is simpler and covers most cases. On Fedora and RHEL, firewalld is the default. Reach for raw iptables when you need fine-grained control that the front ends do not expose, or when you are troubleshooting an existing ruleset.

What is the difference between DROP and REJECT?
DROP silently discards the packet; the sender sees a timeout. REJECT sends an ICMP error back (or a TCP reset for TCP), so the sender gets immediate feedback. DROP is often preferred on public interfaces because it does not confirm that the port exists.

How do I block a country or a list of IPs?
For a handful of addresses, add one -s rule per entry. For larger lists, use the ipset tool to manage the addresses and reference the set from a single iptables rule.

Does iptables handle IPv6?
No. Use ip6tables for IPv6 rules. It has the same syntax and the same tables and chains, but operates on a separate rule set.

Conclusion

iptables is a low-level but reliable way to read and shape the Linux firewall. Once you have a working ruleset, save it with iptables-save and commit the file so the next person to touch the server has a clear starting point.

ripgrep Command in Linux: Fast Recursive Search

Searching through a large codebase or a directory full of log files with grep often means adding -r for recursion, -n for line numbers, and --include or --exclude rules to avoid unrelated files. In a Git repository, you may also need extra excludes for build directories, vendor files, and binary output.

ripgrep (rg) handles the common case with better defaults. It searches directories recursively, respects .gitignore, .ignore, and .rgignore rules, skips hidden and binary files during recursive searches, and shows friendly interactive output. It is also much faster than traditional recursive grep on many large file trees because it uses Rust’s regex engine and parallel directory traversal.

This guide explains how to use the ripgrep command in Linux, from basic searches to file type filters, context lines, replacement previews, and config defaults.

Installing ripgrep

On Ubuntu, Debian, and Derivatives, install the ripgrep package with apt:

Terminal
sudo apt install ripgrep

On Fedora, RHEL, and Derivatives, use dnf:

Terminal
sudo dnf install ripgrep

On Arch Linux, install it from the official repositories:

Terminal
sudo pacman -S ripgrep

Verify the installation with:

Terminal
rg --version

The output shows the installed version:

output
ripgrep 15.1.0 (rev af60c2de9d)

Your distribution may ship a different version, but the examples in this guide use common options available in current ripgrep releases.

Syntax

The basic syntax for the rg command is:

txt
rg [OPTIONS] PATTERN [PATH ...]

The PATTERN argument is the text or regular expression to search for. If you omit PATH, rg searches recursively from the current directory.

For example, rg "error" searches the current directory tree, while rg "error" logs/ limits the search to the logs directory.

Basic Search

Search for a pattern in all files under the current directory:

Terminal
rg "error"

Example output:

output
logs/app.log:42:error: connection refused
logs/app.log:78:error: timeout after 30s
src/main.py:114:raise ValueError("error parsing config")

The output shows the filename, line number, and matching line. In an interactive terminal, rg also uses color by default, so you do not need the usual recursive grep flags for the common code-search workflow.

To search in a specific file, pass the filename after the pattern:

Terminal
rg "error" logs/app.log

To search in a specific directory, pass the directory path:

Terminal
rg "error" logs/

Filtering by File Type

Use -t to restrict the search to a known file type:

Terminal
rg -t py "import os"

This searches only Python files. ripgrep includes built-in definitions for many file types. To see the full list, run:

Terminal
rg --type-list

To exclude a file type, use -T:

Terminal
rg -T js "TODO"

You can also use glob patterns with -g to match or exclude specific filenames. Quote glob patterns so the shell does not expand them before rg receives them:

Terminal
rg -g '*.log' "error"

Use a leading ! to exclude matching paths:

Terminal
rg -g '!*.min.js' "console.log"

The ! prefix belongs to rg, so quoting is especially useful in shells where ! can trigger history expansion.

Case-Insensitive Search

Add -i to ignore letter case:

Terminal
rg -i "warning"

This matches warning, Warning, WARNING, and other case variants.

For a more flexible default, use -S or --smart-case:

Terminal
rg -S "warning"

With smart case, an all-lowercase pattern is case-insensitive, but a pattern with any uppercase letter is case-sensitive. For example, rg -S "warning" matches Warning, while rg -S "Warning" searches for that exact capitalization.

Fixed String Search

By default, rg treats the pattern as a regular expression. Use -F to search for a literal string instead, which is useful when the pattern contains regex characters:

Terminal
rg -F "price[0]"

Without -F, [0] would be interpreted as a character class. With -F, rg searches for the literal text price[0].

Counting and Listing Matches

To count matching lines per file instead of printing the matching lines, use -c:

Terminal
rg -c "error"

Example output:

output
logs/app.log:14
logs/nginx/access.log:3

The count is the number of matching lines, not the total number of matching words or strings.

To print only filenames that contain at least one match, use -l:

Terminal
rg -l "error"

To print only filenames that contain no matches, use --files-without-match:

Terminal
rg --files-without-match "error"

This is different from combining -v with -l. The --files-without-match option checks whether a file has zero matching lines.

Context Lines

When a matching line alone is not enough to understand the surrounding code, add context with -C:

Terminal
rg -C 3 "panic"

This prints three lines before and three lines after each match.

Use -A for lines after the match only:

Terminal
rg -A 2 "def connect"

Use -B for lines before the match only:

Terminal
rg -B 2 "def connect"

Context output is useful when you want to inspect the code around a function, error message, or configuration value without opening each file.

Multiple Patterns

Use -e to search for more than one pattern in a single pass:

Terminal
rg -e "error" -e "warning"

This matches any line containing either word. It is equivalent to the regex error|warning, but repeated -e options are easier to read when patterns become longer.

The -e option is also useful when a pattern begins with a dash:

Terminal
rg -e "--force"

Without -e, rg would try to interpret --force as an option.

Whole-Word Match

The -w flag restricts matches to whole words. This is useful when you want to find a variable name without matching it inside a longer name:

Terminal
rg -w "id"

This matches id, but not uid or invalid.

Invert Match

The -v flag prints lines that do not match the pattern:

Terminal
rg -v "^#" config.txt

This shows all lines in config.txt that do not begin with #.

If you want filenames that do not contain a pattern at all, use --files-without-match instead:

Terminal
rg --files-without-match "version" -g '*.json'

Searching Hidden Files and Ignoring .gitignore

By default, recursive rg searches skip hidden files and directories, and respect .gitignore, .ignore, and .rgignore files. This is usually what you want in a source tree.

To include hidden files and directories, use --hidden:

Terminal
rg --hidden "api_key"

To ignore .gitignore, .ignore, and .rgignore rules, use --no-ignore:

Terminal
rg --no-ignore "TODO"

The --no-ignore option does not include hidden files by itself. To search hidden files and ignored files in the same search, combine both options:

Terminal
rg --hidden --no-ignore "password"
Warning
Searching with --hidden --no-ignore can include build artifacts, dependency directories, cache folders, and other large trees. It is much slower and can produce noisy results, so use it only when you have a specific reason to search outside the normal project files.

Replacing Output

The -r option rewrites matching text in the output to show what a replacement would look like. It does not modify any files:

Terminal
rg "foo" -r "bar"

Example output:

output
src/config.py:5:bar = get_setting("bar")

The output shows the line as it would look after replacing foo with bar. This is useful for previewing a project-wide rename before using sed or a text editor’s find-and-replace feature.

For capture groups in replacements, wrap the command in single quotes so the shell does not expand $1, $name, or similar replacement references before rg runs.

Showing Only the Match

By default, rg prints the full line containing the match. Use -o to print only the matched text:

Terminal
rg -o 'v[0-9]+\.[0-9]+\.[0-9]+'

Example output:

output
package.json:4:v1.4.2
package-lock.json:8:v1.4.2

This is useful when you want to extract values from files rather than inspect matching lines in context.

ripgrep Configuration File

ripgrep can read default options from a configuration file, but it does not automatically look in ~/.config/ripgrep/ or any other fixed path. You must point RIPGREP_CONFIG_PATH to the file you want rg to read.

For example, create a config file named ~/.ripgreprc:

~/.ripgreprctxt
--smart-case
--hidden
--glob=!.git/

Then export the environment variable:

Terminal
export RIPGREP_CONFIG_PATH="$HOME/.ripgreprc"

Add that export line to your shell startup file, such as ~/.bashrc or ~/.zshrc, if you want the setting to apply in new terminal sessions.

Each config file line is passed to rg as one command-line argument. For options with values, use either --option=value on one line or put the option and its value on separate lines.

Troubleshooting

rg does not find a file you expected
The file may be hidden, ignored by .gitignore, ignored by .ignore or .rgignore, or detected as binary. Start with rg --debug "pattern" to see why paths were skipped, then add --hidden, --no-ignore, or both only when needed.

A glob pattern does not work as expected
Quote glob patterns, such as rg -g '*.conf' "server" and rg -g '!*.min.js' "console.log". Without quotes, your shell may expand * before rg sees the pattern.

A pattern starting with - is treated as an option
Use -e before the pattern, for example rg -e "--force". You can also use -- to stop option parsing, as in rg -- "--force".

Options Reference

  • -t TYPE - Search only files of the given type.
  • -T TYPE - Exclude files of the given type.
  • -g GLOB - Include or exclude files by glob. A ! prefix excludes paths.
  • -i - Search case-insensitively.
  • -F - Treat the pattern as a fixed string, not a regex.
  • -c - Count matching lines per file.
  • -l - List only filenames with matches.
  • --files-without-match - List only filenames without matches.
  • -C N - Show N lines of context around each match.
  • -A N - Show N lines after each match.
  • -B N - Show N lines before each match.
  • -e PATTERN - Add a search pattern. Repeat it to search for multiple patterns.
  • -w - Match whole words only.
  • -v - Invert the match and print non-matching lines.
  • -o - Print only the matched text, not the full line.
  • -r REPLACEMENT - Show output with matches replaced. This is a preview only.
  • -n - Show line numbers. This is enabled by default in interactive terminal output.
  • --hidden - Search hidden files and directories.
  • --no-ignore - Do not respect .gitignore, .ignore, and .rgignore rules.
  • -S, --smart-case - Search case-insensitively when the pattern is lowercase, and case-sensitively when it contains uppercase.
  • --stats - Print a summary of the search at the end.
  • -M N - Omit lines longer than N bytes.

Quick Reference

For a printable quick reference, see the ripgrep cheatsheet .

Task Command
Search recursively from the current directory rg "pattern"
Search in a specific file rg "pattern" file.txt
Search in a specific directory rg "pattern" logs/
Search only Python files rg -t py "pattern"
Exclude JavaScript files rg -T js "pattern"
Search by glob rg -g '*.log' "pattern"
Exclude by glob rg -g '!*.min.js' "pattern"
Search case-insensitively rg -i "pattern"
Use smart case rg -S "pattern"
Search for a fixed string rg -F "price[0]"
Count matching lines per file rg -c "pattern"
List matching filenames rg -l "pattern"
List filenames without matches rg --files-without-match "pattern"
Show three lines of context rg -C 3 "pattern"
Search multiple patterns rg -e "foo" -e "bar"
Match a whole word rg -w "id"
Invert line matches rg -v "pattern"
Include hidden files rg --hidden "pattern"
Ignore ignore files rg --no-ignore "pattern"
Include hidden and ignored files rg --hidden --no-ignore "pattern"
Preview replacement output rg "old" -r "new"
Print only matched text rg -o "pattern"

Conclusion

ripgrep covers the same ground as grep , but its recursive search, file filtering, and ignore-file support make it a better default for many code and log searches. For path-based file finding, pair it with find , or use rg -l when you need a list of files that contain a specific pattern.

whois Command in Linux: Query Domain Registration Info

When you need to know who owns a domain, when it expires, which registrar handles it, or which organization holds a particular IP block, the whois command is the fastest route. It queries the registry databases that record this information and returns a plain-text response you can scan in a terminal. The output format varies by registry, but the questions you can answer are consistent: registrar, name servers, registration and expiry dates, and contact info (where privacy rules allow).

This guide explains how to use whois in Linux to look up domains, IP addresses, and AS numbers, how to target a specific server, and how to parse the output for the fields you actually care about.

whois Syntax

The general form is:

txt
whois [OPTIONS] OBJECT

OBJECT is the domain, IP address, or AS number you want information about. With no options, whois picks the right registry automatically based on the type of query.

Install whois

whois is not always installed by default. On Ubuntu, Debian, and Derivatives:

Terminal
sudo apt update
sudo apt install whois

On Fedora, RHEL, and Derivatives:

Terminal
sudo dnf install whois

Confirm it is in place:

Terminal
whois --version
output
Version 5.6.6.

The Debian-family whois is an actively maintained client with built-in routing logic that knows which registry to ask for each TLD.

Look Up a Domain

The most common use is checking a domain:

Terminal
whois example.com
output
 Domain Name: EXAMPLE.COM
Registry Domain ID: 2336799_DOMAIN_COM-VRSN
Registrar WHOIS Server: whois.iana.org
Registrar URL: http://res-dom.iana.org
Updated Date: 2026-01-16T18:26:50Z
Creation Date: 1995-08-14T04:00:00Z
Registry Expiry Date: 2026-08-13T04:00:00Z
Registrar: RESERVED-Internet Assigned Numbers Authority
Registrar IANA ID: 376
Name Server: ELLIOTT.NS.CLOUDFLARE.COM
Name Server: HERA.NS.CLOUDFLARE.COM
DNSSEC: signedDelegation
...

The fields that matter most for everyday questions are:

  • Registrar, the company managing the registration.
  • Creation Date and Registry Expiry Date, which tell you how old the domain is and when it needs renewing.
  • Name Server, which lists the DNS servers authoritative for the domain.
  • DNSSEC, which shows whether the domain is cryptographically signed.

For ccTLDs (.de, .uk, .jp), the format differs because each country runs its own registry. The information is similar; the field names and order change.

Look Up an IP Address

whois on an IP returns the network allocation, not the domain:

Terminal
whois 93.184.216.34
output
inetnum: 93.184.216.0 - 93.184.216.255
netname: EDGECAST-NETBLK-03
descr: NETBLK-03-EU-93-184-216-0-24
country: EU
admin-c: DS7892-RIPE
tech-c: DS7892-RIPE
status: ASSIGNED PA
...

This kind of query is the right tool for “who owns this IP that has been hitting my server” investigations. The output names the network block, maintainer, and abuse contact details when the registry publishes them.

Look Up an AS Number

Pass an autonomous system number with the AS prefix:

Terminal
whois AS15169
output
ASNumber: 15169
ASName: GOOGLE
ASHandle: AS15169
RegDate: 2000-03-30
Updated: 2012-02-24
Ref: https://rdap.arin.net/registry/autnum/15169

AS lookups are useful when you trace a route with mtr or traceroute and want to know which network each hop belongs to.

Pick a Specific WHOIS Server

The default routing finds the right server for most TLDs, but you can force a query against a specific server with -h:

Terminal
whois -h whois.arin.net 8.8.8.8

The flag is the right tool for two situations: when the default routing picks the wrong upstream (rare but happens for some legacy TLDs), and when you want to compare answers between regional registries (ARIN, RIPE, APNIC, AFRINIC, LACNIC).

Limit the Recursion

Most modern whois clients follow a referral chain: query IANA, follow the pointer to the TLD registry, follow the pointer to the registrar, and return the most specific answer. To stop registry-to-registrar recursion, pass --no-recursion:

Terminal
whois --no-recursion example.com

The flag is most useful when you specifically want the registry data and not the registrar’s slightly different format.

The -H option has a different purpose. It hides legal disclaimers from the output, which can make short lookups easier to read:

Terminal
whois -H example.com

Filter the Output

Real whois responses are dozens of lines long with legal disclaimers and template text. To extract one field, pipe through grep:

Terminal
whois example.com | grep -E "Registrar:|Expiry Date:"
output
 Registry Expiry Date: 2026-08-13T04:00:00Z
Registrar: RESERVED-Internet Assigned Numbers Authority

For a name-server list:

Terminal
whois example.com | awk '/Name Server:/ {print $NF}'
output
ELLIOTT.NS.CLOUDFLARE.COM
HERA.NS.CLOUDFLARE.COM

These short patterns work for monitoring scripts that watch for domain expirations or DNSSEC status changes.

Check Domain Availability

If the domain is not registered, the response says so explicitly. The exact wording depends on the registry:

Terminal
whois never-existed-domain-xyzzy.com
output
No match for domain "NEVER-EXISTED-DOMAIN-XYZZY.COM".

Some registries (notably .io, .co, and several ccTLDs) return an empty or near-empty response for unregistered domains. Two heuristics that work in scripts:

  • For .com/.net/.org, grep for No match for or Domain Name: in the output.
  • For ccTLDs, grep for Domain not found or check whether the registration fields exist.

Rate Limits and Etiquette

Registries rate-limit whois queries. Hammering them with a script is the fastest way to get blocked. If you query many domains, add a sleep between calls and cache the result locally. For bulk lookups, use the registry’s RDAP service directly or pay for a commercial WHOIS API.

A simple polite pattern:

Terminal
while IFS= read -r domain; do
 whois "$domain"
 sleep 2
done < domains.txt

Two seconds between queries is a sane starting point; raise it if you see throttling responses.

Privacy and Redacted Output

Since GDPR took effect, most TLDs redact personal contact information for individual registrants. The response usually contains placeholders like REDACTED FOR PRIVACY or Data Protected, Not Disclosed. For organizations and legal entities, the contact information often stays visible.

This is not a defect in whois; the underlying registry data is simply less detailed than it used to be. For account-takeover prevention and abuse handling, focus on the registrar field and the abuse contact email, which remain published.

Quick Reference

Task Command
Look up a domain whois example.com
Look up an IP address whois 93.184.216.34
Look up an AS number whois AS15169
Query a specific server whois -h whois.arin.net 8.8.8.8
Stop registry-to-registrar recursion whois --no-recursion example.com
Hide legal disclaimers whois -H example.com
Extract registrar and expiry fields whois example.com | grep -E “Registrar:|Expiry Date:"
List name servers whois example.com | awk ‘/Name Server:/ {print $NF}’

Troubleshooting

whois: command not found
Install the package: sudo apt install whois on Ubuntu, Debian, and Derivatives, or sudo dnf install whois on Fedora, RHEL, and Derivatives. The package is small and adds no significant dependencies.

Output says “fgets: Connection reset by peer”
The registry rate-limited or blocked your IP. Wait a few minutes and retry, slow your script down, or query through a different network.

Response is in a different language or alphabet
Some ccTLD registries return data in the local language. Look for the English section (usually further down), or pipe through iconv if the encoding makes the response unreadable in your terminal.

FAQ

What is the difference between WHOIS and RDAP?
RDAP (Registration Data Access Protocol) is the modern replacement for WHOIS. It returns structured JSON instead of free-text and supports authentication and access controls. Most registries now serve both, and RDAP is usually the better choice for scripts that need predictable fields.

Why does the data for the same domain look different between two whois runs?
Different clients and servers can follow the referral chain differently. One response may come from the registry, while another may include data from the registrar’s WHOIS server. Use --no-recursion when you want to stop at the registry answer.

Can I run my own WHOIS server?
Yes, but only registrars and registries have authoritative data. Self-hosted WHOIS servers are useful for internal directories (IP allocation in a large network), not for public domain lookups.

Conclusion

whois is the answer to “who owns this”, whether the “this” is a domain, an IP, or an AS number. The output is plain text, the flags are short, and a handful of grep/awk patterns turn it into a script-friendly data source. For bulk work, slow the queries down and respect the rate limits the registries publish.

For related reading, see our guides on the dig command and the nslookup command .

Bash Arithmetic: Integer and Floating-Point Math

Bash treats everything as a string by default, which catches many people out the first time they write total=$count+1 and end up with the literal text 5+1 instead of 6. The shell has dedicated arithmetic forms that evaluate numeric expressions properly, but they only handle integers; for floating-point math you reach for bc or awk. Once you know which form to use where, the math is short and predictable.

This guide explains how Bash arithmetic works, the differences between (( )), $(( )), and let, and how to combine them with external tools when you need decimals.

Why Plain Assignment Does Not Add

A first attempt at incrementing a variable usually looks like this:

sh
count=5
total=$count+1
echo "$total"
output
5+1

The shell sees $count as the string 5, joins it with +1, and assigns the result. To force numeric evaluation, use one of the arithmetic forms below.

The (( )) Compound Command

Wrap an expression in double parentheses to evaluate it as integer math:

sh
count=5
(( count = count + 1 ))
echo "$count"
output
6

Inside (( )), variable names work without $, the C-style operators are available (+, -, *, /, %, **, ++, --, <<, >>, &, |, ^, &&, ||), and the exit status of the whole expression is non-zero when the result is 0, which means you can use arithmetic in if:

sh
if (( count > 5 )); then
 echo "count is above 5"
fi
output
count is above 5

The shortcut increment and decrement operators read cleanly in loops:

sh
for (( i = 0; i < 3; i++ )); do
 echo "i=$i"
done
output
i=0
i=1
i=2

(( )) is the right form when you assign back to a variable or use the result for control flow. It does not print anything to standard output.

The $(( )) Expansion

When you want the value of an expression rather than the side effect, use the $(( )) arithmetic expansion. The result is substituted into the surrounding command like any other expansion:

sh
count=5
echo "Next: $(( count + 1 ))"
output
Next: 6

$(( )) is the right form for inline math inside echo, assignments to other variables, command arguments, and printf:

sh
files=42
echo "Average: $(( files / 7 )) per day"
output
Average: 6 per day

Notice that the division truncates: 42 / 7 happens to be exact, but 43 / 7 would yield 6, not 6.14. Bash arithmetic is integer-only; the decimal part is silently discarded.

The let Builtin

let is the older builtin for arithmetic. It evaluates each argument as an expression:

sh
let "count = 5 + 1"
echo "$count"
output
6

let is mostly historical at this point. (( )) does the same work without the quoting trap (let count=* would expand the * as a glob unless quoted) and reads more cleanly. New scripts should prefer (( )); let is worth recognizing in code you inherit.

Operators You Will Actually Use

Bash supports a wide list of arithmetic operators. These are the ones that come up in everyday scripts:

  • +, -, *, /, % - Standard arithmetic and remainder.
  • ** - Exponentiation.
  • ++, -- - Increment and decrement, prefix or postfix.
  • +=, -=, *=, /=, %= - Compound assignment.
  • ==, !=, <, <=, >, >= - Numeric comparison (inside (( ))).
  • &&, ||, ! - Logical AND, OR, NOT.
  • <<, >>, &, |, ^, ~ - Bitwise shifts and operations.

A small example that uses several:

sh
size=1024
if (( size > 0 && size % 2 == 0 )); then
 echo "Power of two? $(( (size & (size - 1)) == 0 ? 1 : 0 ))"
fi
output
Power of two? 1

The ternary operator (? :) works inside arithmetic contexts, which keeps short branches readable without nesting if.

Number Bases

Bash arithmetic supports several integer bases. Prefix a number to declare its base:

  • 0xNN for hexadecimal.
  • 0NN for octal.
  • BASE#NNN for any base from 2 to 64.

Examples:

sh
echo "$(( 0xff ))"
echo "$(( 0755 ))"
echo "$(( 2#1010 ))"
output
255
493
10

Watch out for leading zeros: 08 is interpreted as octal and rejected because 8 is not a valid octal digit. If user input may include leading zeros (HTTP status codes parsed from a string, timestamps), strip them before arithmetic with ${var#0} or use the explicit 10# base prefix:

sh
value="08"
echo "$(( 10#$value ))"
output
8

Floating-Point Math with bc

Bash itself cannot do decimal math, but it is happy to call out to a tool that can. bc is the arbitrary-precision calculator that ships with most distributions:

sh
echo "scale=2; 43 / 7" | bc
output
6.14

The scale=2 directive sets two decimal places of precision. Without it, bc truncates the division the same way Bash does. Use a higher scale for currency or scientific work:

sh
echo "scale=10; 4*a(1)" | bc -l
output
3.1415926532

The -l flag loads the math library, which gives you s (sine), c (cosine), a (arctangent), l (natural log), e (exponential), and sqrt. The expression above computes pi from 4 * arctan(1).

To capture the result into a variable:

sh
pi=$(echo "scale=4; 4*a(1)" | bc -l)
echo "pi = $pi"
output
pi = 3.1415

bc is the right tool when you need genuine decimals and do not want a heavyweight dependency. For one-off interactive calculations, run bc -l and type expressions at its prompt.

Floating-Point Math with awk

awk is the other obvious choice and is often faster because it does not start a separate calculator process. Use awk for inline expressions inside scripts:

sh
rate=$(awk 'BEGIN { printf "%.2f\n", 43 / 7 }')
echo "rate = $rate"
output
rate = 6.14

printf inside awk works the same way as the C function, with %.2f controlling the number of decimal places. For a percentage:

sh
pct=$(awk -v a=23 -v b=89 'BEGIN { printf "%.1f%%\n", (a / b) * 100 }')
echo "pct = $pct"
output
pct = 25.8%

Pass values into awk with -v name=value rather than building the expression by string concatenation; the -v form avoids quoting headaches and shell-injection issues when the inputs come from user data.

Increment Counters in a Loop

Counter loops are the bread and butter of arithmetic in scripts, and they lean on the increment and decrement operators . Two equivalent forms work; pick the one that reads best:

sh
count=0
while IFS= read -r line; do
 (( count++ ))
done < input.txt
echo "Lines: $count"
sh
count=0
while IFS= read -r line; do
 count=$(( count + 1 ))
done < input.txt
echo "Lines: $count"

The (( count++ )) form is shorter and is what most authors prefer. Both produce the same result and run at the same speed.

If the script uses set -e, avoid (( count++ )) when count may start at zero. The arithmetic command returns a failure status when the expression evaluates to 0, so the first increment can stop the script. Use pre-increment or assignment instead:

sh
(( ++count ))
(( count += 1 ))

Troubleshooting

syntax error in expression
A variable that should hold a number contains non-numeric characters (often a leading or trailing space from read, or a stray letter). Inside (( )) and $(( )), Bash reports a syntax error on the offending token. Trim the input with ${var//[[:space:]]/} or validate it before the arithmetic line.

division by 0
A divisor evaluated to zero, often because the variable was empty and Bash treated it as 0. Quote the expansion in your check (if [ -n "$divisor" ]) before the divide, and either skip the operation or substitute a default with ${divisor:-1}.

Result is 0 when it should be a fraction
Bash arithmetic is integer-only. Switch to bc with an explicit scale= or to awk with %.Nf formatting for decimal output.

FAQ

When should I use (( )) versus $(( ))?
Use (( )) for assignments and control flow (if, while, for). Use $(( )) when you want the value substituted into a surrounding command. They share the same expression syntax.

Can I do floating-point math without an external tool?
Not in Bash. ksh93 and zsh support floating-point in their arithmetic contexts; Bash does not. For Bash, route decimals through bc or awk.

Is there a performance difference between bc and awk?
awk is usually faster because it runs entirely inside a single process and does not communicate over a pipe. For one-off calculations the difference is negligible; in a tight loop, prefer awk or precompute the values with a single awk call instead of running bc per iteration.

Conclusion

Reach for (( )) and $(( )) whenever a script needs counters, conditions, or quick integer math, and switch to bc or awk the moment decimals enter the picture. Pair that habit with Bash strict mode and the patterns in our Bash best practices guide so numeric code keeps working even when the inputs do not.

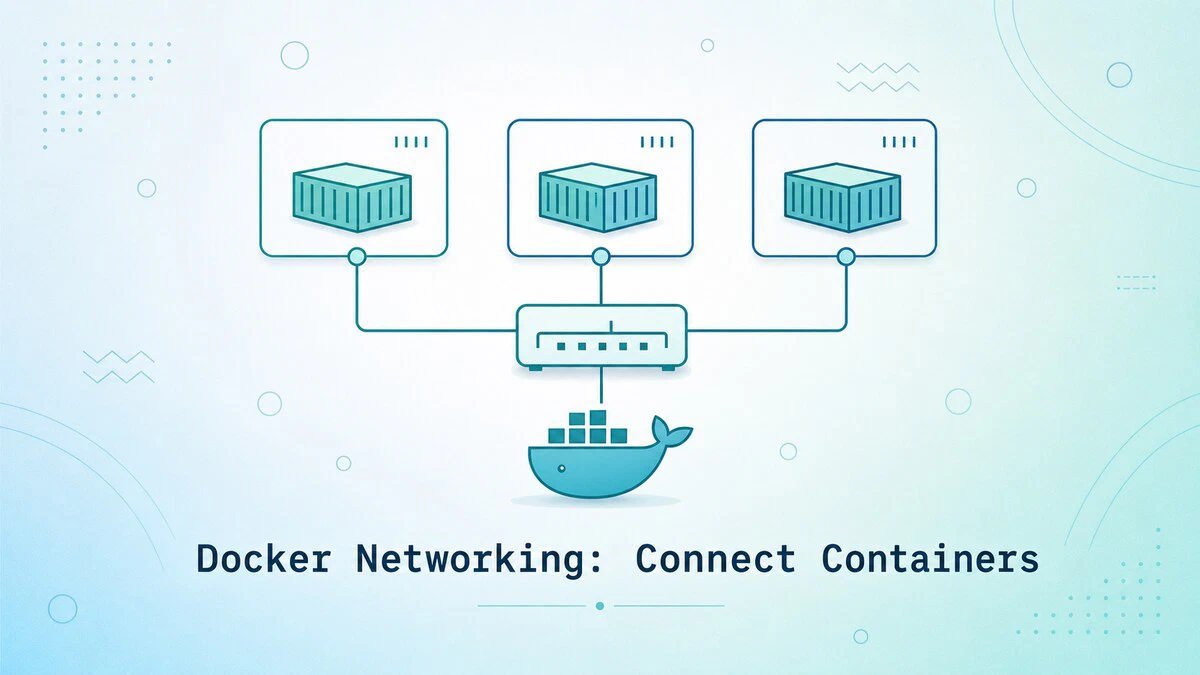
Docker Networking: Connect Containers

Once you move past single-container tests, the next problem is communication. A web application needs to reach its database, a reverse proxy needs to forward traffic to an app server, and none of those internal services should be exposed to the public internet by accident.

Docker networking handles that traffic. The defaults work for quick tests, but production-like setups are easier to manage when you understand networks, drivers, DNS names, and published ports. This guide explains how Docker networking works and walks through practical examples for connecting and isolating containers.

How Docker Networking Works

When the Docker daemon starts, it creates three networks automatically: bridge, host, and none. You can see them with docker network ls:

Terminal
docker network ls
output
NETWORK ID NAME DRIVER SCOPE
b84a2c1f9d8e bridge bridge local
c1f3a7b2d4e5 host host local
e7d6a8c2b1f4 none null local

Each network uses a driver that decides how containers on that network communicate:

  • bridge - Creates an isolated virtual network on one Docker host.
  • host - Removes network namespace isolation and uses the host network directly.
  • none - Starts the container with only a loopback interface.

The bridge driver is the default and works for most single-host applications. For anything beyond a quick test, create a user-defined bridge network instead of relying on the default bridge network. User-defined networks give containers automatic DNS resolution by name and keep unrelated services separated.

The Default Bridge Network

When you start a container without specifying a network, Docker attaches it to the default bridge network. Containers on this network can reach each other by IP address, but not by container name, which makes configuration brittle.

Start two containers on the default network:

Terminal
docker run -d --name default_web1 nginx
docker run -d --name default_web2 nginx

Inspect the default bridge to see both containers and their IP addresses:

Terminal
docker network inspect bridge

The output includes a Containers section listing each container with its assigned IP address. Containers on the default bridge can communicate with those addresses, but a name such as default_web2 does not resolve automatically from default_web1. That is the main reason to avoid the default bridge for application stacks.

Creating a User-Defined Bridge Network

User-defined bridge networks solve the name resolution problem and let you group related containers together. Create one with docker network create:

Terminal
docker network create app_net
output
a1b2c3d4e5f67890123456789abcdef0

Now run containers on that network by passing --network:

Terminal
docker run -d --name net_web --network app_net nginx
docker run -d --name net_client --network app_net alpine sleep 3600

From inside net_client, you can reach net_web by container name:

Terminal
docker exec -it net_client ping -c 2 net_web
output
PING net_web (172.18.0.2): 56 data bytes
64 bytes from 172.18.0.2: seq=0 ttl=64 time=0.098 ms
64 bytes from 172.18.0.2: seq=1 ttl=64 time=0.074 ms

The embedded Docker DNS server resolves the container name to the correct IP address. If you add or remove containers, the DNS records update automatically, so you do not have to track container IP addresses yourself.

Publishing Ports to the Host

Containers on a bridge network are reachable from other containers on the same network, but not from outside the Docker host unless you publish a port. Use -p host_port:container_port with docker run:

Terminal
docker run -d --name port_web -p 8080:80 nginx

Nginx listens on port 80 inside the container, and Docker forwards traffic from port 8080 on the host to it. A browser pointed at http://localhost:8080 reaches the container.

You can publish multiple ports by repeating the flag:

Terminal
docker run -d --name port_app -p 8081:80 -p 8443:443 nginx

By default, Docker publishes the port on all host interfaces. To bind only to a specific host interface, prefix the host port with the address:

Terminal
docker run -d --name loopback_web -p 127.0.0.1:8082:80 nginx

This binds the port to the loopback interface only. The container is reachable from the host itself, but not from other machines on the network.

Connecting a Running Container to a Network

A container is not locked to the network it was started on. You can attach a running container to an additional network with docker network connect:

Terminal
docker network connect app_net default_web1

After connecting, default_web1 has an IP address on both its original network and app_net. Containers on either network can reach it through the network they share. This is useful when a service needs to talk to more than one group of containers, for example a shared logger or monitoring agent.

To remove a container from a network, use docker network disconnect:

Terminal
docker network disconnect app_net default_web1

Isolating Containers with Separate Networks

Multiple user-defined networks act as separate network segments. Containers on different networks cannot reach each other unless one of them is explicitly connected to both. This makes it simple to isolate a frontend tier from a database tier.

Create two networks:

Terminal
docker network create frontend_net
docker network create backend_net

Start a database on backend_net, an application container on both networks, and a web server on frontend_net:

Terminal
docker run -d --name db_net --network backend_net -e POSTGRES_PASSWORD=localpass postgres:16-alpine
docker run -d --name app_net_demo --network backend_net alpine sleep 3600
docker network connect frontend_net app_net_demo
docker run -d --name web_net --network frontend_net -p 8083:80 nginx

The web_net container can reach app_net_demo over frontend_net, and app_net_demo can reach db_net over backend_net. The web_net container cannot reach db_net directly because they do not share a network. If the web container is compromised, it cannot open a connection to the database without going through the application layer.

Warning
The PostgreSQL password above is only a local demo value. Use strong secrets for real services, and do not store production credentials in shell history, Compose files, or source control.

The host Network Driver

The host driver skips network namespace isolation and attaches the container directly to the host network. The container shares the host network interfaces, so any port it listens on is immediately available on the host:

Terminal
docker run --rm -d --name host_nginx --network host nginx

Nginx is now reachable on port 80 of the host with no port publishing. In host mode, -p, --publish, and --publish-all are ignored because there is no separate container network namespace to map from.

Use host networking only when you specifically need it, such as for very high port counts or when the application must bind directly to host interfaces. The trade-off is weaker network isolation and possible port conflicts with services already running on the host.

Host networking is native to Docker Engine on Linux. Docker Desktop supports host networking in version 4.34 and later, but it must be enabled in Docker Desktop settings.

The none Network Driver

The none driver disables external networking for the container. The container gets a loopback interface and nothing else:

Terminal
docker run --rm --network none alpine ip addr

This is useful for batch jobs that process local files and should not reach the network.

Inspecting Networks

docker network inspect prints the full configuration of a network in JSON:

Terminal
docker network inspect app_net

The output includes the subnet, gateway, driver options, and a list of every container attached to the network with its IPv4 and IPv6 addresses. When a container cannot reach another container, this is usually the first place to look.

For a quick overview across all bridge networks, use a filter:

Terminal
docker network ls --filter driver=bridge

You can also inspect a container to see its network attachments:

Terminal
docker inspect net_web

Look for the NetworkSettings.Networks section in the output.

Removing Networks

Unused networks remain on the host until you remove them. Delete a single network with docker network rm:

Terminal
docker network create temp_net
docker network rm temp_net

The removal command fails if any containers are still attached. Stop or disconnect those containers first, then retry.

To clean up every user-defined network that is not in use, run:

Terminal
docker network prune

Docker asks for confirmation and then removes idle user-defined networks. The built-in bridge, host, and none networks are not removed.

Docker Compose Networking

When you run applications with Docker Compose , Compose creates a dedicated default network for each project and attaches every service to it. Services reach each other by service name without extra configuration:

docker-compose.ymlyaml
services:
 web:
 image: nginx
 ports:
 - "8080:80"

 db:
 image: postgres:16-alpine
 environment:
 POSTGRES_PASSWORD: ${POSTGRES_PASSWORD}

Define the password in a local .env file:

.envtxt
POSTGRES_PASSWORD=change-this-password

From the web service, db resolves to the database container IP address. You can also declare multiple named networks under a top-level networks key and attach services selectively, which mirrors the frontend and backend split shown earlier.

Warning
Do not commit .env files or real passwords to version control. Add .env to .gitignore, and use secret management from your platform for production credentials.

Quick Reference

For a printable quick reference, see the Docker cheatsheet .

Command Description
docker network ls List Docker networks
docker network create app_net Create a user-defined bridge network
docker run --network app_net image Start a container on a network
docker network connect app_net container Attach a running container to a network
docker network disconnect app_net container Remove a container from a network
docker network inspect app_net Show network configuration and attached containers
docker run -p 8080:80 image Publish container port 80 on host port 8080
docker run -p 127.0.0.1:8080:80 image Publish a port only on the host loopback interface
docker run --network host image Run a container on the host network
docker run --network none image Run a container with no external network access
docker network rm app_net Remove an unused network
docker network prune Remove all unused user-defined networks

Troubleshooting

Containers cannot reach each other by name
Name-based DNS works on user-defined networks. If you started the containers on the default bridge network, recreate them on a user-defined network, or attach them with docker network connect.

Port is already allocated when publishing
Another process on the host is already using that port. Pick a different host port, or find and stop the conflicting process with lsof -i :PORT .

Cannot remove a network
The network still has containers attached. List them with docker network inspect NAME, disconnect or stop them, and try again.

Service is unreachable from the host after publishing a port
Check that the service inside the container is listening on 0.0.0.0, not only on 127.0.0.1. A service bound to the container loopback interface is not reachable through the published port.

The -p option does not work with host networking
Published ports are ignored when a container uses --network host. The container is already using the host network directly, so it must listen on the desired host port itself.

FAQ

What is the difference between a bridge and a host network?
A bridge network creates an isolated virtual network for containers and requires port publishing to expose services on the host. A host network attaches the container directly to the host network, with no separate container network namespace and no port publishing.

Do containers on the same user-defined bridge network need published ports to talk to each other?
No. Port publishing controls access from the host or external network. Containers on the same user-defined network reach each other directly on the container port.

Can two containers share the same name on different networks?
No. Container names are unique per Docker daemon, regardless of how many networks they are attached to. Network-scoped aliases, set with --network-alias, can overlap across networks.

Why does ping not work from some containers?
Some minimal images do not include ping. Alpine includes it by default, which makes it useful for quick network tests. Other images may require installing the relevant package, or you can use a temporary troubleshooting image.

Conclusion

Docker networking becomes easier to manage when each application gets its own user-defined network and only public-facing services publish ports. For more Docker basics, see the docker run and docker exec guides.

How to Install Podman on Ubuntu: Rootless Container Alternative to Docker

Podman is a daemonless container engine that runs OCI containers without a long-lived root process. Each container is started as a regular user-owned process, which removes the privileged daemon that Docker relies on and makes containers safer to run on shared servers. The command-line surface mirrors Docker almost exactly, so most Dockerfiles, image references, and docker run patterns work with little to no change.

This guide explains how to install Podman on Ubuntu, configure rootless mode, run your first container, and use Podman as a drop-in replacement for the Docker CLI.

Quick Reference

Task Command
Install Podman sudo apt install podman
Run a container podman run -d --name web -p 8080:80 nginx
List containers podman ps -a
Build an image podman build -t myimage .
List images podman images
Pull an image podman pull alpine:latest
Stop and remove podman rm -f web
Inspect rootless setup podman info

Install Podman

Podman has been part of the Ubuntu universe repository since 20.10, so on every supported release you can install it through apt without adding a third-party PPA.

Update the package index, then install:

Terminal
sudo apt update
sudo apt install podman

Confirm the version:

Terminal
podman --version
output
podman version 5.7.0

Ubuntu 26.04 ships Podman 5.7 from the universe repository. Ubuntu 24.04 ships the 4.9 series, while Ubuntu 22.04 ships the 3.4 series, so the exact version depends on the Ubuntu release you are using.

Verify the Rootless Setup

Podman supports both root and rootless modes, and the rootless mode is the one most users want. Run podman info as your regular user and look for rootless: true:

Terminal
podman info | head -20
output
host:
arch: amd64
cgroupManager: systemd
...
security:
rootless: true

Two pieces have to be in place for rootless containers to work: subordinate UID/GID mappings, and a user namespace. Ubuntu sets both up automatically on first run, but you can confirm with:

Terminal
cat /etc/subuid /etc/subgid
output
sara:100000:65536
sara:100000:65536

Each user gets a range of 65,536 subordinate UIDs and GIDs that Podman uses to map container processes to non-overlapping host IDs. If the file is missing your user, add an entry with sudo usermod --add-subuids 100000-165535 --add-subgids 100000-165535 sara and run podman system migrate to apply the change.

Run Your First Container

Pull and run an Nginx container in detached mode, exposing port 8080 on the host:

Terminal
podman run -d --name web -p 8080:80 nginx
output
Resolved "nginx" as an alias (/etc/containers/registries.conf.d/shortnames.conf)
Trying to pull docker.io/library/nginx:latest...
Getting image source signatures
Copying blob sha256:...
Writing manifest to image destination
Storing signatures
2b9bd4e1f3...

Check that the container is running:

Terminal
podman ps
output
CONTAINER ID IMAGE COMMAND CREATED STATUS PORTS NAMES
2b9bd4e1f3a8 docker.io/library/nginx:latest nginx -g daemon o... 10 seconds ago Up 10 seconds 0.0.0.0:8080->80/tcp web

Hit the published port from the host:

Terminal
curl -I http://localhost:8080
output
HTTP/1.1 200 OK
Server: nginx/1.27.4

The response confirms that the user-mode network stack forwarded the request into the container correctly. Stop and remove the container with:

Terminal
podman rm -f web

Configure Registries

By default Podman searches a configured list of registries when you run podman pull nginx (without a registry prefix). The list lives in /etc/containers/registries.conf. To prefer Docker Hub, edit the file:

Terminal
sudo nano /etc/containers/registries.conf

Set the unqualified-search registries:

/etc/containers/registries.conftoml
unqualified-search-registries = ["docker.io", "quay.io"]

Save and exit. From now on podman pull alpine resolves to docker.io/library/alpine:latest, which matches Docker’s default behavior. Save yourself confusion by always pulling with the full reference (podman pull docker.io/library/alpine) in scripts and CI pipelines.

Use Podman as a Docker Replacement

If you already have shell history, Makefiles, or scripts that call docker, install the alias package and keep them working:

Terminal
sudo apt install podman-docker

The package adds a /usr/bin/docker symlink that points to podman, plus a stub that suppresses the daemon-not-running warning. Test it:

Terminal
docker run --rm hello-world
output
Hello from Docker!

Behind the scenes, docker run invoked podman run. Most everyday commands (build, pull, push, images, ps, logs, exec) work identically. The differences show up around Docker Compose and the daemon socket; Podman 4 ships its own socket that Docker Compose can target by setting DOCKER_HOST.

Build an Image with a Dockerfile

Podman builds OCI images from a standard Dockerfile, no changes required. Create a small Flask app to demonstrate:

Terminal
mkdir hello-podman && cd hello-podman
nano app.py
app.pypy
from flask import Flask

app = Flask(__name__)


@app.route("/")
def index():
 return "Hello from Podman!"


if __name__ == "__main__":
 app.run(host="0.0.0.0", port=5000)

Write the Dockerfile:

Dockerfiledockerfile
FROM python:3.12-slim
WORKDIR /app
RUN pip install --no-cache-dir flask
COPY app.py .
EXPOSE 5000
CMD ["python", "app.py"]

Build the image:

Terminal
podman build -t hello-podman .
output
STEP 1/6: FROM python:3.12-slim
STEP 2/6: WORKDIR /app
...
Successfully tagged localhost/hello-podman:latest

Run a container from the new image:

Terminal
podman run -d --name hello -p 5000:5000 hello-podman
curl http://localhost:5000
output
Hello from Podman!

The image and container both live in the user’s storage (~/.local/share/containers), so no sudo is involved at any step.

Run Pods of Containers

The name “Podman” comes from its support for Kubernetes-style pods: groups of containers that share a network namespace. Create an empty pod, then add containers to it:

Terminal
podman pod create --name webapp -p 8080:80
podman run -d --pod webapp --name redis redis:7
podman run -d --pod webapp --name nginx nginx

Inside the pod, nginx can reach Redis at localhost:6379 because they share the network namespace. List pods with:

Terminal
podman pod ps
output
POD ID NAME STATUS CREATED INFRA ID # OF CONTAINERS
8f4d7b8c0e1f webapp Running 20 seconds ago c2a8f9b1d3e4 3

The count of three includes an infra container that holds the shared namespaces.

Run Podman as a systemd Service

To start a container at boot in rootless mode, use a Quadlet container unit. Quadlet is Podman’s current systemd integration method and keeps the container definition in a small, readable file.

Terminal
mkdir -p ~/.config/containers/systemd
nano ~/.config/containers/systemd/web.container

Add the container definition:

~/.config/containers/systemd/web.containerini
[Unit]
Description=Rootless Nginx container

[Container]
Image=docker.io/library/nginx:latest
ContainerName=web
PublishPort=8080:80

[Service]
Restart=always

[Install]
WantedBy=default.target

Reload the user systemd manager, then start the generated service:

Terminal
systemctl --user daemon-reload
systemctl --user start web.service

Enable lingering so the user services keep running after logout:

Terminal
sudo loginctl enable-linger sara

The [Install] section tells the Podman systemd generator to attach the service to the user’s default target. The container now starts without root or a system-wide daemon.

Troubleshooting

Error: short-name "nginx" did not resolve to an alias
The unqualified-search-registries list is empty. Edit /etc/containers/registries.conf and add at least docker.io, or pull with the full reference (podman pull docker.io/library/nginx).

ERRO[0000] cannot find UID/GID for user
The current user has no entry in /etc/subuid or /etc/subgid. Run sudo usermod --add-subuids 100000-165535 --add-subgids 100000-165535 $USER, then podman system migrate.

Ports under 1024 refuse to bind in rootless mode
The kernel restricts low ports for non-root users. Either publish to a high port (-p 8080:80), or allow your user to bind low ports with sudo sysctl net.ipv4.ip_unprivileged_port_start=80.

FAQ

Is Podman a drop-in Docker replacement?
For everyday run, build, pull, push, and exec workflows, yes. Compose and the long-lived socket need extra setup. Most CI jobs only need the CLI and switch over without changes.

Does Podman work with Docker Compose?
Yes. Start the Podman socket with systemctl --user enable --now podman.socket, export DOCKER_HOST=unix://$XDG_RUNTIME_DIR/podman/podman.sock, and run docker compose up.

Are Podman images compatible with Docker?
Yes. Both produce OCI-compliant images, so an image built with podman build runs unchanged under Docker, and vice versa.

Conclusion

Podman gives you the Docker workflow without the daemon and without root, which is often what you want on a multi-user server or a developer workstation. Install it from apt, alias docker if you have existing scripts, and the rest of the CLI feels familiar.

For follow-up reading, see our guides on installing Docker on Ubuntu 26.04 and building Docker images with a Dockerfile .

nmcli Command in Linux: NetworkManager CLI Reference

When a Linux system needs a network change from a terminal, nmcli is usually the cleanest way to make it. It controls NetworkManager, the service that handles wired, wireless, VPN, and other connection profiles on many Linux desktops and servers.

This guide explains how to inspect device status, list and edit connections, join Wi-Fi networks, assign a static IP address, and get script-friendly output with nmcli.

Before You Begin

Before changing network settings, confirm that NetworkManager is installed and running:

Terminal
systemctl status NetworkManager

On distributions that use a different network stack, install NetworkManager from the package manager and enable the service before continuing. Most Ubuntu, Fedora, and Arch desktops have it preinstalled.

If you are connected over SSH , be careful with commands that disconnect an interface, change an address, or bring a profile down. A wrong gateway, IP address, or device name can drop the remote session.

nmcli Syntax

The general nmcli syntax is:

txt
nmcli [OPTIONS] OBJECT { COMMAND | help }

OBJECT is the part of NetworkManager you want to inspect or change. The most common objects are:

  • general - show overall NetworkManager status and hostname settings
  • networking - enable, disable, or check networking
  • radio - control Wi-Fi and WWAN radio switches
  • device - show and manage network interfaces
  • connection - show and manage saved connection profiles
  • monitor - watch NetworkManager events in real time

You can abbreviate most objects, for example nmcli con show instead of nmcli connection show, but the full form is clearer in scripts and documentation.

Show General Status

The general subcommand reports the overall NetworkManager state, the hostname, and whether networking is enabled:

Terminal
nmcli general status
output
STATE CONNECTIVITY WIFI-HW WIFI WWAN-HW WWAN
connected full enabled enabled enabled enabled

Read or change the system hostname through the same subcommand:

Terminal
nmcli general hostname
sudo nmcli general hostname server01

The second form writes the new hostname to /etc/hostname and updates the kernel value without a reboot. For more hostname options, see the guide on changing the hostname in Linux .

Manage Devices

A device in NetworkManager is a physical or virtual interface, for example eth0, wlan0, or wg0. List every known device with:

Terminal
nmcli device status
output
DEVICE TYPE STATE CONNECTION
eth0 ethernet connected Wired connection 1
wlan0 wifi connected home-wifi
lo loopback unmanaged --

Show detailed properties of a single device, including the MAC address, driver, and current IP configuration:

Terminal
nmcli device show eth0

Bring an interface up or down without changing the underlying connection profile:

Terminal
sudo nmcli device connect eth0
sudo nmcli device disconnect eth0

disconnect stops the connection but keeps the profile available for the next connect call. Do not disconnect the device that carries your current SSH session unless you have another access path.

Manage Connection Profiles

NetworkManager stores each network as a connection profile under /etc/NetworkManager/system-connections/. List every profile:

Terminal
nmcli connection show
output
NAME UUID TYPE DEVICE
Wired connection 1 3f4e... ethernet eth0
home-wifi 7a92... wifi wlan0

Activate a saved profile by name:

Terminal
sudo nmcli connection up "home-wifi"

Deactivate it without deleting the profile:

Terminal
sudo nmcli connection down "home-wifi"

Delete a profile when it is no longer needed:

Terminal
sudo nmcli connection delete "home-wifi"

Deleting a profile removes the saved NetworkManager configuration. If you only want to stop using it for the moment, bring it down instead.

Connect to a Wi-Fi Network

Scan for available networks. The radio must be on for the scan to return results:

Terminal
nmcli device wifi list

Join an open or WPA2 network in one call. NetworkManager creates a new profile and stores the password in the system keyring:

Terminal
sudo nmcli device wifi connect "home-wifi" password "secret-passphrase"

Avoid putting real Wi-Fi passwords in shell history, shared scripts, or configuration repositories. For interactive use, run sudo nmcli --ask device wifi connect "home-wifi" so nmcli prompts for the password instead.

For hidden networks, add the hidden yes flag so NetworkManager probes the SSID directly:

Terminal
sudo nmcli device wifi connect "office-hidden" password "secret-passphrase" hidden yes

Turn the radio on or off without removing saved profiles:

Terminal
sudo nmcli radio wifi off
sudo nmcli radio wifi on

Configure a Static IP Address

Static addressing is one of the most common scripted changes on a server. The example below sets a static IPv4 address, gateway, and DNS servers on the existing Wired connection 1 profile:

Terminal
sudo nmcli connection modify "Wired connection 1" \
 ipv4.method manual \
 ipv4.addresses 192.168.1.50/24 \
 ipv4.gateway 192.168.1.1 \
 ipv4.dns "1.1.1.1 9.9.9.9"

Apply the change by reactivating the profile:

Terminal
sudo nmcli connection up "Wired connection 1"

If you are changing a remote machine, confirm the address, prefix, gateway, and DNS values before running connection up. A wrong value can make the host unreachable. On Ubuntu systems that use Netplan instead, see the guide on configuring a static IP address on Ubuntu .

Switch back to DHCP at any point with:

Terminal
sudo nmcli connection modify "Wired connection 1" \
 ipv4.method auto \
 ipv4.addresses "" \
 ipv4.gateway "" \
 ipv4.dns ""
sudo nmcli connection up "Wired connection 1"

The empty values clear the manual entries that would otherwise stay on the profile.

Add a New Wired Connection

When the default profile is missing or has been deleted, create a fresh ethernet profile:

Terminal
sudo nmcli connection add type ethernet ifname eth0 con-name "wired-static" \
 ipv4.method manual \
 ipv4.addresses 192.168.1.50/24 \
 ipv4.gateway 192.168.1.1 \
 ipv4.dns 1.1.1.1
sudo nmcli connection up "wired-static"

This pattern works well in provisioning scripts when you first check whether the profile exists, or when you intentionally replace a known profile. If you only need to change an existing profile, use connection modify instead of deleting and recreating it.

Set DNS Servers

You can change DNS servers without changing the IP address method. For example, to set Cloudflare and Quad9 DNS on a wired profile:

Terminal
sudo nmcli connection modify "Wired connection 1" ipv4.dns "1.1.1.1 9.9.9.9"
sudo nmcli connection up "Wired connection 1"

To append another DNS server instead of replacing the whole list, prefix the property with +:

Terminal
sudo nmcli connection modify "Wired connection 1" +ipv4.dns 8.8.8.8

After changing DNS, verify name resolution with a lookup tool such as dig or nslookup .

Common Examples

Show only the active connections in a parseable format. The -t flag enables terse output and -f selects fields:

Terminal
nmcli -t -f NAME,DEVICE connection show --active

Watch interface events in real time, useful when a connection drops during a remote session:

Terminal
nmcli monitor

Reload all profile files from disk after editing them by hand:

Terminal
sudo nmcli connection reload

For low-level interface and route inspection outside NetworkManager, pair nmcli with the ip command .

Quick Reference

For a printable quick reference, see the nmcli cheatsheet .

Task Command
Show overall status nmcli general status
Show syntax help nmcli OBJECT help
List devices nmcli device status
List connection profiles nmcli connection show
Activate a profile sudo nmcli connection up <name>
Deactivate a profile sudo nmcli connection down <name>
Scan Wi-Fi networks nmcli device wifi list
Join a Wi-Fi network sudo nmcli device wifi connect <ssid> password <pwd>
Prompt for Wi-Fi password sudo nmcli --ask device wifi connect <ssid>
Set static IPv4 sudo nmcli connection modify <name> ipv4.method manual ipv4.addresses <ip/cidr>
Set DNS servers sudo nmcli connection modify <name> ipv4.dns "<a> <b>"
Switch back to DHCP sudo nmcli connection modify <name> ipv4.method auto ipv4.addresses "" ipv4.gateway "" ipv4.dns ""
Reload profile files sudo nmcli connection reload
Watch events nmcli monitor

Troubleshooting

Error: NetworkManager is not running
Start the service with sudo systemctl start NetworkManager and enable it at boot with sudo systemctl enable NetworkManager. On a fresh server install, the package may not be present yet.

Wi-Fi list is empty after nmcli device wifi list
The radio is most likely off. Run sudo nmcli radio wifi on, and check that no rfkill switch is blocking the device with rfkill list.

A new static IP does not take effect
NetworkManager applies the change only after the connection is reactivated. Run sudo nmcli connection up <name> after connection modify. If a stale DHCP lease is still in place, run sudo nmcli connection down <name> first.

Not authorized to control networking
The operation requires administrator privileges or a PolicyKit rule that allows the current user. Run the command with sudo, or ask the system administrator to grant the needed NetworkManager permissions.

A profile keeps reverting to DHCP after reboot
A second profile or a cloud-init configuration may be overwriting it. Check /etc/NetworkManager/system-connections/ and /etc/netplan/ for conflicting files.

Conclusion

nmcli gives you a scriptable way to inspect NetworkManager state, activate profiles, join Wi-Fi networks, and make persistent IP and DNS changes. For deeper network troubleshooting, use it alongside ip, ss, dig, and the system logs so you can see both the saved profile and the live kernel state.

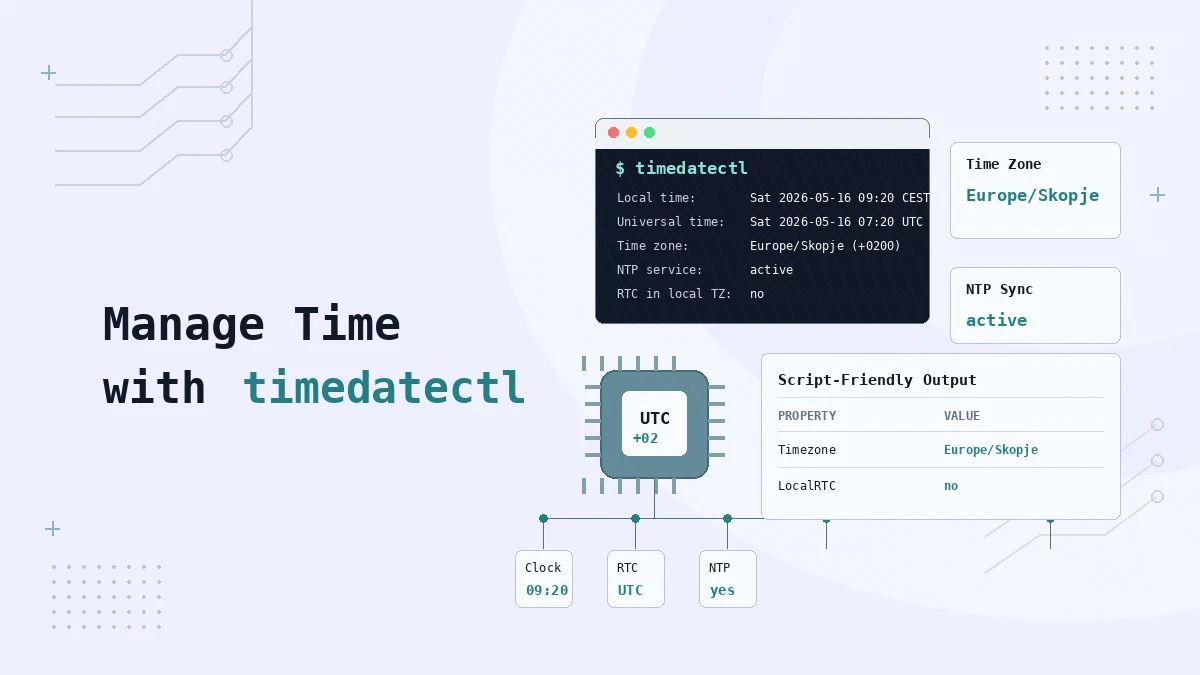
timedatectl Command in Linux: Manage Time, Date, and Time Zone

Wrong system time can break TLS checks, make cron jobs run at the wrong hour, and leave logs with misleading timestamps. On systemd-based Linux systems, timedatectl is the standard tool for checking and changing time settings.

timedatectl is part of systemd and is available on most systemd-based distributions. It handles time zones, NTP synchronization, RTC settings, and manual time adjustments from the command line. This guide explains how to use it with practical examples.

Syntax

txt
timedatectl [OPTIONS] COMMAND

When called without any arguments, timedatectl shows the current status, which is the same as running timedatectl status.

Check Current Time and Date

Run timedatectl with no arguments to see the full time status:

Terminal
timedatectl
output
 Local time: Tue 2026-04-14 12:00:00 CEST
Universal time: Tue 2026-04-14 10:00:00 UTC
RTC time: Tue 2026-04-14 10:00:00
Time zone: Europe/Berlin (CEST, +0200)
System clock synchronized: yes
NTP service: active
RTC in local TZ: no

The output shows the local time in your configured time zone, the same moment in UTC, and the hardware clock (RTC) time. System clock synchronized: yes means NTP has synced the clock recently. NTP service: active means systemd-timesyncd (or another NTP daemon) is running and managing synchronization.

If RTC in local TZ shows yes, the hardware clock is set to local time rather than UTC. Most Linux systems keep the hardware clock in UTC, which avoids daylight saving time complications when rebooting.

Set the Time Zone

To set the system time zone, use set-timezone followed by a time zone identifier:

Terminal
sudo timedatectl set-timezone America/New_York

After running this, timedatectl shows the new time zone immediately. The change persists across reboots.

If you do not know the exact time zone identifier, use list-timezones:

Terminal
timedatectl list-timezones

The list is long, so pipe it through grep to filter by region:

Terminal
timedatectl list-timezones | grep America
output
America/Adak
America/Anchorage
America/Anguilla
America/Antigua
America/Araguaina
America/Argentina/Buenos_Aires
...
America/New_York
...

Time zone identifiers follow the Region/City format, such as Europe/Paris, Asia/Tokyo, or Australia/Sydney. For a step-by-step walkthrough, see the guide on how to set or change the time zone in Linux .

Enable and Disable NTP Synchronization

NTP (Network Time Protocol) keeps the system clock accurate by periodically syncing it against internet time servers. timedatectl can enable or disable NTP management:

Terminal
sudo timedatectl set-ntp true
Terminal
sudo timedatectl set-ntp false

After enabling NTP, run timedatectl to confirm NTP service: active appears in the output.

Turn off NTP before setting the time manually. If NTP is active, timedatectl rejects direct clock changes.

Set the Time and Date Manually

To set the clock manually, you must first disable NTP synchronization:

Terminal
sudo timedatectl set-ntp false

Then set the time and date using the set-time subcommand. You can provide a full timestamp:

Terminal
sudo timedatectl set-time '2026-04-15 14:30:00'

To set only the time and keep the current date:

Terminal
sudo timedatectl set-time '14:30:00'

To set only the date and keep the current time:

Terminal
sudo timedatectl set-time '2026-04-15'

After setting the time, you can re-enable NTP to let the system sync automatically afterward:

Terminal
sudo timedatectl set-ntp true

Set the Hardware Clock Mode

The RTC, or hardware clock, can store time in UTC or in local time. Linux systems should normally keep the RTC in UTC because it avoids daylight saving time issues and works better on servers.

To make sure the hardware clock uses UTC, run:

Terminal
sudo timedatectl set-local-rtc 0

If you dual-boot with an operating system that expects the hardware clock to use local time, you can switch the RTC to local time:

Terminal
sudo timedatectl set-local-rtc 1

After changing the RTC mode, run timedatectl again and check the RTC in local TZ line. Use local RTC only when another operating system on the same machine requires it.

Check NTP Synchronization Status

For more detail about the NTP sync, use timesync-status. This subcommand is provided by systemd-timesyncd and shows the current server, offset, and polling interval:

Terminal
timedatectl timesync-status
output
 Server: 185.125.190.56 (ntp.ubuntu.com)
Poll interval: 34min 8s (min: 32s; max 34min 8s)
Leap: normal
Version: 4
Stratum: 2
Reference: 17.253.52.253
Precision: 1us (-19)
Root distance: 19.455ms (max: 5s)
Offset: -2.408ms
Delay: 29.124ms
Jitter: 5.716ms
Packet count: 5

Offset is how far your system clock drifted before the last sync. A small offset, under a few hundred milliseconds, is normal. A large offset can point to network problems or a misconfigured time source.

timesync-status only works when systemd-timesyncd is handling NTP. If your system uses a different NTP daemon such as chrony or ntpd, check its own status commands instead.

Machine-Parseable Output

The show subcommand prints the same information as status in a key-value format that is easier to parse in scripts:

Terminal
timedatectl show
output
Timezone=Europe/Berlin
LocalRTC=no
CanNTP=yes
NTP=yes
NTPSynchronized=yes
TimeUSec=Tue 2026-04-14 10:00:00 UTC
RTCTimeUSec=Tue 2026-04-14 10:00:00 UTC

Pass --property to extract a single value:

Terminal
timedatectl show --property=Timezone --value
output
Europe/Berlin

This is useful in automation and configuration management scripts where you need to check the current time zone without parsing the human-readable status output.

For timesync details in key-value format, use show-timesync:

Terminal
timedatectl show-timesync

This gives scripts access to systemd-timesyncd properties such as the current server name, poll interval, and root distance.

timedatectl Options

  • --no-ask-password - Do not prompt for authentication; use the invoking user’s credentials
  • --adjust-system-clock - When setting the RTC, also adjust the system clock accordingly
  • --no-pager - Print output without piping through a pager
  • -p NAME, --property=NAME - Show one named property from show output
  • -H ADDR, --host=ADDR - Execute the command on a remote host over SSH
  • -M MACHINE, --machine=MACHINE - Execute the command inside a local container

Quick Reference

For a printable quick reference, see the timedatectl cheatsheet .

Command Description
timedatectl Show current time, time zone, and NTP status
timedatectl show Show status in key-value format (script-friendly)
timedatectl list-timezones List all available time zone identifiers
sudo timedatectl set-timezone TZ Set the time zone (e.g., America/New_York)
sudo timedatectl set-ntp true Enable NTP synchronization
sudo timedatectl set-ntp false Disable NTP synchronization
sudo timedatectl set-time 'YYYY-MM-DD HH:MM:SS' Set time and date manually (NTP must be off)
sudo timedatectl set-local-rtc 0 Store the hardware clock in UTC
timedatectl timesync-status Show NTP sync detail from systemd-timesyncd
timedatectl show-timesync Show NTP sync detail in key-value format
timedatectl show --property=Timezone --value Print the current time zone name only

Troubleshooting

Failed to set time: Automatic time synchronization is enabled
NTP is active and has locked the clock. Disable NTP first with sudo timedatectl set-ntp false, then run your set-time command.

Failed to set time: Access denied
You need administrator privileges. Prepend sudo to the command.

Failed to connect to bus: No such file or directory
timedatectl communicates with systemd-logind over D-Bus. This error usually appears in minimal containers or chroot environments where systemd is not running. In those cases, set the time directly with the date command: sudo date -s '2026-04-15 14:30:00'.

timesync-status returns Failed to query server: Unit dbus-org.freedesktop.timesync1.service not found
systemd-timesyncd is not installed or not running. If your system uses chrony or ntpd instead, check their status with chronyc tracking or ntpq -p.

FAQ

What is the difference between timedatectl and the date command?
date reads and formats timestamps, and it can set the system clock with sudo date -s. timedatectl is the systemd tool that also manages time zones, the RTC, and NTP synchronization. On systemd-based systems, use timedatectl for time configuration and date for formatting timestamps.

Does timedatectl work on non-systemd distributions?
No. timedatectl is part of systemd and requires systemd-logind and D-Bus to be running. On systems without systemd (such as Alpine Linux with OpenRC), use the date command and edit /etc/localtime or /etc/timezone directly.

How do I check which NTP servers the system is using?
Run timedatectl timesync-status to see the current NTP server. To see the full list of configured servers, check /etc/systemd/timesyncd.conf. The NTP= and FallbackNTP= lines list the configured time servers.

How do I view historical time changes in system logs?
timedatectl itself does not keep a history, but the system journal does. Search for time-related events with:

Terminal
journalctl -u systemd-timesyncd

For more on reading system logs, see the journalctl guide .

Conclusion

For day-to-day administration, timedatectl is usually enough to check the current time settings, switch time zones, toggle NTP, and inspect RTC behavior. If you need distribution-specific time zone steps, see the guide on how to set or change the time zone in Linux .

How to Check CPU Usage in Linux

A Linux server tells you what its CPUs are doing through several built-in tools, each with a different angle. top and htop show the live picture. mpstat, vmstat, and sar from the sysstat package report numeric samples that suit scripts and dashboards. ps attributes usage to specific processes, and uptime summarizes the load over the last fifteen minutes.

This guide explains how to read CPU usage from each of those tools, which one to reach for in which situation, and how to interpret common output fields.

Quick Reference

Tool Best for Command
top Live snapshot, sort by CPU top
htop Interactive, per-core view htop
mpstat Per-core sampling for scripts mpstat -P ALL 1 5
vmstat System-wide CPU and memory vmstat -y 1 5
sar Current or saved CPU samples sar -u 1 5
ps Per-process attribution ps -eo pid,user,%cpu,comm --sort=-%cpu | head
uptime Load average summary uptime
nproc Logical core count nproc
lscpu CPU topology details lscpu

Method 1: top

The top command is available on most Linux systems without any extra packages. Run it without arguments to open the live view:

Terminal
top

The header summarizes the CPU lines:

output
%Cpu(s): 4.2 us, 1.3 sy, 0.0 ni, 93.8 id, 0.5 wa, 0.0 hi, 0.2 si, 0.0 st

The fields tell you where CPU time goes. us is user-space code, sy is kernel code, id is idle, wa is time waiting for I/O, and st is time stolen by the hypervisor on a virtual machine. A high wa value points at slow disks rather than a CPU bottleneck.

Press 1 while top is open to switch from the aggregate line to one row per logical CPU. Press P to sort processes by CPU usage, M to sort by memory, and q to quit.

Method 2: htop

htop is an interactive replacement for top. It is available in the default repositories of most Linux distributions, but it may not be installed by default.

On Ubuntu, Debian, and Derivatives:

Terminal
sudo apt install htop

On Fedora, RHEL, and Derivatives:

Terminal
sudo dnf install htop

Run it the same way:

Terminal
htop

htop shows a colored bar per CPU at the top, a memory and swap bar, and a sortable process table below. Click a column header or use the function keys to sort. Search for a process with F3, filter with F4, and send a signal to a selected process with F9.

Method 3: mpstat

mpstat is part of the sysstat package and is the right tool when you need numeric CPU samples per core. Install it once before using mpstat or sar.

On Ubuntu, Debian, and Derivatives:

Terminal
sudo apt install sysstat

On Fedora, RHEL, and Derivatives:

Terminal
sudo dnf install sysstat

Sample all cores at one-second intervals five times:

Terminal
mpstat -P ALL 1 5
output
03:14:00 PM CPU %usr %nice %sys %iowait %irq %soft %steal %guest %gnice %idle
03:14:01 PM all 3.27 0.00 0.75 0.00 0.00 0.00 0.00 0.00 0.00 95.98
03:14:01 PM 0 4.95 0.00 0.99 0.00 0.00 0.00 0.00 0.00 0.00 94.06
03:14:01 PM 1 1.00 0.00 1.00 0.00 0.00 0.00 0.00 0.00 0.00 98.00

The all row is the aggregate. Each numbered row is a single logical CPU. Use this output when one core is pinned at 100 percent and the others are idle, which can happen when an application is single-threaded.

Method 4: vmstat

vmstat is part of procps and combines CPU usage with memory, swap, and I/O. The first report normally shows averages since boot, so use -y when you want only interval samples. The columns at the right are the CPU summary:

Terminal
vmstat -y 1 5
output
procs -----------memory---------- ---swap-- -----io---- -system-- ------cpu-----
r b swpd free buff cache si so bi bo in cs us sy id wa st
0 0 0 7430080 311288 1843264 0 0 8 18 148 263 3 1 96 0 0
0 0 0 7430080 311288 1843264 0 0 0 0 127 226 1 0 99 0 0

r is the run queue length, which is how many processes are ready to use a CPU. A run queue consistently larger than the number of CPUs is a sign of CPU pressure. The cpu columns mirror the meaning of the top header.

Method 5: sar

sar, also from sysstat, can print current samples and read saved activity logs. On Ubuntu and Debian, enable history collection after installing sysstat:

Terminal
sudo sed -i 's/^ENABLED="false"/ENABLED="true"/' /etc/default/sysstat
sudo systemctl enable --now sysstat

The collector setup differs between distributions. If sar shows no saved history, check your distribution’s sysstat service or timer configuration.

Show current CPU samples:

Terminal
sar -u 1 5
output
03:15:01 PM CPU %user %nice %system %iowait %steal %idle
03:15:02 PM all 2.34 0.00 0.71 0.05 0.00 96.90
03:15:03 PM all 2.18 0.00 0.69 0.04 0.00 97.09

Each row is a sample interval. Combine with -f to read an older log, for example sar -u -f /var/log/sysstat/sa10 for the tenth of the month on systems that store logs in /var/log/sysstat/. This is the right tool when you need to confirm that a slowdown reported yesterday lined up with a CPU spike.

Method 6: ps

The ps command lists every process and lets you sort by CPU percentage. The pattern most admins reach for is:

Terminal
ps -eo pid,user,%cpu,%mem,comm --sort=-%cpu | head
output
 PID USER %CPU %MEM COMMAND
1437 dejan 23.5 4.2 firefox
2049 dejan 11.2 2.8 node
1102 root 4.7 0.9 systemd-journal

The output is a snapshot at the moment ps ran. The %CPU value is the average CPU usage over the lifetime of the process, not an instantaneous reading. For a live view, repeat the command with watch:

Terminal
watch -n 2 'ps -eo pid,user,%cpu,%mem,comm --sort=-%cpu | head'

watch reruns the command every two seconds, which gives you a refreshing top-five view without leaving the shell.

Method 7: uptime and Load Averages

The uptime command is the smallest of the lot. Without arguments it prints the system uptime and the load average:

Terminal
uptime
output
 15:04:23 up 3:17, 2 users, load average: 0.42, 0.35, 0.31

The three numbers are the average number of processes that are runnable or in uninterruptible sleep over the last 1, 5, and 15 minutes. Compare them with nproc:

Terminal
nproc
output
8

A load average that stays below the core count is healthy. A load average well above the core count means processes are queueing for CPU time. The 15-minute value is the trend; the 1-minute value reacts to short spikes.

Method 8: Capacity Context

Before you read CPU usage, know what the host has. lscpu summarizes the CPU model, sockets, cores, and threads. For a deeper hardware view, see the guide on checking CPU information in Linux .

Terminal
lscpu
output
Architecture: x86_64
CPU op-mode(s): 32-bit, 64-bit
Address sizes: 46 bits physical, 48 bits virtual
Byte Order: Little Endian
CPU(s): 8
On-line CPU(s) list: 0-7
Vendor ID: GenuineIntel
Model name: Intel(R) Core(TM) i7-9700K CPU @ 3.60 GHz
Thread(s) per core: 1
Core(s) per socket: 8
Socket(s): 1

Thread(s) per core: 1 means hyper-threading is disabled or not present, so each logical CPU is a physical core. A high CPU usage on a chip with eight physical cores is different from the same number on a four-core chip with hyper-threading.

Troubleshooting

mpstat: command not found
The sysstat package is not installed. Install it with sudo apt install sysstat on Ubuntu, Debian, and Derivatives, or sudo dnf install sysstat on Fedora, RHEL, and Derivatives.

sar reports Cannot open /var/log/sysstat/
Sample collection is not enabled. Set ENABLED="true" in /etc/default/sysstat and restart the service with sudo systemctl restart sysstat. Wait at least one collection interval before rerunning sar.

top shows more than 100% CPU for one process
The default mode shows percentage relative to a single CPU, so a multi-threaded process can exceed 100 percent. Press Shift+I to toggle Irix mode off, and the value normalizes across all CPUs.

Load average looks high but no process consumes CPU
Load includes processes in D state, which is uninterruptible sleep. Check ps -eo state,pid,comm | awk '$1 ~ /D/' to find processes blocked on I/O. The cause is usually a slow or stalled disk.

Per-core view in htop is empty
Old terminal sizes hide the CPU bar. Resize the window or set Display options inside htop with F2.

FAQ

Which tool should I check first?
Run top or htop for a live picture, then drop to mpstat and sar when you need numbers or history. ps answers the per-process question once you know there is a problem.

What does %steal mean?
%steal is the time the hypervisor took from the guest VM to run something else. A consistent non-zero %steal value on a VM means the host is over-committed and the guest cannot get the CPU it asked for.

How do I count CPUs from a script?
Use nproc for the logical CPU count, or nproc --all to include offline CPUs. Both return a single integer and are stable across distributions.

Is high CPU always bad?
No. A batch job that finishes faster on a CPU running at full capacity is healthier than the same job spread thinly over a long period. CPU is bad when the load average exceeds the core count for sustained periods or when interactive workloads time out.

Conclusion

Pick the tool that matches the question. top and htop answer “what is happening right now”. mpstat and vmstat answer “is the load even across cores”. sar answers “what happened last night”. Treat load averages as a trend, not a verdict, and always read CPU numbers in the context of the core count from nproc.

systemctl Command in Linux: Start, Stop, and Manage Services

Every modern Linux distribution runs a handful of services in the background at any given moment: an SSH daemon, a cron daemon, a web server, a database, a firewall. On systemd-based systems, the one tool you use to control all of them is systemctl.

systemctl is the command-line front end for systemd. It starts and stops services, enables them at boot, reloads unit files after an edit, and reports the status of each one. This guide walks through the commands you will reach for most often when managing services on a running system.

systemctl Syntax

The general syntax of the command is:

txt
systemctl [OPTIONS] COMMAND [UNIT...]

A UNIT is usually a service name such as nginx.service or cron.service. The .service suffix is optional when the unit type is unambiguous, so systemctl start nginx and systemctl start nginx.service do the same thing.

Most commands that change state (start, stop, enable, disable) require root privileges. Run them with sudo or as root.

Check the Status of a Service

Before you touch a service, check what it is doing. The status command prints the current state, recent log lines, the PID of the main process, and the path of the unit file:

Terminal
systemctl status nginx
output
● nginx.service - A high performance web server and a reverse proxy server
Loaded: loaded (/lib/systemd/system/nginx.service; enabled; preset: enabled)
Active: active (running) since Mon 2026-04-13 09:12:04 CEST; 2h 3min ago
Docs: man:nginx(8)
Main PID: 1591 (nginx)
Tasks: 3 (limit: 4612)
Memory: 6.2M
CPU: 112ms
CGroup: /system.slice/nginx.service
├─1591 "nginx: master process /usr/sbin/nginx -g daemon on; master_process on;"
└─1592 "nginx: worker process"

The two lines to read first are Loaded and Active. Loaded tells you whether the unit file was found and whether it is set to start at boot (enabled, disabled, masked, or static). Active tells you what the service is doing right now (active (running), inactive (dead), failed, and so on).

Start and Stop Services

To start a service that is not running:

Terminal
sudo systemctl start nginx

The command returns silently when the service starts. Run systemctl status nginx afterwards to confirm.

To stop a running service:

Terminal
sudo systemctl stop nginx

Stopping a service only affects the current session. If the service is enabled at boot, it will come back the next time the system starts.

Restart and Reload

A restart fully stops the service and starts it again, which terminates all active connections. This is the command you use after a binary upgrade or any change that the service cannot pick up on its own:

Terminal
sudo systemctl restart nginx

A reload asks the service to re-read its configuration without dropping active connections. Whether this works depends on the service itself. Web servers such as Nginx and Apache support it well; some services do not define a reload action.

Terminal
sudo systemctl reload nginx

If the unit file supports it, reload-or-restart is a safer combination: it tries reload first and falls back to a full restart if the service does not handle reload signals.

Terminal
sudo systemctl reload-or-restart nginx

Enable and Disable at Boot

Starting a service with start does not persist across a reboot. To make a service launch automatically at boot, use enable:

Terminal
sudo systemctl enable nginx
output
Created symlink /etc/systemd/system/multi-user.target.wants/nginx.service → /lib/systemd/system/nginx.service.

The output hints at what is happening behind the scenes. Enabling a service creates a symlink in one of the *.wants directories so that the appropriate boot target pulls the unit in.

To disable a service so that it no longer starts at boot:

Terminal
sudo systemctl disable nginx

enable and disable only change the boot behavior. To start or stop the service in the current session as well, add the --now flag:

Terminal
sudo systemctl enable --now nginx
sudo systemctl disable --now nginx

To check whether a service is currently enabled at boot:

Terminal
systemctl is-enabled nginx

Mask and Unmask

Disabling a service prevents it from starting at boot, but another service, socket, or admin can still start it manually. mask is the stronger option. It links the unit file to /dev/null so that every attempt to start it fails, whether from the command line, from another unit, or from a boot target.

Terminal
sudo systemctl mask apache2

To undo this:

Terminal
sudo systemctl unmask apache2

Masking is useful when two services conflict over the same port (for example, Nginx and Apache both wanting port 80) and you want to make sure the one you are not using cannot come back.

Reload systemd After Unit File Changes

When you add a new unit file or edit an existing one, systemd does not pick up the changes automatically. Tell it to reload its configuration with:

Terminal
sudo systemctl daemon-reload

Run this command after:

  • Creating a new .service file under /etc/systemd/system/
  • Editing a unit file (either directly or via systemctl edit)
  • Installing a package that ships a new unit file

After daemon-reload, restart the affected service if it was already running, so it starts under the new definition.

List Services

systemctl can list every unit it knows about, which is useful when you want to see what is active, what is failing, or what is simply installed. Because the listing commands have several useful variations, they have their own dedicated guide: see listing Linux services with systemctl for filtering by state, showing inactive units, and listing unit files.

The quickest view is:

Terminal
systemctl --failed

It prints every service that has failed since boot, which is usually the first thing you want to know on a box you do not fully trust yet.

View Service Logs

systemd stores service logs in the journal, which you query with journalctl. To follow the log for a single service:

Terminal
sudo journalctl -u nginx -f

The -u flag filters by unit, and -f follows new entries as they are written. For a full walkthrough of the journal, see the journalctl command guide.

Reboot, Power Off, and Suspend

systemctl also controls system power state. These commands do not require a service name:

Terminal
sudo systemctl reboot
sudo systemctl poweroff
sudo systemctl suspend
sudo systemctl hibernate

They are equivalent to the older reboot, poweroff, and halt commands, and they go through systemd so that services shut down cleanly.

Troubleshooting

Unit nginx.service could not be found.
The service is not installed, or the unit file is in a location systemd does not scan. Install the package, or run sudo systemctl daemon-reload if you just added a unit file manually.

Failed to start nginx.service: Unit is masked.
The unit has been masked. Run sudo systemctl unmask nginx and try again.

Service keeps failing after a config change
Run systemctl status SERVICE and journalctl -u SERVICE -n 50 to read the most recent log lines. Configuration syntax errors are the most common cause.

Changes to the unit file are ignored
You forgot sudo systemctl daemon-reload. systemd caches unit files in memory and needs to be told to reread them.

Permission denied
Most state-changing commands require root. Prefix the command with sudo, or switch to the root user.

Quick Reference

For a printable quick reference, see the systemctl cheatsheet .

Task Command
Show service status systemctl status nginx
Start a service sudo systemctl start nginx
Stop a service sudo systemctl stop nginx
Restart a service sudo systemctl restart nginx
Reload configuration sudo systemctl reload nginx
Enable at boot sudo systemctl enable nginx
Enable and start now sudo systemctl enable --now nginx
Disable at boot sudo systemctl disable nginx
Check boot status systemctl is-enabled nginx
Reload unit files sudo systemctl daemon-reload
Show failed units systemctl --failed
Follow service logs sudo journalctl -u nginx -f

FAQ

What is the difference between enable and start?
start launches the service in the current session only. enable creates the symlinks that make systemd start the service at every boot. The two are independent, which is why --now exists to do both in one command.

What is the difference between disable and mask?
disable removes the service from boot targets, but it can still be started manually or pulled in by another unit. mask links the unit file to /dev/null so every start attempt fails.

How do I know if my system uses systemd?
Run ps -p 1 -o comm=. If the output is systemd, your init system is systemd and systemctl applies. Virtually every mainstream distribution has used systemd as the default since around 2015.

Does reload work for every service?
No. It depends on whether the unit file defines an ExecReload command and whether the service itself supports reloading. If you are unsure, use reload-or-restart, which falls back to restart when reload is not available.

What happens to running connections when I restart a service?
They are dropped. A full restart kills the process and starts a new one, so anything holding a connection will see it close. Use reload or reload-or-restart when the service supports it.

Conclusion

Most day-to-day work with systemctl comes down to status, start, stop, restart, enable, and disable. Keep daemon-reload in mind whenever you edit a unit file, and pair systemctl with journalctl when something fails to start.

Bash Best Practices: Writing Safer, Cleaner Scripts

Bash scripts tend to start small and grow over time. A helper you wrote in five minutes to copy a few files can end up running in a cron job, a deployment pipeline, or a server startup script. When that happens, small oversights such as an unquoted variable or an ignored error become real outages.

This guide covers practical Bash best practices that keep scripts predictable, safe to re-run, and easy for other people to read.

Start With a Clear Shebang

Every Bash script should begin with a proper shebang line. The portable choice for Bash is:

~/script.shsh
#!/usr/bin/env bash

Using /usr/bin/env bash lets the script find Bash through the PATH, which matters on systems where Bash is installed outside /bin, such as macOS with Homebrew. If you rely on features that exist only in Bash, do not use #!/bin/sh. On many distributions /bin/sh points to dash or another minimal shell, and arrays, [[ ]], and local will not behave the same way.

Enable Strict Mode

By default, Bash ignores many errors. A command can fail, a variable can be unset, and the script will keep running as if nothing happened. Enabling strict mode at the top of the script changes that behavior.

~/script.shsh
#!/usr/bin/env bash
set -euo pipefail

Here is what each flag does:

  • -e - Exit immediately if any command returns a non-zero status.
  • -u - Treat unset variables as an error and exit.
  • -o pipefail - Make a pipeline fail if any command in it fails, not only the last one.

A common extra is IFS=$'\n\t', which prevents word splitting on spaces and avoids surprises when iterating over filenames that contain spaces.

~/script.shsh
#!/usr/bin/env bash
set -euo pipefail
IFS=$'\n\t'

Strict mode is not magic. It will not catch logic errors, and in some scripts you will need to opt out locally with || true for commands that are allowed to fail. The point is to flip the default from “keep going on errors” to “stop on errors”, which is almost always the safer choice. For a closer look at each option on its own, see our bash set command guide.

Always Quote Your Variables

Unquoted variables in Bash are expanded and then word-split. If a variable contains spaces, wildcards, or is empty, the result may be very different from what you expect.

Terminal
file="My Report.txt"
printf '<%s>\n' $file

Because $file is not quoted, Bash passes two arguments to printf: My and Report.txt. Quoting fixes it and keeps the filename as one value:

Terminal
printf '<%s>\n' "$file"

The same rule applies inside tests, loops, and command substitutions. When in doubt, quote. The only common case where you intentionally leave a variable unquoted is when you want word splitting, which should be rare and deliberate.

Prefer [[ ]] Over [ ]

Bash supports two test constructs: the older [ ] (a synonym for the test command) and the newer [[ ]] keyword. For Bash scripts, prefer [[ ]]:

sh
if [[ -f "$config" && "$env" == "production" ]]; then
 echo "Loading production config"
fi

[[ ]] handles empty variables safely even without quotes, supports pattern matching with == and regex with =~, and allows logical operators such as && and || inside the test. Only fall back to [ ] when writing a portable POSIX script that must run under sh or dash.

Use Functions for Repeated Logic

Once a script has more than a couple of steps, group related commands into functions. Functions make scripts easier to read, test, and refactor.

~/backup.shsh
log() {
 printf '[%s] %s\n' "$(date +'%F %T')" "$*"
}

backup_dir() {
 local src="$1"
 local dst="$2"

 log "Backing up $src to $dst"
 rsync -a "$src/" "$dst/"
}

backup_dir "/var/www" "/backup/www"

Declare variables inside functions with local so they do not leak into the rest of the script. Pass input as positional parameters, and return output via echo or printf rather than global variables when possible.

See Bash functions for more details on arguments, return values, and scoping.

Handle Errors Explicitly

Strict mode stops the script on errors, but it does not tell the user what went wrong. Adding a trap on ERR gives you a single place to log failures.

~/script.shsh
#!/usr/bin/env bash
set -Eeuo pipefail

on_error() {
 local exit_code=$?
 local line=$1
 echo "Error on line $line (exit code $exit_code)" >&2
 exit "$exit_code"
}

trap 'on_error $LINENO' ERR

The -E option makes the ERR trap inherit into functions and subshells. Without it, a failure inside a helper function may exit the script without running your error handler.

For cleanup tasks such as removing temporary files, use trap on EXIT:

~/script.shsh
tmp_dir=$(mktemp -d)
trap 'rm -rf "$tmp_dir"' EXIT

The EXIT trap runs whether the script exits normally, hits an error under set -e, or is interrupted with Ctrl+C. It is the safest way to guarantee cleanup.

Validate Input Early

Scripts that take arguments should fail fast when those arguments are missing or invalid. Check them before doing any work:

~/deploy.shsh
if [[ $# -lt 2 ]]; then
 echo "Usage: $0 <environment> <version>" >&2
 exit 1
fi

env="$1"
version="$2"

case "$env" in
 staging|production) ;;
 *)
 echo "Unknown environment: $env" >&2
 exit 1
 ;;
esac

For scripts with several flags, use getopts instead of parsing $@ manually. It handles short options, arguments, and error reporting in a consistent way.

Avoid Parsing the Output of ls

A common beginner mistake is looping over ls output:

sh
for f in $(ls /var/log); do
 echo "$f"
done

This breaks on filenames with spaces, newlines, or special characters. Use a glob or find instead:

sh
for f in /var/log/*; do
 echo "$f"
done

For recursive traversal, use find with -print0 and xargs -0, or a while read loop with IFS= and -d '' to handle unusual filenames correctly.

Keep Scripts Idempotent When Possible

A script you can safely re-run is much easier to work with than one that breaks on the second attempt. Aim for idempotent behavior: check before creating directories, use mkdir -p instead of mkdir, use ln -sf instead of ln -s, and guard commands with if blocks when they would otherwise fail on re-run.

Terminal
mkdir -p /opt/app/config

The same pattern applies to package installation, user creation, and configuration edits. Tools like Ansible enforce idempotency by design; in Bash, you have to add those checks yourself.

Use Shellcheck

Shellcheck is a static analyzer for shell scripts. It catches unquoted variables, unsafe for loops, and many other common mistakes before you hit them in production.

Install it from your package manager:

Terminal
sudo apt install shellcheck

Then run it against your script:

Terminal
shellcheck script.sh

Fix the warnings it raises, or document with an inline comment why a specific check is being ignored. Making shellcheck part of your editor or pre-commit hook removes an entire class of Bash bugs.

Prefer Readable Over Clever

Bash is full of shortcuts and obscure expansions. They can make scripts shorter, but they also make them harder to read six months later. Choose the clearer form, even when it is a few characters longer.

sh
if [[ -z "$name" ]]; then
 name="anonymous"
fi

is almost always easier to maintain than the golfed equivalent:

Terminal
: "${name:=anonymous}"

Aim for scripts that a teammate can read once and understand, not ones that require a reference manual.

Quick Reference

For a printable quick reference, see the Bash cheatsheet .

Before committing a Bash script, confirm the following:

  • #!/usr/bin/env bash shebang is present.
  • set -euo pipefail is enabled.
  • All variable expansions are quoted.
  • Tests use [[ ]] instead of [ ].
  • Functions replace long repeated blocks, with local variables.
  • trap handles errors and cleanup.
  • Input is validated before work begins.
  • No parsing of ls output.
  • shellcheck reports no warnings, or they are explicitly ignored.

FAQ

Is set -e enough on its own?
No. set -e stops on many errors, but it misses failures in pipelines and ignores unset variables. Combine it with -u and -o pipefail to cover those cases.

Does strict mode break existing scripts?
It often surfaces bugs that were already there, such as unset variables and ignored errors. The fix is to quote variables, use default values like ${VAR:-}, and handle expected failures with || true.

Should I write scripts in Bash or switch to Python?
Bash is a good fit for short glue scripts that mostly call other commands. Once a script grows past a few hundred lines, has complex data structures, or needs proper error handling and testing, Python or another language is usually a better choice.

Where can I learn more safe scripting patterns?
Keep the Shellcheck wiki open while you write, and read through the official Bash manual section on shell builtins. Both cover the reasoning behind each rule, not only the rule itself.

Conclusion

Strict mode, quoting, and a few well-placed traps cover most of the risk in Bash scripting. Make these practices your defaults, run shellcheck on every change, and your scripts will behave the same way on your laptop, in CI, and on a production server.

How to Install LAMP Stack on Ubuntu 26.04

When you spin up a new server to run a PHP application or a CMS such as WordPress, Joomla, or Drupal, the LAMP stack is one of the most familiar starting points. LAMP stands for Linux, Apache, MySQL, and PHP, and the four pieces work together to serve dynamic web pages over HTTP.

This guide explains how to install and configure a complete LAMP stack on Ubuntu 26.04. By the end you will have Apache serving HTTP traffic, MySQL 8.4 running as the database, and PHP 8.5 processing dynamic pages through mod_php.

Quick Reference

Task Command
Update package index sudo apt update
Install Apache sudo apt install apache2
Install MySQL sudo apt install mysql-server
Install PHP with Apache sudo apt install php libapache2-mod-php php-mysql
Secure MySQL sudo mysql_secure_installation
Restart Apache sudo systemctl restart apache2
Test Apache config sudo apache2ctl configtest
Allow HTTP/HTTPS sudo ufw allow 'Apache Full'
Enable a site sudo a2ensite example.com
Disable default site sudo a2dissite 000-default

Prerequisites

Before installing the stack, make sure you have:

Step 1: Install Apache

Apache is in the default Ubuntu 26.04 repositories. Refresh the package index and install it:

Terminal
sudo apt update
sudo apt install apache2

The service starts automatically after the install. Confirm it is running:

Terminal
sudo systemctl status apache2

The output shows the service as active (running). If UFW is enabled, allow HTTP and HTTPS through the firewall:

Terminal
sudo ufw allow 'Apache Full'

Open http://your_server_ip in a browser. You should see the default Apache welcome page, which confirms that Apache is serving requests.

For an in-depth walkthrough of the install and the directory layout, see How to Install Apache on Ubuntu 26.04 .

Step 2: Install MySQL

The database tier handles persistence. Install the MySQL server package:

Terminal
sudo apt install mysql-server

Once the install completes, run the security script. It walks you through removing anonymous users, disabling remote root login, and dropping the test database:

Terminal
sudo mysql_secure_installation

Answer Y to each hardening question. The validate password component is optional; skip it if you plan to manage credentials yourself.

To verify that the service is running:

Terminal
sudo systemctl status mysql

For details on creating users and granting privileges, see How to Install MySQL on Ubuntu 26.04 .

Step 3: Install PHP

Apache integrates with PHP through the libapache2-mod-php module, which lets Apache run PHP code in-process. Install PHP, the Apache module, and the MySQL driver:

Terminal
sudo apt update
sudo apt install php libapache2-mod-php php-mysql

On Ubuntu 26.04 this pulls in PHP 8.5. Confirm the version:

Terminal
php -v

The output starts with PHP 8.5.x. Restart Apache so the PHP module loads:

Terminal
sudo systemctl restart apache2

If you need extra extensions such as php-curl, php-gd, php-mbstring, php-xml, or php-zip, install them now:

Terminal
sudo apt install php-curl php-gd php-mbstring php-xml php-zip

For information on additional modules and switching PHP versions, see How to Install PHP on Ubuntu 26.04 .

Step 4: Configure an Apache Virtual Host

The default Apache configuration serves files from /var/www/html. For a real site you usually want a dedicated document root and a virtual host. Create the directory and a small placeholder:

Terminal
sudo mkdir -p /var/www/example.com
sudo chown -R $USER:$USER /var/www/example.com
echo "<h1>example.com is live</h1>" > /var/www/example.com/index.html

Create a new virtual host file:

Terminal
sudo nano /etc/apache2/sites-available/example.com.conf

Paste the following content. Replace example.com with your domain or your server IP if you do not have a domain yet:

apache
<VirtualHost *:80>
 ServerName example.com
 ServerAlias www.example.com
 ServerAdmin webmaster@example.com
 DocumentRoot /var/www/example.com

 <Directory /var/www/example.com>
 Options -Indexes +FollowSymLinks
 AllowOverride All
 Require all granted
 </Directory>

 ErrorLog ${APACHE_LOG_DIR}/example.com-error.log
 CustomLog ${APACHE_LOG_DIR}/example.com-access.log combined
</VirtualHost>

AllowOverride All lets you use per-directory .htaccess files, which is required by many PHP applications such as WordPress for clean URL rewrites. Enable the site and disable the default one:

Terminal
sudo a2ensite example.com
sudo a2dissite 000-default

Make sure mod_rewrite is enabled if your application uses it:

Terminal
sudo a2enmod rewrite

Test the configuration before reloading Apache:

Terminal
sudo apache2ctl configtest

The output should end with Syntax OK. Reload Apache to apply the change:

Terminal
sudo systemctl reload apache2

Step 5: Test the PHP Setup

Create a PHP info file to confirm that Apache executes PHP:

Terminal
echo "<?php phpinfo();" | sudo tee /var/www/example.com/info.php

Open http://example.com/info.php (or http://your_server_ip/info.php) in a browser. You should see the PHP information page that lists the PHP version, loaded extensions, and configuration directives. If the browser downloads the file or shows the source code, the PHP module is not loaded; reinstall libapache2-mod-php and restart Apache.

Once you confirm PHP is working, remove the info file. It exposes details about your environment that should not be publicly readable:

Terminal
sudo rm /var/www/example.com/info.php

Step 6: Test the MySQL Connection from PHP

To confirm that PHP can talk to MySQL, create a test database and user:

Terminal
sudo mysql

In the MySQL prompt, run:

sql
CREATE DATABASE lamp_test;
CREATE USER 'lamp_user'@'localhost' IDENTIFIED BY 'changeme';
GRANT ALL PRIVILEGES ON lamp_test.* TO 'lamp_user'@'localhost';
FLUSH PRIVILEGES;
EXIT;
Warning
The password above is a placeholder. Replace changeme with a strong value, and do not commit credentials to version control. Store secrets in environment variables or a .env file outside the repository.

Create a small connection test:

Terminal
sudo nano /var/www/example.com/db-test.php

Add the following content:

php
<?php
$mysqli = new mysqli("localhost", "lamp_user", "changeme", "lamp_test");
if ($mysqli->connect_error) {
 die("Connection failed: " . $mysqli->connect_error);
}
echo "Connected to MySQL " . $mysqli->server_info;
$mysqli->close();

Open http://example.com/db-test.php. The page prints Connected to MySQL 8.4.x when the credentials and the PHP MySQL driver are working. Remove the file once you confirm the connection:

Terminal
sudo rm /var/www/example.com/db-test.php

Troubleshooting

Apache shows the default page after editing the virtual host
The default site is still enabled. Run sudo a2dissite 000-default, then sudo a2ensite example.com, and reload Apache.

PHP files download instead of executing
The Apache PHP module is not loaded. Reinstall it with sudo apt install --reinstall libapache2-mod-php, enable it with sudo a2enmod php8.5, and restart Apache.

AllowOverride All is ignored
The <Directory> block in the virtual host must include AllowOverride All. Confirm that the path matches your DocumentRoot and run sudo apache2ctl configtest after the change.

.htaccess rewrites do not work
The rewrite module is not enabled. Run sudo a2enmod rewrite and restart Apache. Verify that the <Directory> block sets AllowOverride All.

MySQL connection refused from PHP
Confirm that the php-mysql package is installed, that the user has been granted privileges on the target database, and that the password in the PHP code matches the one used in CREATE USER.

FAQ

What is the difference between LAMP and LEMP?
LAMP uses Apache as the web server, while LEMP uses Nginx. Apache supports .htaccess overrides and mod_php, which makes shared hosting and many PHP CMS workflows simpler. Nginx is event-driven and tends to use less memory under high concurrency. For an Nginx-based stack, see How to Install LEMP Stack on Ubuntu 26.04 .

Can I use MariaDB instead of MySQL?
Yes. MariaDB is a drop-in replacement for MySQL and uses the same client tools, the same protocol, and the same SQL syntax for the cases covered in this guide.

Should I use mod_php or PHP-FPM with Apache?
mod_php is the simplest setup and is fine for many sites. For higher concurrency or when you run multiple PHP versions, switch to PHP-FPM with mpm_event and proxy_fcgi. The php-fpm package and the proxy_fcgi Apache module handle the connection.

How do I add HTTPS to the site?
Install Certbot and request a Let’s Encrypt certificate for your domain. The Certbot Apache plugin updates the virtual host automatically and sets up redirection from HTTP to HTTPS.

Next Steps

You now have a working LAMP stack on Ubuntu 26.04. From here you can deploy a PHP application, create additional Apache virtual hosts for more sites, or add HTTPS using Let’s Encrypt.

dd Command in Linux: Copy Disks, Partitions, and Files

Most of the time when you copy a file on Linux, you reach for cp. It walks the filesystem, respects permissions, and works on individual files. But when you need to copy an entire disk, write an ISO image to a USB stick, or create a byte-for-byte backup of a partition, the filesystem view is not enough. For that, Linux ships with dd, a tool that copies raw data block by block between any two files or devices.

This guide explains how to use dd safely to write ISO images, clone disks, back up partitions, create test files, and benchmark storage performance.

dd Syntax

The general form of the dd command is:

txt
dd if=INPUT of=OUTPUT [OPTIONS]

The two key operands are if (input file) and of (output file). Either one can be a regular file, a block device such as /dev/sda, or even /dev/zero and /dev/urandom. Options control the block size, how many blocks to copy, and what conversions to apply.

Warning
dd writes exactly what you tell it to write, to exactly the target you point it at. Pointing of= at the wrong disk will overwrite that disk without warning or confirmation. Always double-check the target device with lsblk or sudo fdisk -l before running a dd command.

Writing an ISO Image to a USB Drive

The most common use for dd is flashing a Linux ISO to a USB drive so you can boot and install from it. First, identify the USB device with lsblk or sudo fdisk -l:

Terminal
lsblk
output
NAME MAJ:MIN RM SIZE RO TYPE MOUNTPOINTS
sda 8:0 0 465.8G 0 disk
├─sda1 8:1 0 512M 0 part /boot/efi
└─sda2 8:2 0 465.3G 0 part /
sdb 8:16 1 14.5G 0 disk
└─sdb1 8:17 1 14.5G 0 part

Here sda is the system disk and sdb is the USB drive. Make sure the USB is unmounted before writing to it:

Terminal
sudo umount /dev/sdb1

Then write the ISO image:

Terminal
sudo dd if=ubuntu-24.04-desktop-amd64.iso of=/dev/sdb bs=4M status=progress oflag=sync

Notice that the output target is the whole disk (/dev/sdb), not a partition (/dev/sdb1). Writing an ISO to a partition would leave the USB unbootable. The options do the following:

  • bs=4M - Read and write 4 MB at a time, which is much faster than the 512-byte default.
  • status=progress - Print a live progress indicator so you can see how much has been written.
  • oflag=sync - Flush every write to the device, so the final byte count reflects data actually on disk.

When dd finishes, run sync once more to make sure all buffered writes hit the USB stick before you remove it:

Terminal
sync

For alternative methods and distro-specific tips, see the guide on how to create a bootable Linux USB drive .

Cloning a Whole Disk

To make an exact block-level copy of one disk onto another, point if= and of= at two different block devices:

Terminal
sudo dd if=/dev/sda of=/dev/sdb bs=64K conv=noerror,sync status=progress

The destination disk must be at least as large as the source. Anything already on it is overwritten. The conversion flags handle read errors gracefully:

  • conv=noerror - Keep going when a read error occurs instead of aborting.
  • conv=sync - Pad short reads with zeros so the output stays aligned with the source.

Clone offline whenever possible. Cloning a disk that is actively being written to produces an inconsistent copy, especially for databases and journaling filesystems.

Backing Up a Partition to an Image File

dd can also write a partition or whole disk to a regular file. That file becomes a bit-for-bit image you can restore later:

Terminal
sudo dd if=/dev/sda1 of=/backup/sda1.img bs=4M status=progress

To save space, pipe the output through gzip:

Terminal
sudo dd if=/dev/sda1 bs=4M status=progress | gzip -c > /backup/sda1.img.gz

The compressed image is much smaller for filesystems that contain text or empty space, though the compression step adds CPU time.

To restore the image to a partition:

Terminal
gunzip -c /backup/sda1.img.gz | sudo dd of=/dev/sda1 bs=4M status=progress

The target partition must be unmounted during restore, and it must be at least as large as the original.

Backing Up and Restoring the MBR

The Master Boot Record sits in the first 512 bytes of a disk that uses a traditional BIOS partition table. You can back it up with dd:

Terminal
sudo dd if=/dev/sda of=/backup/mbr.img bs=512 count=1

To restore the MBR, swap the input and output:

Terminal
sudo dd if=/backup/mbr.img of=/dev/sda bs=512 count=1

On modern UEFI systems the partition table uses GPT instead of MBR, so this trick only applies to older BIOS installations. For GPT disks, use sgdisk --backup and sgdisk --load-backup from the gdisk package.

Creating an Empty File of a Specific Size

dd is often used to create test files of a known size. The count option sets how many blocks to write, and bs sets the block size:

Terminal
dd if=/dev/zero of=testfile bs=1M count=100

This creates a 100 MB file filled with zeros, useful for testing backups, simulating quota limits, or preparing a swap file. To create a file filled with random data instead, read from /dev/urandom:

Terminal
dd if=/dev/urandom of=random.bin bs=1M count=10

Random data is slower to generate because the kernel has to produce the bytes, while /dev/zero is effectively free.

Creating a Swap File

One practical use of the empty-file pattern is creating a swap file :

Terminal
sudo dd if=/dev/zero of=/swapfile bs=1M count=2048 status=progress
sudo chmod 600 /swapfile
sudo mkswap /swapfile
sudo swapon /swapfile

The chmod 600 step keeps the swap file readable only by root, which is required by mkswap on most distros. After swapon, the 2 GB swap file is active immediately. Add an entry to /etc/fstab to make it permanent.

Wiping a Disk

To destroy data on a disk before disposing of it or repurposing it, overwrite the entire device with zeros:

Terminal
sudo dd if=/dev/zero of=/dev/sdb bs=4M status=progress

For a stronger wipe that makes recovery harder on traditional spinning disks, use random data:

Terminal
sudo dd if=/dev/urandom of=/dev/sdb bs=4M status=progress

On SSDs, a dd wipe is not the right tool. SSDs remap blocks internally, so a full write does not guarantee every cell was overwritten. Use blkdiscard or the drive vendor’s secure-erase utility instead.

Benchmarking Disk Write Speed

dd is a quick way to measure sustained write throughput. Write a 1 GB file of zeros and let dd report the rate:

Terminal
dd if=/dev/zero of=tempfile bs=1M count=1024 oflag=direct
output
1024+0 records in
1024+0 records out
1073741824 bytes (1.1 GB, 1.0 GiB) copied, 3.1 s, 346 MB/s

The oflag=direct flag bypasses the page cache, so the number reflects actual disk speed rather than memory throughput. For a read benchmark, drop the caches first and then read the file back:

Terminal
sudo sh -c "sync && echo 3 > /proc/sys/vm/drop_caches"
dd if=tempfile of=/dev/null bs=1M

Remove the test file when you are done:

Terminal
rm tempfile

For more detailed I/O profiling, tools like fio and ioping produce more accurate, repeatable results.

Showing Progress on a Running dd

If you started dd without status=progress, you can still ask it to print a status line by sending the USR1 signal to its process. From another terminal, run:

Terminal
sudo kill -USR1 $(pidof dd)

dd will respond by printing the number of bytes copied so far and its current rate, then keep running.

Common Options

A quick rundown of the options covered in this guide, plus a few more worth knowing:

  • if=FILE - Input file or device.
  • of=FILE - Output file or device.
  • bs=N - Block size for both reads and writes (e.g., 4M for 4 MB).
  • ibs=N / obs=N - Separate input and output block sizes.
  • count=N - Number of input blocks to copy.
  • skip=N - Skip N blocks at the start of the input.
  • seek=N - Skip N blocks at the start of the output.
  • status=progress - Print progress while copying.
  • conv=noerror - Continue past read errors.
  • conv=sync - Pad short reads with zeros to keep block alignment.
  • oflag=direct - Bypass the kernel page cache on write.
  • oflag=sync - Flush each write to the device before continuing.

Quick Reference

Command Description
sudo dd if=image.iso of=/dev/sdX bs=4M status=progress oflag=sync Write an ISO image to a USB drive
sudo dd if=/dev/sda of=/dev/sdb bs=64K conv=noerror,sync status=progress Clone one disk to another
sudo dd if=/dev/sda1 of=/backup/sda1.img bs=4M status=progress Back up a partition to an image file
sudo dd if=/dev/sda bs=4M status=progress | gzip -c > disk.img.gz Compressed disk image backup
sudo dd if=/dev/sda of=/backup/mbr.img bs=512 count=1 Back up the MBR
dd if=/dev/zero of=testfile bs=1M count=100 Create a 100 MB file of zeros
sudo dd if=/dev/zero of=/dev/sdX bs=4M status=progress Wipe a disk with zeros
dd if=/dev/zero of=tempfile bs=1M count=1024 oflag=direct Benchmark disk write speed
sudo kill -USR1 $(pidof dd) Ask a running dd for its progress

Troubleshooting

dd: failed to open ‘/dev/sdX’: Permission denied
Writing to a block device requires root privileges. Prefix the command with sudo. If you are already using sudo, double-check that the device path is correct and that the device is not exclusively held by another process.

dd: error writing ‘/dev/sdX’: No space left on device
The destination is smaller than the source. When cloning, the target disk or partition must be at least as large as the source. When writing an ISO, the USB drive must be larger than the ISO file.

The write is much slower than expected
The default block size of 512 bytes forces millions of tiny syscalls. Set bs=4M or bs=64K to speed things up. Also check whether other processes are doing heavy I/O on the same device.

The USB does not boot after writing the ISO
Verify that you wrote the image to the disk (/dev/sdb), not a partition (/dev/sdb1). Also confirm the ISO download with its SHA256 checksum; a truncated or corrupted download produces an unbootable stick.

dd: invalid number: ‘4M’
Older or minimal systems may ship a dd that does not accept the M, G, or K suffixes. On those systems, spell out the block size in bytes (bs=4194304 for 4 MB), or install GNU coreutils.

FAQ

What does dd stand for?
The name comes from the IBM Job Control Language statement “Data Definition.” Because of how often the command is used to overwrite disks by mistake, many Linux users jokingly call it “disk destroyer.” Either way, the behavior is the same: it copies bytes from input to output without touching the filesystem layer.

Is dd faster than cp for copying large files?
For regular files on a normal filesystem, cp is usually just as fast and safer to use. dd only wins when you are copying raw devices, working with exact byte offsets, or deliberately limiting how much data is copied with count.

Can I use dd on an SSD without damaging it?
Reading and writing with dd is fine. The concern with SSDs is full-disk wipes: a single pass of zeros is enough to erase visible data, but repeated full-drive writes wear out the flash cells. For secure erase, use blkdiscard or the drive’s built-in secure-erase command.

How do I see how much data dd has copied?
Add status=progress to the command, or send the running process the USR1 signal with sudo kill -USR1 $(pidof dd). Both methods print the byte count and current throughput without interrupting the copy.

Why use bs=4M instead of the default?
The default block size of 512 bytes means dd issues a separate read and write for every 512 bytes of data. Larger block sizes such as 4 MB dramatically reduce syscall overhead and let the kernel fill the disk pipeline efficiently, often cutting copy times by a factor of ten.

Conclusion

dd is one of the most direct tools in the Linux toolbox. It copies bytes, no more and no less, between any two files or devices. That power makes it indispensable for flashing installers, cloning disks, and building image backups, and the same power makes it unforgiving if you point it at the wrong target.

For related disk tools, see the guides on fdisk for partitioning and df for checking free space.

How to Install and Use uv: Fast Python Package Manager

If you have worked with Python for a while, you have probably juggled pip, virtualenv, pip-tools, pipx, and pyenv just to keep a few projects running. Each tool does one thing, and wiring them together is slow and fragile. uv is a single binary that replaces all of them. It is written in Rust, published by Astral (the team behind ruff), and is typically ten to a hundred times faster than pip for common workflows.

This guide explains how to install uv on Linux, create and manage Python projects with it, add dependencies, work with virtual environments, and install specific Python versions.

Quick Reference

Command Description
uv init my-project Create a new project with pyproject.toml
uv add requests Add a dependency and update the lockfile
uv add --dev pytest Add a development dependency
uv remove requests Remove a dependency
uv sync Install dependencies from the lockfile
uv lock Update the lockfile
uv run script.py Run a command in the project environment
uv venv Create a virtual environment
uv pip install requests Pip-compatible install interface
uv python install 3.12 Install a specific Python version
uv python list List installed and available Python versions
uv tool install ruff Install a CLI tool globally
uvx ruff check . Run a tool without installing it permanently

Installing uv

The recommended install path on Linux is the standalone script from Astral. It downloads a prebuilt binary, places it in ~/.local/bin, and does not require Python to be installed first:

Terminal
curl -LsSf https://astral.sh/uv/install.sh | sh

The script prints where it put the binary and whether it updated your shell rc file. Reload your shell or run source ~/.bashrc so the new PATH takes effect, then verify the install:

Terminal
uv --version
output
uv 0.11.11

If you prefer to install from a package manager, uv is also available through pip, pipx, and Homebrew:

Terminal
pip install uv
Terminal
pipx install uv
Terminal
brew install uv

On Ubuntu, Debian, and Derivatives, pip may refuse a system-wide install because the Python environment is marked as externally managed. In that case, use pipx install uv or the standalone installer.

If you installed uv with the standalone installer, update it to the latest release with:

Terminal
uv self update

Creating a Project

uv init scaffolds a new project with a pyproject.toml, a README.md, a .python-version file, and a starter module:

Terminal
uv init my-project
cd my-project
output
Initialized project `my-project`

The generated pyproject.toml looks like this:

pyproject.tomltoml
[project]
name = "my-project"
version = "0.1.0"
description = "Add your description here"
readme = "README.md"
requires-python = ">=3.12"
dependencies = []

uv has not created a virtual environment yet. That happens the first time you add a dependency or run a command in the project.

Adding and Removing Dependencies

To add a package, use uv add:

Terminal
uv add requests
output
Resolved 5 packages in 320ms
Installed 5 packages in 45ms
+ certifi==2025.1.31
+ charset-normalizer==3.4.1
+ idna==3.10
+ requests==2.32.3
+ urllib3==2.3.0

On the first run, uv creates a .venv directory in the project root, resolves the dependency graph, writes a uv.lock file that pins every package and its transitive dependencies, and installs everything into the venv. The requests line is also added to pyproject.toml under dependencies.

Development-only dependencies go into a separate group with --dev:

Terminal
uv add --dev pytest ruff

They are recorded under a dev dependency group in pyproject.toml and are installed into the same venv, but they are excluded when your project is published or installed as a library.

Remove a dependency with uv remove:

Terminal
uv remove requests

uv updates pyproject.toml, updates uv.lock, and uninstalls the package along with any dependencies that are no longer needed.

Running Code in the Project Environment

You do not have to activate the virtual environment manually. uv run executes a command inside the project venv and syncs dependencies first if needed:

Terminal
uv run python main.py
Terminal
uv run pytest

Scripts declared in pyproject.toml under [project.scripts] are also available:

Terminal
uv run my-command

If you prefer the classic workflow, activate the venv yourself:

Terminal
source .venv/bin/activate
python main.py

Either approach works, but uv run has the advantage of keeping the environment in sync with uv.lock every time you invoke it.

Syncing and Reproducing an Environment

When you clone a project that uses uv, run uv sync to install exactly the versions pinned in uv.lock:

Terminal
uv sync
output
Resolved 12 packages in 5ms
Installed 12 packages in 110ms

uv sync is deterministic: given the same uv.lock, it produces the same environment on any machine. This is the command to run in CI, in Docker builds, and on every fresh checkout.

If pyproject.toml changes but the lockfile is out of date, refresh the lock with:

Terminal
uv lock

Use uv lock --upgrade to bump every dependency to the latest version allowed by the version constraints in pyproject.toml, and uv lock --upgrade-package requests to bump a single package.

Working with Virtual Environments Directly

uv can also be used as a faster drop-in for virtualenv. To create a standalone venv in the current directory:

Terminal
uv venv
output
Using Python 3.12.8
Creating virtual environment at: .venv
Activate with: source .venv/bin/activate

Specify a Python version with --python:

Terminal
uv venv --python 3.11

Specify a different path:

Terminal
uv venv /tmp/myenv

Once the venv exists, use uv pip as a fast replacement for the regular pip commands:

Terminal
uv pip install requests
uv pip install -r requirements.txt
uv pip freeze
uv pip list

The uv pip interface is intentionally compatible with pip, which makes it easy to adopt uv in existing projects without restructuring them as pyproject.toml-based projects.

For a refresher on classic virtual environments, see the guide on Python virtual environments .

Installing and Managing Python Versions

uv can download and manage Python interpreters without touching your system Python. List the versions available and installed:

Terminal
uv python list

Install a specific version:

Terminal
uv python install 3.12
Terminal
uv python install 3.11 3.13

The downloaded interpreters live under ~/.local/share/uv/python/ and are independent of the system package manager. To use a specific version in a project, set it in the .python-version file or pass --python when creating the venv:

Terminal
uv venv --python 3.13

When uv run starts a project, it reads .python-version and the requires-python constraint in pyproject.toml, then picks or downloads a matching interpreter automatically.

Installing CLI Tools

uv ships with a tool manager similar to pipx. It installs Python-based CLIs in isolated environments so they do not pollute your system Python:

Terminal
uv tool install ruff
output
Resolved 1 package in 80ms
Installed 1 package in 12ms
+ ruff==0.9.2
Installed 1 executable: ruff

The ruff binary is now on your PATH. List, upgrade, or remove tools:

Terminal
uv tool list
uv tool upgrade ruff
uv tool uninstall ruff

To run a tool without installing it permanently, use uvx (an alias for uv tool run):

Terminal
uvx ruff check .

uvx downloads the tool into a cached environment, runs it, and reuses the cache on subsequent invocations. This is the fastest way to try a CLI without making it permanent.

Running Single-File Scripts

A Python script can declare its dependencies inline with a PEP 723 comment block. uv run reads that block and sets up an ephemeral environment before executing the script:

script.pypy
# /// script
# requires-python = ">=3.12"
# dependencies = [
# "requests",
# ]
# ///

import requests

response = requests.get("https://api.github.com")
print(response.status_code)

Run the script with:

Terminal
uv run script.py

uv creates a temporary venv, installs requests, runs the script, and keeps the environment in a cache for next time. This pattern is useful for small utilities and one-off automation where a full project is overkill.

Troubleshooting

uv: command not found after install
The installer places the binary in ~/.local/bin, which may not be on your PATH. Add it in your shell rc file: export PATH="$HOME/.local/bin:$PATH", then reload the shell. Verify with which uv.

Installation fails with “error: externally-managed-environment”
This message comes from system pip, not from uv. Use pipx install uv or the standalone installer instead. Installing Python packages into the system Python is discouraged on modern Ubuntu and Debian releases.

uv sync installs different versions than expected
Check that uv.lock is committed to your repository. Without the lockfile, uv sync falls back to resolving from pyproject.toml and may pick newer versions. Commit uv.lock to keep environments reproducible across machines.

uv cannot find a suitable Python interpreter
Run uv python install 3.12 (or whichever version your project requires) to let uv download a matching interpreter. The requires-python field in pyproject.toml tells uv which versions are acceptable.

Permission denied when installing to the system
uv does not need root. If a command prompts for sudo, the destination path is wrong. Use a project virtual environment or uv tool install for CLIs instead of writing to system directories.

FAQ

How is uv different from pip?
pip installs packages into an existing Python environment. uv is a full project manager: it creates and manages virtual environments, locks dependencies, installs Python interpreters, and runs scripts and tools. uv pip also provides a drop-in pip-compatible command for teams that want just the speed without adopting the full workflow.

Does uv replace Poetry or Hatch?
For most projects, yes. uv reads the standard pyproject.toml format used by Poetry and Hatch, manages lockfiles, and handles dependency groups. If you depend on specific features of Poetry plugins or Hatch build hooks, evaluate those needs before migrating.

Is uv compatible with existing requirements.txt workflows?
Yes. uv pip install -r requirements.txt works as a faster replacement for pip install -r, and uv pip compile generates a pinned requirements file from your unpinned input, similar to pip-compile from pip-tools.

Can I use uv with Docker?
Yes, and it is a good fit. The recommended pattern is to copy pyproject.toml and uv.lock first, run uv sync --frozen --no-install-project to install dependencies, then copy the rest of the source and run uv sync --frozen. This keeps the dependency layer cached across builds.

Where does uv store downloaded interpreters and package cache?
Interpreters go under ~/.local/share/uv/python/ and the package cache lives in ~/.cache/uv/. Both paths respect the XDG environment variables, so you can override them by setting XDG_DATA_HOME and XDG_CACHE_HOME.

Conclusion

uv rolls together the jobs that previously required pip, virtualenv, pip-tools, pipx, and pyenv into one fast binary. The speed is the headline feature, but the real payoff is a single, consistent workflow for projects, tools, scripts, and Python versions.

For related Python tooling on Linux, see the guide on installing Python on Ubuntu 24.04 and the guide on Python virtual environments .

Initial Server Setup on Ubuntu 26.04

A fresh Ubuntu 26.04 server ships with root SSH access, no regular user, and no firewall rules. That works for the first login, but it is not a safe state to leave running on a public VPS.

This guide walks through the first tasks to perform on a new Ubuntu 26.04 server: creating a sudo user, enabling SSH key authentication, locking down SSH, configuring UFW, setting the hostname and timezone, and applying package updates.

Quick Reference

Task Command or file
Log in as root ssh root@server_ip_address
Create a user adduser username
Grant sudo access usermod -aG sudo username
Copy root SSH keys rsync --archive --chown=username:username /root/.ssh /home/username
Add a local key ssh-copy-id username@server_ip_address
SSH hardening file /etc/ssh/sshd_config.d/99-hardening.conf
Test SSH config sudo sshd -t
Allow SSH in UFW sudo ufw allow OpenSSH
Set hostname sudo hostnamectl set-hostname server-name
Set timezone sudo timedatectl set-timezone Europe/Berlin

Prerequisites

Before starting, make sure you have:

  • A new Ubuntu 26.04 server with a public IP address.
  • Root access over SSH, either with a password or a provider-supplied key.
  • A local SSH key pair on your workstation. If you do not have one yet, see how to generate SSH keys on Linux .
  • Access to the provider web console as a backup path in case SSH access stops working.

Keep your original root SSH session open until you have tested the new user login and the hardened SSH configuration.

Log In as Root

Open a terminal on your local machine and connect to the server using the public IP address from your hosting provider:

Terminal
ssh root@server_ip_address

Accept the host key when prompted and enter the root password if password authentication is still enabled. If your provider created the server with an SSH key, the connection should use that key automatically.

Create a New Sudo User

Working as root for daily administration is risky because every command runs with full privileges. Create a regular user account and give it administrative access through the sudo group.

Replace username with the account name you want to use:

Terminal
adduser username

The command prompts for a password and optional user details. Enter a strong password, then press Enter to skip any fields you do not need.

Add the new user to the sudo group:

Terminal
usermod -aG sudo username

The account can now run administrative commands with sudo.

Set Up SSH Key Authentication

SSH keys are safer than password logins and are easier to use once configured. The exact command depends on where your public key is currently stored.

If your public key is already present under the root account, copy the root SSH directory to the new user:

Terminal
rsync --archive --chown=username:username /root/.ssh /home/username

If you need to copy a key from your local workstation, run this command from the local machine:

Terminal
ssh-copy-id username@server_ip_address

Open a new terminal window and test the login before changing the SSH server configuration:

Terminal
ssh username@server_ip_address

The connection should succeed as the new user. Keep both the root session and the new user session open while you continue.

Disable Root Login and Password Authentication

After key-based login works, configure OpenSSH to reject direct root logins and password authentication. Ubuntu includes files from /etc/ssh/sshd_config.d/, which keeps local changes separate from the main SSH configuration file.

Create a hardening snippet:

Terminal
sudo nano /etc/ssh/sshd_config.d/99-hardening.conf

Add the following lines:

/etc/ssh/sshd_config.d/99-hardening.conftxt
PermitRootLogin no
PasswordAuthentication no

Save the file and test the SSH configuration syntax:

Terminal
sudo sshd -t

If the command prints no output, the configuration is valid. Reload SSH to apply the change:

Terminal
sudo systemctl reload ssh

Open another terminal and confirm that you can still log in as the regular user:

Terminal
ssh username@server_ip_address

Do not close your existing sessions until this test succeeds.

Set Up the Firewall with UFW

Ubuntu uses UFW (Uncomplicated Firewall) as a simple front-end for managing host firewall rules. Start by allowing SSH so the firewall does not block your current access:

Terminal
sudo ufw allow OpenSSH

Enable the firewall:

Terminal
sudo ufw enable

Confirm the prompt with y, then check the active rules:

Terminal
sudo ufw status

The output should show that OpenSSH is allowed:

output
Status: active
To Action From
-- ------ ----
OpenSSH ALLOW Anywhere
OpenSSH (v6) ALLOW Anywhere (v6)

When you install services such as Nginx or Apache, open their profiles before expecting traffic to reach them. For example, an Nginx server that should accept HTTP and HTTPS traffic needs:

Terminal
sudo ufw allow 'Nginx Full'

For more examples, see how to set up a firewall with UFW .

Set the Hostname

A descriptive hostname makes logs, shell prompts, monitoring alerts, and dashboards easier to read. Set the hostname with hostnamectl:

Terminal
sudo hostnamectl set-hostname server-name

Replace server-name with a short name that matches the server role, such as web-01 or db-01.

Check the result:

Terminal
hostnamectl

You can update DNS records or your local SSH config separately if you want to connect by name instead of IP address.

Set the Timezone

Set the server timezone so logs, cron jobs, and timestamps match the region you use for operations:

Terminal
sudo timedatectl set-timezone Europe/Berlin

List available zones if you are unsure of the exact name:

Terminal
timedatectl list-timezones

See how to set or change the timezone on Ubuntu for a deeper explanation.

Update the System

Refresh the package index and install pending updates:

Terminal
sudo apt update
sudo apt upgrade

If the upgrade installed a new kernel or core system libraries, reboot the server:

Terminal
sudo reboot

After the reboot, reconnect as the regular sudo user:

Terminal
ssh username@server_ip_address

Troubleshooting

Locked out after disabling password authentication
Use your provider web console or recovery mode to log in. Edit /etc/ssh/sshd_config.d/99-hardening.conf, temporarily set PasswordAuthentication yes, run sudo sshd -t, reload SSH, and test key login again before disabling passwords.

usermod: group 'sudo' does not exist
Some minimal images may not include the sudo package. Install it with apt install sudo, then rerun usermod -aG sudo username.

sshd -t reports an error
Read the line number in the error message, fix the snippet in /etc/ssh/sshd_config.d/99-hardening.conf, and run sudo sshd -t again. Do not reload SSH until the syntax test passes.

UFW blocks an expected service
Check the active rules with sudo ufw status. Allow the needed service profile or port, such as sudo ufw allow 'Nginx Full' for Nginx web traffic, then test the connection again.

Conclusion

You now have an Ubuntu 26.04 server with a sudo user, key-based SSH access, direct root logins disabled, a basic firewall, and current packages. A good next step is to enable automatic security updates before installing the rest of your stack.

netstat Command in Linux: Network Connections and Statistics

When something on a server is holding port 80, a connection is refusing to close, or a service is not reachable from the outside, the first question is almost always the same: what is actually listening, and who is talking to whom. For years, the answer on Linux was the netstat command.

netstat is part of the classic net-tools package and prints network connections, listening ports, routing tables, interface counters, and per-protocol statistics. It has been deprecated in favor of ss and ip , but it is still installed on many systems and the tool many sysadmins reach for first. This guide explains how to read its output and which flags cover the cases you run into day to day.

Install netstat

On most modern distributions, net-tools is not installed by default. If netstat is not available, install it with your package manager.

On Ubuntu, Debian, and Derivatives:

Terminal
sudo apt install net-tools

On Fedora, RHEL, and Derivatives:

Terminal
sudo dnf install net-tools

Once the package is installed, verify the binary is on your path:

Terminal
netstat --version

netstat Syntax

The general form of the command is:

txt
netstat [OPTIONS]

Run without options, netstat prints a list of open non-listening sockets, which is rarely what you want. In practice, you almost always pass a combination of flags that describe what kind of sockets you care about (TCP, UDP, Unix), what state they are in, and how you want the output formatted.

List All Connections

To list every connection, both listening and established, use the -a option:

Terminal
sudo netstat -a

The output is divided into two parts. The top lists Internet sockets with columns for protocol, receive and send queue sizes, local and foreign address, and state. The bottom lists Unix domain sockets used for local inter-process communication.

Running netstat with sudo is recommended because without it, the command cannot read socket ownership for processes that belong to other users.

Show TCP and UDP Connections

The -t and -u flags filter the output by protocol. To show only TCP connections:

Terminal
sudo netstat -at

To show only UDP connections:

Terminal
sudo netstat -au

You can combine both flags to get TCP and UDP together:

Terminal
sudo netstat -atu

Show Listening Ports

When you want to know which services are accepting new connections, use the -l option. For TCP, it restricts the output to sockets in the LISTEN state. UDP does not use the same connection states, but UDP sockets that are ready to receive traffic are still shown.

Terminal
sudo netstat -tuln

The combined flags read as: show TCP (-t) and UDP (-u) sockets that are listening (-l), with numeric addresses and ports (-n). The output looks similar to this:

output
Proto Recv-Q Send-Q Local Address Foreign Address State
tcp 0 0 0.0.0.0:22 0.0.0.0:* LISTEN
tcp 0 0 127.0.0.1:3306 0.0.0.0:* LISTEN
tcp6 0 0 :::80 :::* LISTEN
udp 0 0 0.0.0.0:68 0.0.0.0:*

From the output, we can see that SSH is listening on all interfaces on port 22, MySQL is bound to localhost only on port 3306, and a web server is listening on port 80 over IPv6.

Show the Process Using a Port

To find out which program owns a socket, add the -p option. It prints the PID and the process name next to each connection:

Terminal
sudo netstat -tulnp
output
Proto Recv-Q Send-Q Local Address Foreign Address State PID/Program name
tcp 0 0 0.0.0.0:22 0.0.0.0:* LISTEN 812/sshd
tcp 0 0 127.0.0.1:3306 0.0.0.0:* LISTEN 1034/mysqld
tcp6 0 0 :::80 :::* LISTEN 1591/nginx: master

The PID/Program name column ties each listening port to a process. This is the quickest way to find out which service is holding a port when you get an Address already in use error.

To check one specific port, pipe the output to grep :

Terminal
sudo netstat -tulnp | grep ':80'

If the command prints a row, a process is listening on port 80. If it prints nothing, no TCP or UDP listener matched that port on the local system.

Show Numeric Output

By default, netstat resolves IP addresses to hostnames and port numbers to service names (for example, 22 becomes ssh). On a busy system, this can be slow because each address needs a DNS lookup.

The -n option disables name resolution and prints raw numbers:

Terminal
sudo netstat -n

Numeric output is also easier to pipe into other tools such as grep or awk, because the field values are predictable.

Continuous Monitoring

The -c option tells netstat to print the output every second until you stop it with Ctrl+C. It is useful when you want to watch a connection appear, change state, and close:

Terminal
sudo netstat -atnc

Each iteration prints the full table again, so it is best used together with a filter such as grep to isolate a single connection.

Show TCP Connection States

TCP connections move through states such as ESTABLISHED, LISTEN, TIME_WAIT, and CLOSE_WAIT. To show active TCP sockets with numeric addresses, run:

Terminal
sudo netstat -ant

The State column tells you where each connection is in the TCP lifecycle:

output
Proto Recv-Q Send-Q Local Address Foreign Address State
tcp 0 0 192.168.1.10:22 192.168.1.5:52710 ESTABLISHED
tcp 0 0 192.168.1.10:80 203.0.113.25:51422 TIME_WAIT
tcp 0 0 127.0.0.1:3306 127.0.0.1:41834 CLOSE_WAIT

ESTABLISHED means the connection is active. TIME_WAIT is normal after a connection closes. A large number of CLOSE_WAIT entries can mean the local application is not closing sockets correctly.

To show only established TCP connections, filter the output:

Terminal
sudo netstat -ant | grep ESTABLISHED

For new troubleshooting work, ss gives better built-in state filters, such as ss -tn state established.

Count Connections

On busy web servers, you may want a quick count instead of a full connection table. To count all current TCP connections that involve port 80, run:

Terminal
sudo netstat -ant | grep ':80' | wc -l

To count only established connections on port 80, add the TCP state to the filter:

Terminal
sudo netstat -ant | grep ':80' | grep ESTABLISHED | wc -l

These counts are useful as a quick signal, but they are not a replacement for application metrics. The number can change while the pipeline is running, especially on high-traffic systems.

Display the Routing Table

To print the kernel IP routing table, use the -r option:

Terminal
netstat -rn
output
Kernel IP routing table
Destination Gateway Genmask Flags MSS Window irtt Iface
0.0.0.0 192.168.1.1 0.0.0.0 UG 0 0 0 eth0
192.168.1.0 0.0.0.0 255.255.255.0 U 0 0 0 eth0

The first row is the default route, which sends all traffic not matching another rule to 192.168.1.1. The ip route command from ip is the modern equivalent and is what you should use on new systems.

Interface Statistics

The -i option prints a per-interface summary that includes received and transmitted packets, errors, drops, and the MTU:

Terminal
netstat -i
output
Kernel Interface table
Iface MTU RX-OK RX-ERR RX-DRP TX-OK TX-ERR TX-DRP Flg
eth0 1500 2345678 0 12 1987654 0 0 BMRU
lo 65536 55432 0 0 55432 0 0 LRU

A growing RX-ERR or TX-ERR column is a hint that you have a cabling, duplex, or driver issue on that interface.

Protocol Statistics

To print a summary of statistics for each protocol, use -s:

Terminal
netstat -s

The output is long and grouped by protocol (Ip, Tcp, Udp, and so on). It includes counters such as total packets received, segments retransmitted, and connection resets. You can narrow the output to a single protocol by combining -s with -t or -u:

Terminal
netstat -st

netstat vs ss

On modern Linux distributions, ss is the recommended replacement for netstat. It is faster and reads information directly from the kernel through Netlink, with richer filter support. The ip command replaces the routing and interface parts of netstat.

A few common translations:

  • netstat -tuln is equivalent to ss -tuln
  • netstat -tulnp is equivalent to sudo ss -tulnp
  • netstat -s maps to ss -s (a much shorter summary)
  • netstat -i maps to ip -s link
  • netstat -r maps to ip route

For a full walkthrough of the replacement tool, see the guide on the ss command .

Quick Reference

For a printable quick reference, see the netstat cheatsheet .

Command Description
netstat Show active non-listening sockets
sudo netstat -a Show all listening and non-listening sockets
sudo netstat -at Show all TCP sockets
sudo netstat -au Show all UDP sockets
sudo netstat -tuln Show TCP and UDP listening sockets with numeric output
sudo netstat -tulnp Show listening sockets with PID and process name
sudo netstat -tulnp | grep ':80' Find the process listening on port 80
sudo netstat -ant Show all TCP sockets with numeric addresses
sudo netstat -ant | grep ESTABLISHED Show established TCP connections
sudo netstat -ant | grep ':80' | wc -l Count TCP connections involving port 80
sudo netstat -atnc Refresh TCP connection output every second
netstat -rn Show the routing table with numeric addresses
netstat -i Show interface statistics
netstat -s Show protocol statistics
netstat -st Show TCP protocol statistics

Troubleshooting

netstat: command not found
The net-tools package is not installed. Install it with your package manager, or use ss instead.

No PID/Program name column shown
You need to run the command with sudo. Without root privileges, netstat cannot read process information for sockets owned by other users.

Output is slow or hangs
DNS resolution is slow or failing. Add the -n option to disable name lookups and print numeric addresses and ports.

A port shows up as LISTEN on :: but not on 0.0.0.0
The service is listening on the IPv6 wildcard address. On systems with dual-stack enabled, this accepts IPv4 traffic too. Check your IPv6 configuration if only IPv4 clients are failing.

FAQ

Is netstat deprecated?
Yes. The net-tools suite, which includes netstat, ifconfig, and route, has been deprecated for years in favor of the iproute2 tools ss and ip. It is still functional and still shipped by most distributions, but new scripts should target ss and ip.

What is the difference between netstat on Linux and Windows?
The command name is the same, and the general idea is the same, but the flags are different. This guide covers the Linux version from net-tools. On Windows, the closest equivalents to netstat -tulnp are netstat -ano and Get-NetTCPConnection in PowerShell.

How do I find what process is using a specific port?
Run sudo netstat -tulnp | grep ':PORT', replacing PORT with the port number. The last column shows the PID and program name. With ss, the same query is sudo ss -tulnp 'sport = :PORT'.

Why is a port still TIME_WAIT after I stopped the service?
TIME_WAIT is a normal TCP state that keeps a closed connection around for a short period so late packets can be handled safely. The kernel clears these entries automatically, usually within one or two minutes.

Conclusion

netstat remains useful when you need to inspect network connections on systems that still have net-tools installed. For new scripts and current Linux systems, prefer ss for sockets and ip for routes and interface statistics.

How to Install Google Chrome Web Browser on Ubuntu 26.04

Google Chrome is a fast web browser with built-in Google account sync, automatic updates, password management, and support for modern web applications. It is not included in the standard Ubuntu repositories because it is proprietary software.

This guide explains how to install Google Chrome on Ubuntu 26.04 using the official Google .deb package.

Info
The official Google Chrome .deb package is available for 64-bit x86 systems. On ARM devices, use Chromium or another ARM-compatible browser.

Quick Reference

Task Command
Download package wget https://dl.google.com/linux/direct/google-chrome-stable_current_amd64.deb
Install package sudo apt install ./google-chrome-stable_current_amd64.deb
Start Chrome google-chrome
Set as default browser xdg-settings set default-web-browser google-chrome.desktop
Update Chrome sudo apt update && sudo apt upgrade
Uninstall Chrome sudo apt remove google-chrome-stable
Check repository file cat /etc/apt/sources.list.d/google-chrome.list

Installing Google Chrome on Ubuntu

The official Chrome package installs the browser and configures the Google APT repository so future updates arrive through the normal Ubuntu update process.

Download Google Chrome

Open a terminal and use wget to download the latest stable package:

Terminal
wget https://dl.google.com/linux/direct/google-chrome-stable_current_amd64.deb

Install Google Chrome

Install the package with apt. This command requires sudo privileges :

Terminal
sudo apt install ./google-chrome-stable_current_amd64.deb

When prompted, enter your password and confirm the installation.

Starting Google Chrome

Open the Activities overview, search for “Google Chrome”, and launch it:

Open Google Chrome on Ubuntu 26.04

You can also start Chrome from the terminal:

Terminal
google-chrome

When Chrome starts for the first time, it asks whether you want to set it as the default browser and send crash reports:

Google Chrome default browser prompt on Ubuntu 26.04

Chrome then opens the welcome page:

Google Chrome welcome page on Ubuntu 26.04

From here, you can sign in with your Google account and sync bookmarks, history, passwords, and extensions.

Set Chrome as Default Browser

To set Chrome as the default browser from the command line, run:

Terminal
xdg-settings set default-web-browser google-chrome.desktop

Verify the current default browser:

Terminal
xdg-settings get default-web-browser
output
google-chrome.desktop

Updating Google Chrome

The Chrome package adds the Google repository to your system. Check the repository file with cat :

Terminal
cat /etc/apt/sources.list.d/google-chrome.list

The file should contain a Google Chrome repository entry for the stable channel.

Chrome updates are installed through the standard Ubuntu update workflow:

Terminal
sudo apt update
sudo apt upgrade

Uninstalling Google Chrome

To remove Google Chrome, run:

Terminal
sudo apt remove google-chrome-stable

Remove packages that are no longer needed:

Terminal
sudo apt autoremove

If you also want to remove the Google Chrome repository file, delete it and update the package index:

Terminal
sudo rm /etc/apt/sources.list.d/google-chrome.list
sudo apt update

Troubleshooting

The installation fails with dependency errors
Fix broken dependencies and repeat the installation:

Terminal
sudo apt --fix-broken install
sudo apt install ./google-chrome-stable_current_amd64.deb

Chrome does not start after installation
Close any running Chrome processes and start it again:

Terminal
pkill -f google-chrome
google-chrome

The repository file is missing
Reinstall the downloaded package so the Chrome repository is recreated:

Terminal
sudo apt install ./google-chrome-stable_current_amd64.deb

FAQ

What is the difference between Chrome and Chromium?
Chromium is the open-source browser project that Chrome is based on. Chrome adds proprietary media codecs, Google account integration, and Google-managed update packaging.

Can I install Chrome Beta or Dev on Ubuntu?
Yes. Download the Beta or Dev .deb package from Google and install it with apt in the same way as the stable package.

Does Chrome update automatically on Ubuntu?
Chrome is updated by Ubuntu’s package manager after the Google repository is added. Run sudo apt update && sudo apt upgrade to install available updates.

Conclusion

Google Chrome installs on Ubuntu 26.04 through the official .deb package. After installation, Chrome receives updates from the Google repository along with your other system packages.

How to Install Apache on Ubuntu 26.04

Apache is one of the most popular web servers in the world. It is an open-source and cross-platform HTTP server that powers a large percentage of the Internet’s websites. Apache provides many powerful features that can be further extended through the use of additional modules, making it a good option for those looking for a customizable and flexible web server.

This tutorial will guide you through the process of installing and managing the Apache web server on Ubuntu 26.04. You will learn how to install Apache, open HTTP and HTTPS ports in the firewall, and set up virtual hosts.

Installing Apache

On Ubuntu and Debian systems, the Apache package and the service are called apache2.

Apache is included in the default Ubuntu repositories, and the installation is pretty straightforward.

Run the following commands to refresh the local package index and install Apache:

Terminal
sudo apt update
sudo apt install apache2

After the installation process is finished, the Apache service will start automatically.

You can verify that Apache is running by typing:

Terminal
sudo systemctl status apache2

The output should tell you that the service is running and enabled to start on system boot:

output
● apache2.service - The Apache HTTP Server
Loaded: loaded (/usr/lib/systemd/system/apache2.service; enabled; preset: enabled)
Active: active (running) since Sat 2026-04-25 18:28:47 UTC; 5min ago
Invocation: d7369f2830cc4e29b4d03d6f2c0968ba
Docs: https://httpd.apache.org/docs/2.4/
Main PID: 9429 (apache2)
Status: "Total requests: 2; Idle/Busy workers 100/0;Requests/sec: 0.00608; Bytes served/>
Tasks: 7 (limit: 375)
Memory: 12.4M (peak: 12.7M)
CPU: 168ms
CGroup: /system.slice/apache2.service
├─9429 /usr/sbin/apache2 -k start -DFOREGROUND
├─9432 /usr/sbin/apache2 -k start -DFOREGROUND
├─9433 /usr/sbin/apache2 -k start -DFOREGROUND
...

Apache has been successfully installed on your Ubuntu 26.04 server. You can now start using it.

Opening HTTP and HTTPS Ports

Apache listens on port 80 (HTTP) and 443 (HTTPS). You need to open the necessary firewall ports to allow access to the web server from the Internet.

Assuming you are using UFW , you can do that by enabling the ‘Apache Full’ profile, which includes rules for both ports:

Terminal
sudo ufw allow 'Apache Full'

Verify the change:

Terminal
sudo ufw status

The output should look something like this:

output
Status: active
To Action From
-- ------ ----
22/tcp ALLOW Anywhere
Apache Full ALLOW Anywhere
22/tcp (v6) ALLOW Anywhere (v6)
Apache Full (v6) ALLOW Anywhere (v6)

Verifying the Apache Installation

To verify that everything works correctly, open your browser, type your server IP address http://YOUR_IP_OR_DOMAIN/, and you will see the default Ubuntu 26.04 Apache welcome page as shown below:

Apache welcome page

The page provides basic information about Apache configuration files, relevant helper scripts, and directory locations.

Setting up a Virtual Host

A virtual host allows Apache to serve more than one website from the same server. Each virtual host defines the settings for a specific domain.

Apache ships with one default virtual host. If you are hosting a single website, you can place the site files in /var/www/html and edit /etc/apache2/sites-enabled/000-default.conf. If you want to host multiple sites, create a separate virtual host file for each domain.

In this example, we will configure a site for example.com. Replace example.com with your own domain name.

First, create the document root directory:

Run the following command to create the directory :

Terminal
sudo mkdir -p /var/www/example.com

Create a simple index.html file inside the document root so you can test the configuration:

/var/www/example.com/index.htmlhtml
<!DOCTYPE html>
<html lang="en" dir="ltr">
 <head>
 <meta charset="utf-8">
 <title>Welcome to example.com</title>
 </head>
 <body>
 <h1>Success! example.com home page!</h1>
 </body>
</html>

Set the ownership to the Apache user:

Terminal
sudo chown -R www-data:www-data /var/www/example.com

Next, create the virtual host file:

/etc/apache2/sites-available/example.com.confapache
<VirtualHost *:80>
 ServerName example.com
 ServerAlias www.example.com
 ServerAdmin webmaster@example.com
 DocumentRoot /var/www/example.com

 <Directory /var/www/example.com>
 Options -Indexes +FollowSymLinks
 AllowOverride All
 Require all granted
 </Directory>

 ErrorLog ${APACHE_LOG_DIR}/example.com-error.log
 CustomLog ${APACHE_LOG_DIR}/example.com-access.log combined
</VirtualHost>

Enable the site:

Terminal
sudo a2ensite example.com.conf

Test the configuration:

Terminal
sudo apachectl configtest

If the syntax check passes, you will see the following output:

output
Syntax OK

Restart Apache:

Terminal
sudo systemctl restart apache2

Now open http://example.com in your browser. If everything is configured correctly, you should see the test page.

Example Apache virtual host test page on Ubuntu 26.04

Conclusion

We have shown you how to install Apache on Ubuntu 26.04, open the required firewall ports, and configure a virtual host. From here, you can deploy your site content or continue with SSL and PHP setup.

How to Install Docker on Ubuntu 26.04

Docker is an open-source container platform that lets you build, test, and run applications as portable containers. Containers package the application code together with its dependencies, which makes it easier to run the same workload across development machines, test environments, and servers.

Docker is widely used in development workflows and DevOps pipelines because it keeps application environments predictable.

This tutorial explains how to install Docker on Ubuntu 26.04.

Supported Ubuntu Versions

Docker is available from the standard Ubuntu repositories, but those packages are often outdated. To ensure you get the latest stable version, we will install Docker from the official Docker repository.

At the time of writing, the Docker repository provides packages for current supported Ubuntu releases, including Ubuntu 26.04 LTS, Ubuntu 25.10, Ubuntu 24.04 LTS, and Ubuntu 22.04 LTS.

Info
Derivatives like Linux Mint are not officially supported, though they often work.

Prerequisites

Before you begin, make sure that:

  • You are running a 64-bit supported Ubuntu version
  • You have a user account with sudo privileges
  • Your system is connected to the internet and up to date

Uninstall any old or conflicting Docker packages first to avoid potential issues:

Terminal
sudo apt remove docker.io docker-doc docker-compose docker-compose-v2 podman-docker containerd runc

Installing Docker on Ubuntu 26.04

Installing Docker on Ubuntu is relatively straightforward. We will enable the Docker repository, import the repository GPG key, and install the Docker packages.

Step 1: Update the Package Index and Install Dependencies

First, update the package index and install packages required to use repositories over HTTPS :

Terminal
sudo apt update
sudo apt install ca-certificates curl

Step 2: Import Docker’s Official GPG Key

Add Docker’s official GPG key so your system can verify package authenticity:

Terminal
sudo install -m 0755 -d /etc/apt/keyrings
sudo curl -fsSL https://download.docker.com/linux/ubuntu/gpg -o /etc/apt/keyrings/docker.asc
sudo chmod a+r /etc/apt/keyrings/docker.asc

Step 3: Add the Docker APT Repository

Add the Docker repository to your system:

Terminal
sudo tee /etc/apt/sources.list.d/docker.sources <<EOF
Types: deb
URIs: https://download.docker.com/linux/ubuntu
Suites: $(. /etc/os-release && echo "${UBUNTU_CODENAME:-$VERSION_CODENAME}")
Components: stable
Architectures: $(dpkg --print-architecture)
Signed-By: /etc/apt/keyrings/docker.asc
EOF

$(. /etc/os-release && echo "${UBUNTU_CODENAME:-$VERSION_CODENAME}") reads your Ubuntu codename from the OS release file. On Ubuntu 26.04 it returns resolute.

Step 4: Install Docker Engine

Tip
If you want to install a specific Docker version, skip this step and go to the next one.

Now that the Docker repository is enabled, update the package index and install Docker:

Terminal
sudo apt update
sudo apt install docker-ce docker-ce-cli containerd.io docker-buildx-plugin docker-compose-plugin

Installing a Specific Docker Version (Optional)

If you want to install a specific Docker version instead of the latest one, first list the available versions:

Terminal
sudo apt update
apt list --all-versions docker-ce

The available Docker versions are printed in the second column:

output
docker-ce/resolute 5:29.4.0-1~ubuntu.26.04~resolute amd64
docker-ce/resolute 5:29.3.1-1~ubuntu.26.04~resolute amd64
docker-ce/resolute 5:29.3.0-1~ubuntu.26.04~resolute amd64
...

Install a specific version by adding =<VERSION> after the package name:

Terminal
DOCKER_VERSION="<VERSION>"
sudo apt install docker-ce=$DOCKER_VERSION docker-ce-cli=$DOCKER_VERSION containerd.io docker-buildx-plugin docker-compose-plugin

Replace <VERSION> with the exact version string returned by apt list --all-versions docker-ce.

Verify the Docker Installation

On most Ubuntu systems, the Docker service starts automatically after installation. If it does not, start it manually:

Terminal
sudo systemctl start docker

Check the service status:

Terminal
sudo systemctl status docker

The output will look something like this:

output
● docker.service - Docker Application Container Engine
Loaded: loaded (/usr/lib/systemd/system/docker.service; enabled)
Active: active (running)
...

You can also confirm that the client and daemon are responding:

Terminal
sudo docker version

To verify that Docker can pull and run containers correctly, run the test image:

Terminal
sudo docker run hello-world

If the image is not found locally, Docker will download it from Docker Hub, run the container, print a “Hello from Docker” message, and exit.

Docker Hello World

The container stops after printing the message because it has no long-running process.

Run Docker Commands Without sudo (Highly Recommended)

By default, only root and a user with sudo privileges can run Docker commands.

To allow a non-root user to execute Docker commands, add the user to the docker group:

Terminal
sudo usermod -aG docker $USER

$USER is an environment variable that holds the currently logged-in username. If you want to execute commands with another user, replace $USER with that username.

Run newgrp docker or log out and log back in for the group membership changes to take effect.

After that, you can rerun the test container without sudo :

Terminal
docker run hello-world
Info
By default, Docker pulls images from Docker Hub. It is a cloud-based registry service that stores Docker images in public or private repositories.

Updating Docker

When a new Docker version is released, update it using standard system commands:

Terminal
sudo apt update
sudo apt upgrade

To prevent Docker from being updated automatically, mark it as held:

Terminal
sudo apt-mark hold docker-ce

Uninstalling Docker

Before uninstalling Docker, it is recommended to remove all containers, images, volumes, and networks :

Run the following commands to stop all running containers and remove all Docker objects:

Terminal
docker container stop $(docker container ls -aq)
docker system prune -a --volumes -f

Remove Docker packages:

Terminal
sudo apt purge docker-ce docker-ce-cli containerd.io \
docker-buildx-plugin docker-compose-plugin docker-ce-rootless-extras
sudo apt autoremove

To completely remove Docker data from your system, delete the directories that were created during the installation process:

Terminal
sudo rm -rf /var/lib/{docker,containerd}

Troubleshooting

Permission denied while trying to connect to the Docker daemon socket
Your user is not yet in the docker group, or the group membership has not taken effect. Run sudo usermod -aG docker $USER, then log out and back in (or run newgrp docker).

Cannot connect to the Docker daemon. Is the daemon running?
The Docker service is not running. Start it with sudo systemctl start docker and check its status with sudo systemctl status docker.

Package ‘docker-ce’ has no installation candidate
The Docker repository was not added correctly. Re-run Steps 2 and 3, then run sudo apt update before installing.

Containers fail to start after an OS or Docker upgrade
Check the Docker daemon status, the installed Docker version, and your container runtime configuration. If the host or Docker Engine was upgraded recently, review the Docker release notes and verify that your workloads are using a supported configuration before restarting them.

Conclusion

Installing Docker from the official repository ensures you always have access to the latest stable releases and security updates. For post-install steps such as configuring log drivers or setting up rootless mode, see the official post-install guide .

❌