After installing Ubuntu 26.04, the desktop is ready to use, but a few setup steps make the system easier to work with day to day. Updating packages, checking drivers, installing media codecs, setting up backups, and reviewing privacy settings are good first tasks on a new installation.
This guide explains what to do after installing Ubuntu 26.04. The checklist is aimed at desktop users who want a clean, practical setup without adding unnecessary tools.
Start by updating the package index and installing available updates. This pulls in security fixes, bug fixes, and package updates released after the installation image was created.
Open a terminal and run:
Terminal
sudo apt update
sudo apt upgrade
Enter your password when prompted and confirm the upgrade. If the update installs a new kernel or graphics driver, reboot before continuing:
Terminal
sudo reboot
You can also update from the desktop by opening Software Updater from the application menu.
Ubuntu detects most hardware automatically, but some systems need proprietary drivers for graphics cards, Wi-Fi adapters, or other devices. This is common on laptops and systems with NVIDIA graphics.
Open Software & Updates, go to the Additional Drivers tab, and wait while Ubuntu checks available drivers. If Ubuntu recommends a proprietary driver, select it and apply the change. Reboot after installing graphics or Wi-Fi drivers.
If you selected the third-party software option during installation, your system may already have the correct driver installed. It is still worth checking this screen once on a new system.
Ubuntu does not include every media codec by default. If you want better support for common audio and video files, Microsoft fonts, and some archive formats, install the restricted extras package:
Terminal
sudo apt install ubuntu-restricted-extras
During installation, you may be asked to accept the Microsoft font license. Use the keyboard to select OK, press Enter, then select Yes and press Enter again.
After the package is installed, try playing the video or audio file again. For most desktop users, this package is enough for everyday media playback.
Ubuntu includes Snap support by default, and many applications are available from the Ubuntu App Center. Flatpak is another popular desktop app format, and Flathub provides current builds of many Linux desktop applications.
A fresh Ubuntu installation includes a browser, file manager, terminal, text editor, and basic utilities. Most users still add a few daily-use applications.
Common choices include:
A web browser such as Google Chrome
, Chromium, Microsoft Edge, or Firefox.
A media player such as VLC.
Development tools such as Node.js
, Git, Python, Docker, or Visual Studio Code.
Communication apps such as Slack, Discord, Zoom, or Teams.
Desktop apps from Flathub when the Ubuntu repositories or Snap packages do not provide the version you want.
Use the Ubuntu App Center for simple desktop installs. Use apt when a package is available in Ubuntu repositories, and use the vendor’s official package only when you need the current upstream version.
Set up backups before you spend too much time customizing the system. Backups are easier to trust when they are configured early and tested before you need them.
Open Settings > System > Backup and choose where to store your backups. An external drive is the simplest option for a single desktop or laptop. If you already use a cloud storage provider or network storage, configure that target instead.
At minimum, back up your home directory, which contains documents, downloads, browser profiles, SSH keys, and most application settings. If you keep important files outside your home directory, include those paths too.
After the first backup finishes, restore one small test file to confirm that the backup is usable.
Open Settings > Privacy & Security and review the options that match how you use the computer. On a laptop, pay special attention to location services, screen lock, automatic suspend, and notifications on the lock screen.
Good defaults for most systems are:
Disable location services unless you use apps that need location access.
Keep the screen lock enabled.
Use a short automatic blank-screen delay on laptops.
Hide notification details on the lock screen if the computer is used in public places.
Review diagnostics and error reporting options.
If the computer is shared, create separate user accounts instead of sharing one login. Use an administrator account only when needed, and keep daily users separate when possible.
Ubuntu includes UFW, a simple firewall tool for managing incoming connections. On a typical desktop system, enabling UFW blocks unsolicited inbound traffic while allowing normal outbound connections.
Enable the firewall:
Terminal
sudo ufw enable
Check the status:
Terminal
sudo ufw status
output
Status: active
If you use SSH, file sharing, development servers, or remote desktop tools, allow those services before relying on the firewall rules. For a full command reference, see our UFW firewall guide
.
GNOME Tweaks exposes settings that are not shown in the default Settings app. It is useful for changing window behavior, fonts, startup applications, and a few interface details.
Install it with:
Terminal
sudo apt install gnome-tweaks
Open Tweaks from the application menu. If you also use GNOME Shell extensions, install only the extensions you need and remove ones you no longer use. Too many extensions can make desktop upgrades harder to troubleshoot.
On laptops, start with the built-in power settings. Open Settings > Power and choose the profile that matches your current use:
Power Saver for longer battery life.
Balanced for normal use.
Performance when you need maximum speed and the laptop is plugged in.
Also review screen brightness, automatic suspend, Bluetooth, and keyboard backlight settings. Small changes here often matter more than installing extra tools.
If you need more control, you can install TLP:
Terminal
sudo apt install tlp
Start and enable the service:
Terminal
sudo systemctl enable --now tlp
Use TLP only if you are comfortable troubleshooting power behavior. On many newer laptops, Ubuntu’s built-in power profiles are enough.
Once the desktop basics are in place, install the tools you need for your work. Developers may want Docker
, Node.js, Git, Python, or Visual Studio Code. Desktop users may want Chrome, VLC, Flatpak apps, printer support, or cloud sync tools.
If you plan to use the machine as a server, create a separate setup plan. Desktop post-install tasks are different from server hardening, SSH access, service configuration, and firewall rules for hosted applications.
Ubuntu 26.04 works well after a clean installation, but updates, drivers, codecs, backups, firewall settings, and desktop preferences make the system more practical for daily use. Start with the essentials, then add only the applications and customizations you actually need.
Installing Ubuntu 26.04 gives you a fresh long-term support desktop with the current Ubuntu installer, GNOME desktop, and updated system packages. A clean installation is the right choice when you are setting up a new computer, replacing another operating system, or starting over with a known-good system.
This guide explains how to install Ubuntu 26.04 from a bootable USB drive. We will download the ISO, create the installer USB, boot from it, walk through the installer screens, and review the first steps after the system starts.
A computer where you want to install Ubuntu 26.04.
A USB flash drive with at least 12 GB of storage.
A reliable internet connection.
A backup of any files you want to keep from the target computer.
Installing Ubuntu can erase the selected disk. If the computer already contains another operating system or personal files, back up your data before continuing.
If you already run an older Ubuntu release and want to keep your existing setup, see how to upgrade to Ubuntu 26.04
instead of doing a clean install.
Download the Ubuntu 26.04 Desktop ISO from the official Ubuntu downloads page
. Choose the 64-bit desktop image and save it to your computer. The file name should look similar to ubuntu-26.04-desktop-amd64.iso.
If Ubuntu publishes checksum files for the release, verify the ISO before writing it to the USB drive. This step confirms that the file downloaded correctly and was not corrupted.
Write the ISO file to a USB flash drive with a tool such as Rufus, balenaEtcher, GNOME Disks, or Startup Disk Creator. The exact steps depend on your current operating system, but the process is the same:
Select the Ubuntu 26.04 ISO file.
Select the USB flash drive.
Start the write process.
Wait until the tool finishes and safely ejects the drive.
Warning
Writing the ISO to a USB drive erases the selected drive. Double-check that you selected the correct USB device before starting.
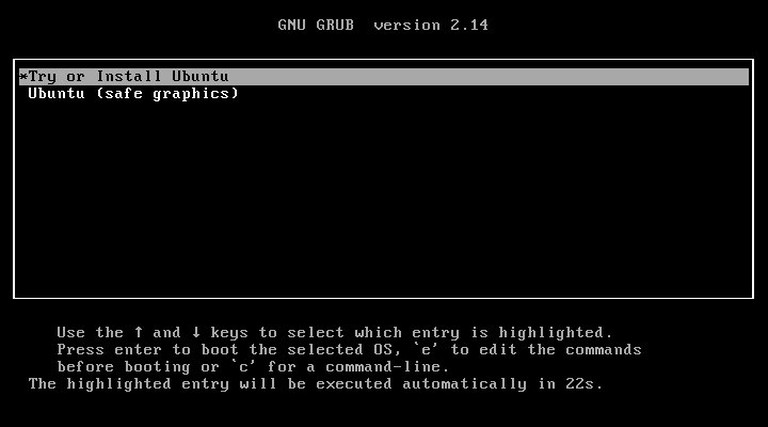
Insert the USB drive into the computer where you want to install Ubuntu and restart the machine. Open the boot menu during startup and select the USB drive.
The key used to open the boot menu depends on the computer manufacturer. Common keys include F12, F10, F9, Esc, and Del. If the computer starts the existing operating system instead, restart and try the boot-menu key again.
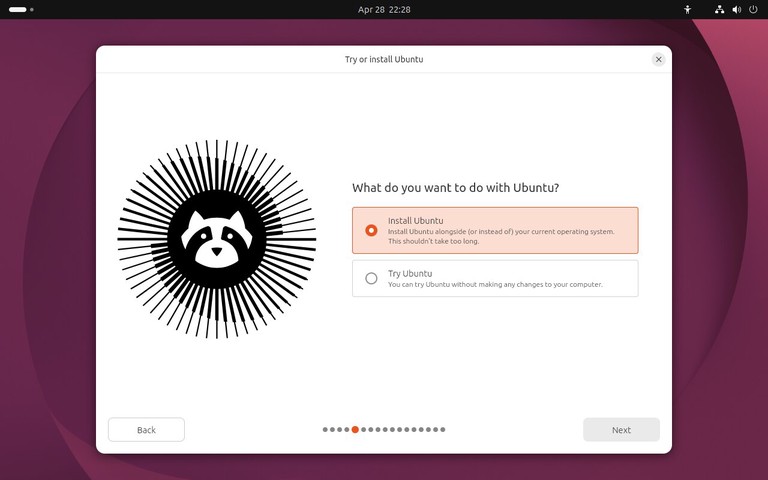
When the Ubuntu boot menu appears, choose Try or Install Ubuntu.
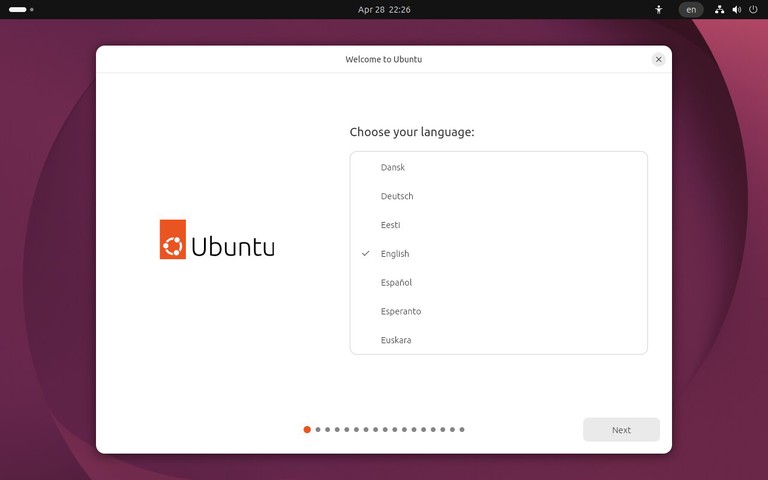
Choose your keyboard layout. If you are unsure, use the text field on the screen to test keys such as quotes, symbols, and special characters.
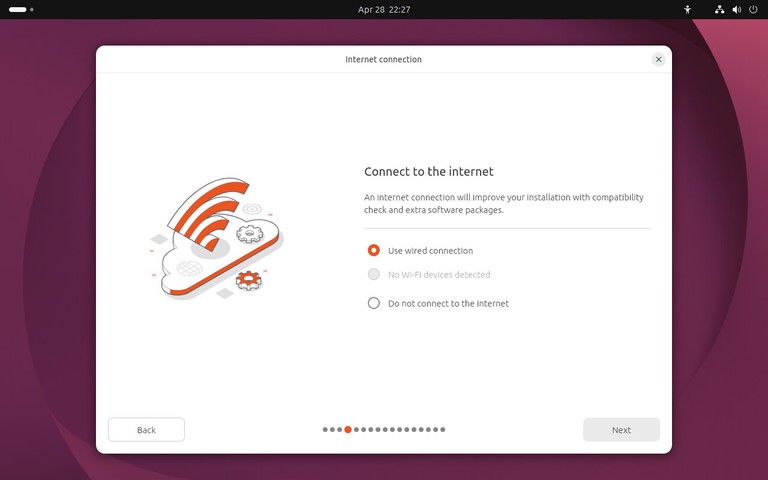
Next, connect to the internet if the installer asks for network access. A wired Ethernet connection is usually detected automatically. For Wi-Fi, select your network and enter the password.
You can install Ubuntu without internet access, but connecting during installation allows the installer to download updates and third-party packages when those options are selected.
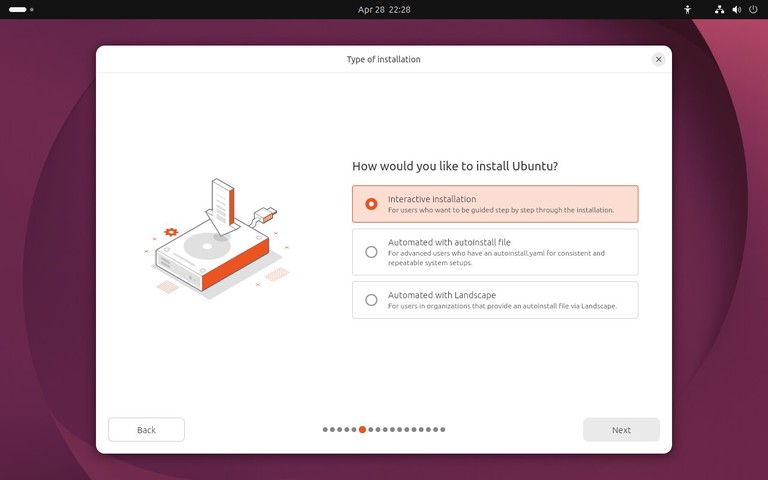
On the next screen, choose Interactive installation. This is the standard installer path for a single desktop computer.
The automated installation option is for advanced deployments where you provide an installation configuration file. Most desktop users should leave it unselected.
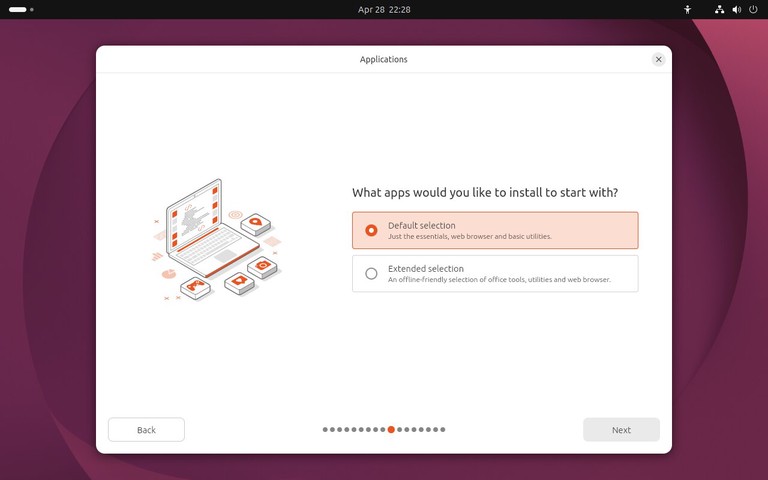
Choose the application set you want to install. The default selection is a good fit for most desktop systems. The extended selection installs more applications during setup.
Ubuntu 26.04 uses Default selection for a smaller desktop setup and Extended selection for additional tools such as office utilities. Choose the default option if you want a clean desktop and plan to add applications later. Choose the extended option if you want more applications installed immediately.
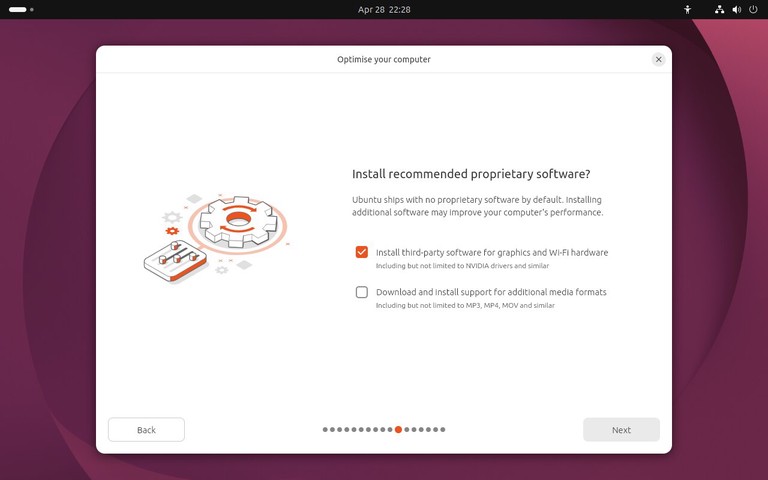
The next screen offers proprietary software for graphics and Wi-Fi hardware, along with support for additional media formats.
Enable these options when you have a working internet connection. They can help with NVIDIA graphics, some Wi-Fi adapters, and common media playback.
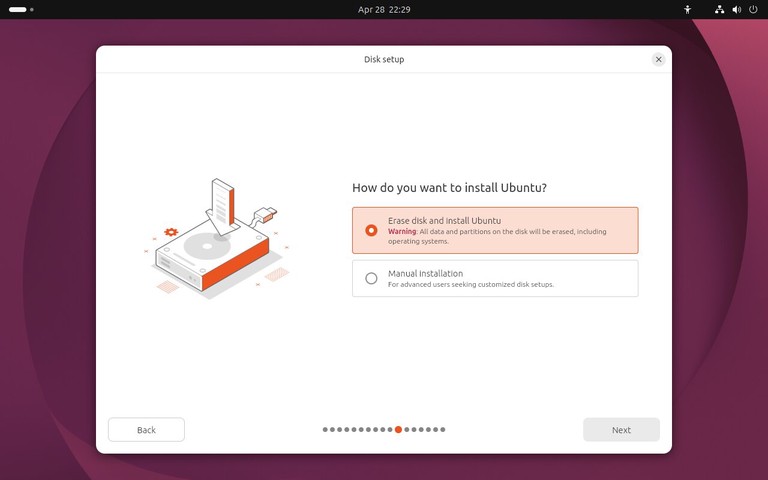
The disk setup screen is the most important part of the installation.
For a clean install on a dedicated computer or virtual machine, choose the option to erase the disk and install Ubuntu. This creates the required partitions automatically.
If you are installing Ubuntu next to another operating system, read the installer options carefully before continuing. Do not erase the disk unless you want to remove the existing operating system and all files on that disk.
Advanced users can choose manual partitioning to control mount points, file systems, and encryption. For most desktop installs, the automatic disk setup is simpler and less error-prone.
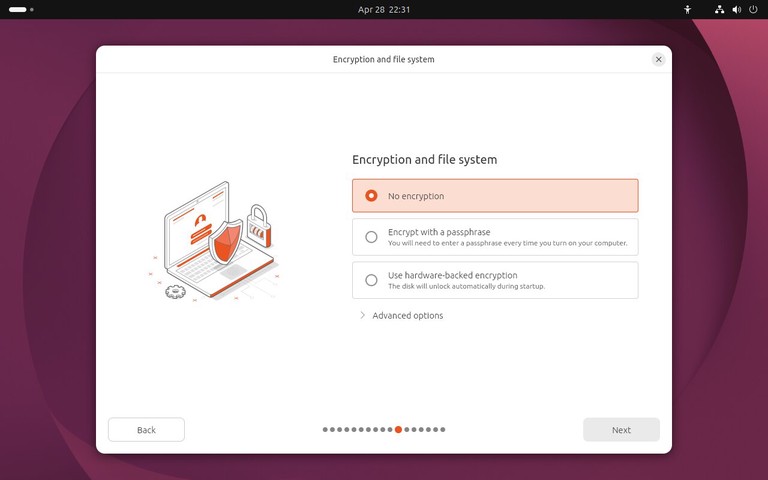
After choosing the disk setup, select the encryption and file system options. For a basic desktop installation, leave No encryption selected.
If you are installing Ubuntu on a laptop or a computer that stores private data, disk encryption is worth considering. Make sure you can store the recovery key safely, because encrypted data is difficult or impossible to recover without the correct passphrase or recovery key.
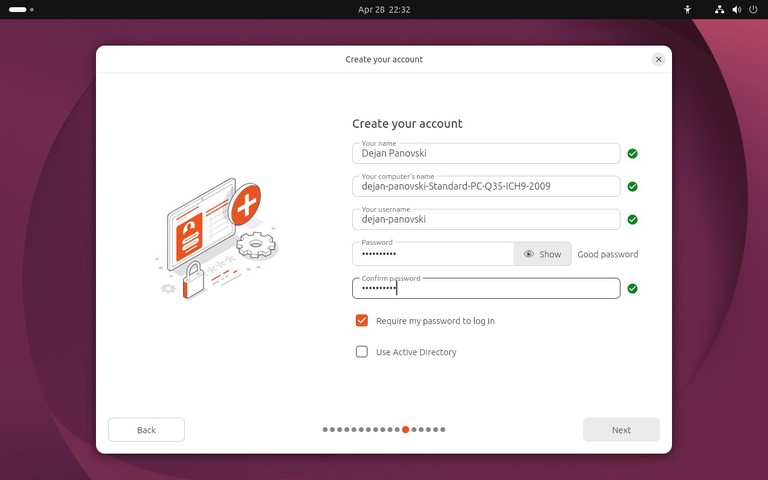
Enter your name, computer name, username, and password. Choose a strong password because this account will be used for desktop login and administrative tasks with sudo
.
You can choose automatic login if the computer is for personal use in a trusted location. For laptops, shared machines, and work systems, require a password at login.
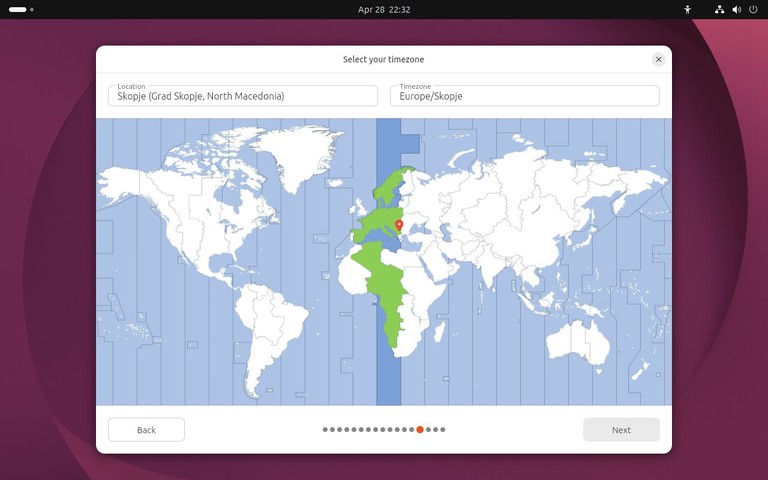
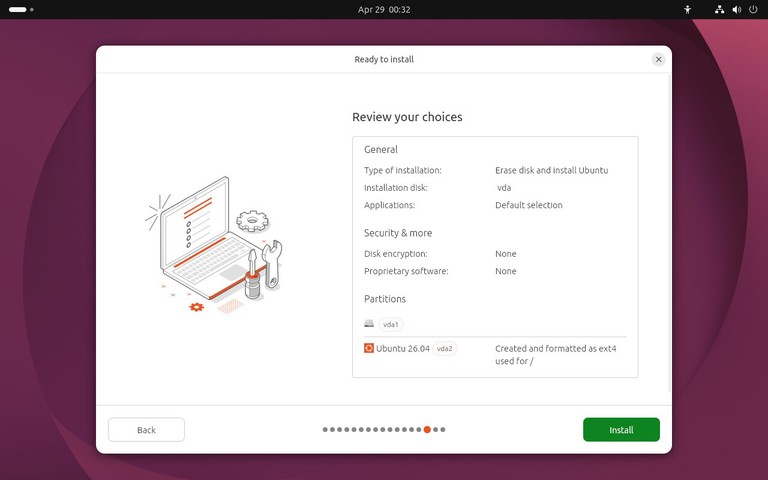
Before copying files, the installer shows a summary of the selected options. Review the disk, keyboard layout, time zone, and account details.
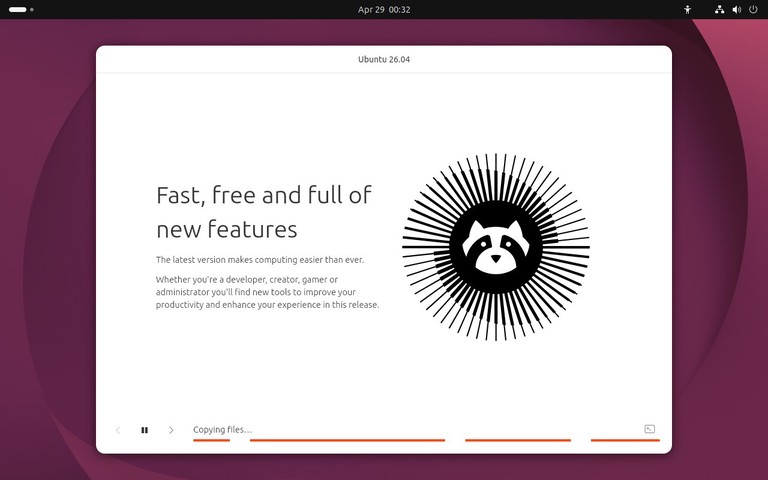
When everything looks correct, start the installation. Ubuntu will copy files to the disk, install packages, configure the boot loader, and prepare the system for first boot.
The installation can take several minutes depending on your hardware and USB drive speed.
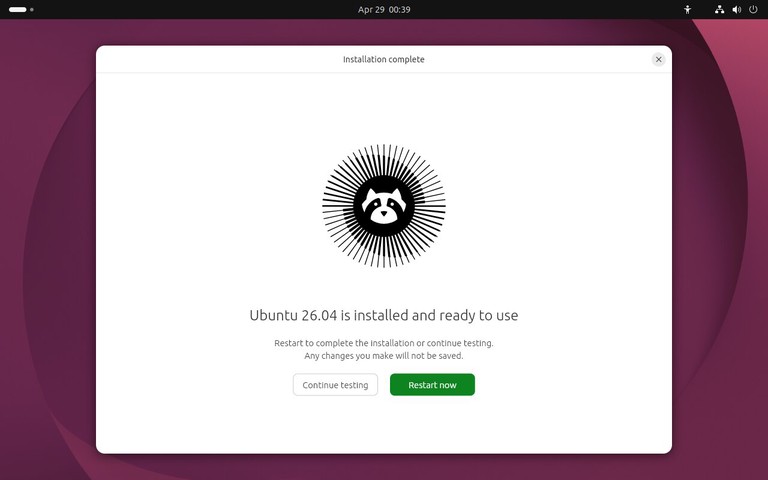
When the installer finishes, restart the computer and remove the USB drive when prompted.
After the reboot, the computer should start from the internal disk and show the Ubuntu login screen or desktop.
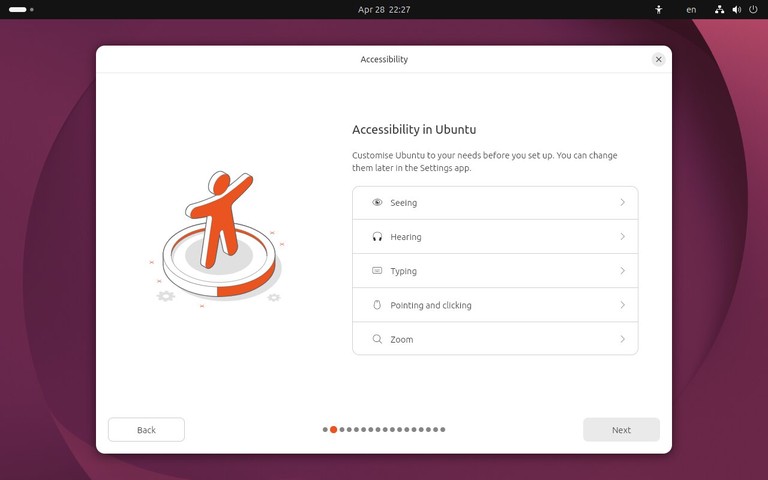
Ubuntu may show a short welcome wizard after the first login. Use it to review location services, privacy reporting, appearance, and application suggestions, or skip the options you do not need.
You may also want to install extra .deb packages for applications that are not available from the Ubuntu repositories. For details, see how to install deb files on Ubuntu
.
The computer does not boot from the USB drive
Open the boot menu and choose the USB device manually. If the USB drive is not listed, recreate it with another tool or try a different USB port.
The installer freezes or shows a blank screen
Restart and choose the safe graphics option from the Ubuntu boot menu. This can help on systems with graphics drivers that do not work well during installation.
The disk you want to use is not listed
Check the computer firmware settings for storage mode and disk controller options. On some systems, switching from RAID or Intel RST mode to AHCI is required before Linux installers can detect the disk. Back up data before changing storage settings.
Wi-Fi does not work during installation
Install without network access and connect after the first boot. If the Wi-Fi adapter needs third-party drivers, connect with Ethernet or USB tethering, then install updates and additional drivers from Ubuntu.
The system boots back into the installer after installation
Remove the USB drive and reboot. If it still opens the installer, check the boot order in the firmware settings and move the internal disk above the USB device.
Can I install Ubuntu 26.04 without internet access?
Yes. You can install Ubuntu without an internet connection. Updates, language packs, and some third-party packages can be installed after the first boot.
Will installing Ubuntu erase Windows?
It depends on the disk option you choose. Erasing the disk removes Windows and all files on that disk. If you want to keep Windows, choose the install-alongside option when available or use manual partitioning.
How much disk space does Ubuntu 26.04 need?
Ubuntu can install on a modest disk, but a desktop system is more comfortable with at least 25 GB of free space. Use more if you plan to install many applications, keep large files, or run development tools.
Should I choose default or extended installation?
Choose the default selection if you want a smaller desktop setup and plan to install applications as needed. Choose the extended selection if you want more desktop tools installed immediately.
You now have Ubuntu 26.04 installed and ready to use. After the first login, install updates, confirm that your hardware works, and add only the applications and services you need for your setup.
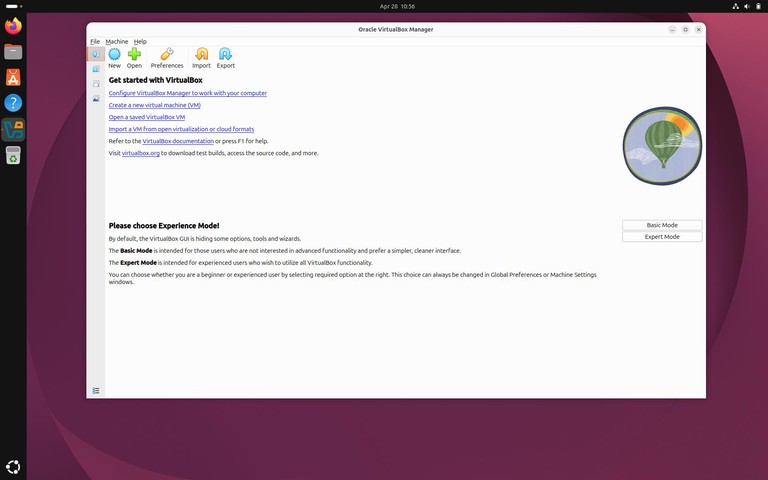
VirtualBox
is a desktop virtualization application that lets you run Linux, Windows, BSD, and other guest operating systems in virtual machines. It is useful for testing software, running lab environments, and keeping experiments separate from your main system.
This guide explains how to install VirtualBox on Ubuntu 26.04 from the Ubuntu multiverse repository.
At publication time, Ubuntu 26.04 packages VirtualBox 7.2 in the Ubuntu repositories. The Oracle VirtualBox APT repository does not yet provide a dedicated resolute repository suite, so the Ubuntu package is the safer install path for this release.
You need to be logged in as root or as a user with sudo privileges
.
If Secure Boot is enabled, Ubuntu may ask you to enroll a Machine Owner Key (MOK) so the VirtualBox kernel modules can load. Follow the on-screen prompts and reboot when asked.
The VirtualBox Extension Pack adds support for features such as USB 2.0 and USB 3.0 devices, webcam passthrough, disk encryption, and remote display access.
Install the Ubuntu package:
Terminal
sudo apt install virtualbox-ext-pack
The installer downloads the matching Oracle Extension Pack and asks you to accept the license terms. Read the prompt, then select the confirmation option if you agree.
If you want to remove saved virtual machines, delete them from the VirtualBox interface first or remove the files manually from your home directory. Do this only after you have backed up any virtual machines you still need.
Secure Boot blocks VirtualBox modules
Enroll the MOK key when Ubuntu prompts you, then reboot. If you skipped the enrollment screen, reinstall or reconfigure the VirtualBox DKMS package so Ubuntu shows the prompt again.
The virtualbox-ext-pack install stops at a license prompt
Use the keyboard to select the confirmation option in the terminal dialog. If the terminal dialog is hard to read, expand the terminal window and run the install command again.
USB devices do not appear in guest machines
Install the Extension Pack, add your user to the vboxusers group, and log out and back in:
Should I install VirtualBox from Oracle or Ubuntu repositories?
For Ubuntu 26.04, the Ubuntu repository package is the best default choice because it matches the release and kernel packaging. Use the Oracle repository only after Oracle publishes a repository suite for Ubuntu 26.04.
Do I need the Extension Pack?
You only need it for extra features such as USB 2.0/3.0 passthrough and remote display support. Basic virtual machines work without it.
Where are VirtualBox virtual machines stored?
By default, VirtualBox stores virtual machines under ~/VirtualBox VMs/.
VirtualBox is available on Ubuntu 26.04 from the multiverse repository. After installation, add the Extension Pack only if you need its extra device and remote display features.
TeamViewer
is a remote access and support application that lets you connect to another computer over the internet. It supports remote control, file transfer, screen sharing, and unattended access across Linux, Windows, and macOS.
This guide explains how to install TeamViewer on Ubuntu 26.04 using the official .deb package.
You need to be logged in as root or as a user with sudo privileges
.
The command below downloads the x86-64 package. If you are using an ARM device, choose the correct Ubuntu/Debian package from the TeamViewer Linux download page
.
During installation, the TeamViewer APT repository is added to your system. This allows TeamViewer to update through the same package manager you use for other Ubuntu packages.
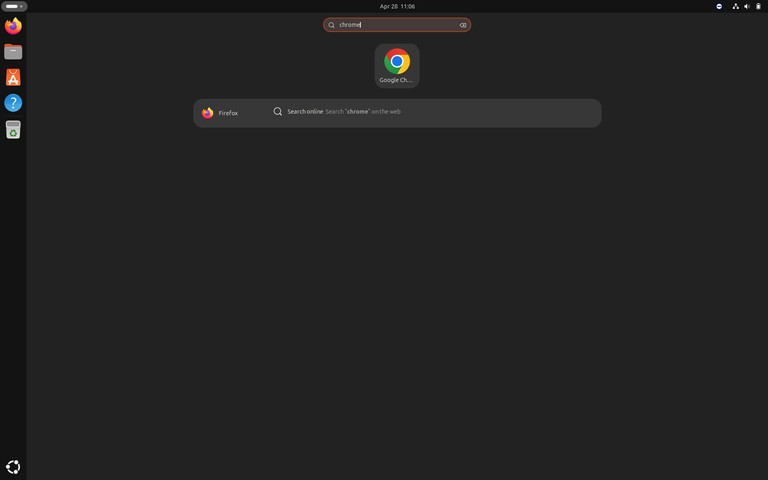
Open the Activities overview, search for “TeamViewer”, and click the application icon.
You can also start TeamViewer from the command line:
Terminal
teamviewer
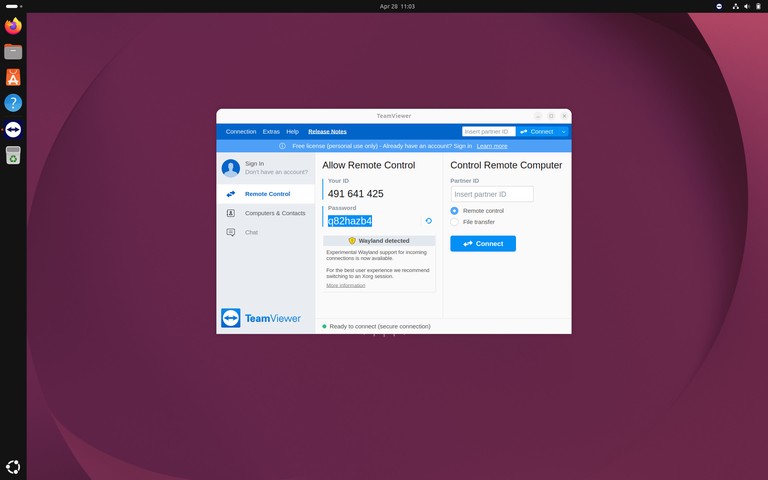
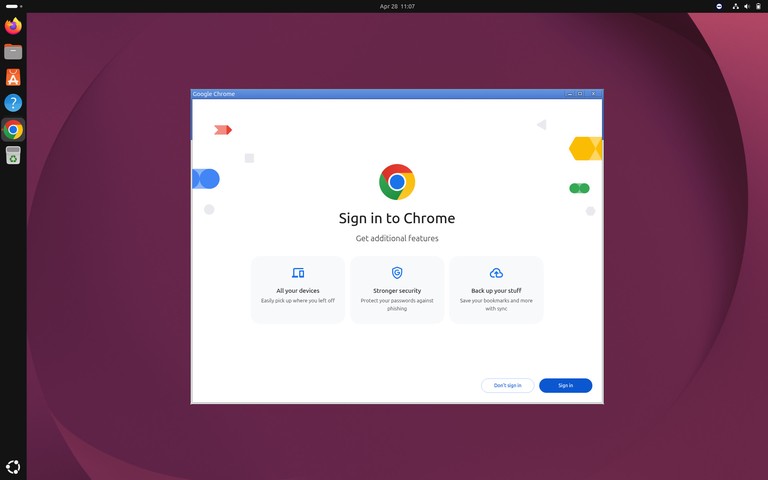
The first time TeamViewer starts, accept the license agreement. After that, the main TeamViewer window displays your ID and password. Share those values only with someone you trust, or enter a remote computer’s ID to start an outgoing connection.
teamviewer: command not found after installation
Close and reopen your terminal, then try again. If the command is still missing, verify the package installation:
Terminal
dpkg -l teamviewer
The installation fails because of missing dependencies
Ask apt to repair broken dependencies and retry the package install:
TeamViewer shows “Not ready. Please check your connection.”
Restart the TeamViewer daemon:
Terminal
sudo systemctl restart teamviewerd
Check that the service is running:
Terminal
systemctl status teamviewerd
You are using an ARM system
Do not install the teamviewer_amd64.deb package on ARM. Download the ARM package from TeamViewer’s Linux download page instead.
Is TeamViewer free on Ubuntu?
TeamViewer is free for personal, non-commercial use. Commercial use requires a paid license.
Can I install TeamViewer Host instead?
Yes. TeamViewer Host is meant for unattended access. Download the Host package from TeamViewer’s Linux download page and install it with apt the same way.
How do I connect to another computer?
Open TeamViewer, enter the remote computer’s ID in the partner ID field, and start the connection. Enter the remote password when prompted.
TeamViewer installs on Ubuntu 26.04 from the official .deb package. The package also configures the TeamViewer repository so future updates are handled through Ubuntu’s package manager.
Google Chrome is a fast web browser with built-in Google account sync, automatic updates, password management, and support for modern web applications. It is not included in the standard Ubuntu repositories because it is proprietary software.
This guide explains how to install Google Chrome on Ubuntu 26.04 using the official Google .deb package.
Info
The official Google Chrome .deb package is available for 64-bit x86 systems. On ARM devices, use Chromium
or another ARM-compatible browser.
The official Chrome package installs the browser and configures the Google APT repository so future updates arrive through the normal Ubuntu update process.
What is the difference between Chrome and Chromium?
Chromium is the open-source browser project that Chrome is based on. Chrome adds proprietary media codecs, Google account integration, and Google-managed update packaging.
Can I install Chrome Beta or Dev on Ubuntu?
Yes. Download the Beta or Dev .deb package from Google and install it with apt in the same way as the stable package.
Does Chrome update automatically on Ubuntu?
Chrome is updated by Ubuntu’s package manager after the Google repository is added. Run sudo apt update && sudo apt upgrade to install available updates.
Google Chrome installs on Ubuntu 26.04 through the official .deb package. After installation, Chrome receives updates from the Google repository along with your other system packages.
Apache is one of the most popular web servers in the world. It is an open-source and cross-platform HTTP server that powers a large percentage of the Internet’s websites. Apache provides many powerful features that can be further extended through the use of additional modules, making it a good option for those looking for a customizable and flexible web server.
This tutorial will guide you through the process of installing and managing the Apache web server on Ubuntu 26.04. You will learn how to install Apache, open HTTP and HTTPS ports in the firewall, and set up virtual hosts.
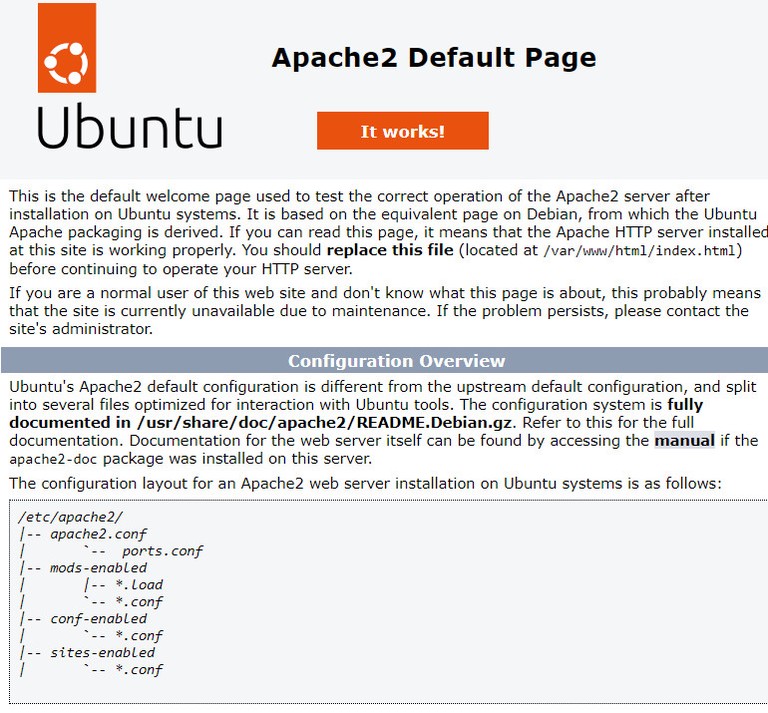
To verify that everything works correctly, open your browser, type your server IP address http://YOUR_IP_OR_DOMAIN/, and you will see the default Ubuntu 26.04 Apache welcome page as shown below:
The page provides basic information about Apache configuration files, relevant helper scripts, and directory locations.
A virtual host allows Apache to serve more than one website from the same server. Each virtual host defines the settings for a specific domain.
Apache ships with one default virtual host. If you are hosting a single website, you can place the site files in /var/www/html and edit /etc/apache2/sites-enabled/000-default.conf. If you want to host multiple sites, create a separate virtual host file for each domain.
In this example, we will configure a site for example.com. Replace example.com with your own domain name.
Create a simple index.html file inside the document root so you can test the configuration:
/var/www/example.com/index.htmlhtml
<!DOCTYPE html><htmllang="en"dir="ltr"><head><metacharset="utf-8"><title>Welcome to example.com</title></head><body><h1>Success! example.com home page!</h1></body></html>
We have shown you how to install Apache on Ubuntu 26.04, open the required firewall ports, and configure a virtual host. From here, you can deploy your site content or continue with SSL and PHP setup.
There are several Java implementations available. OpenJDK and Oracle JDK are the two most common choices. OpenJDK is the default option in Ubuntu and the best fit for most systems.
Ubuntu 26.04 includes OpenJDK packages for both the Java Runtime Environment (JRE) and the Java Development Kit (JDK). The JRE includes the Java virtual machine (JVM) and the libraries needed to run Java programs. The JDK includes the JRE plus the tools needed to build Java applications.
If you are not sure which package to install, start with the default OpenJDK version. Some applications require a specific Java release, so check the application documentation before you install it.
If Java is not installed, the output will tell you the command is not found. Otherwise, it shows the installed version.
Update the package index:
Terminal
sudo apt update
The current long-term supported (LTS) versions of Java are: 11, 17, 21, and 25. The default Java in Ubuntu 26.04 is Java 25, which you get by installing the default-jdk package.
Install latest LTS Java 25:
Terminal
sudo apt install openjdk-25-jdk
Info
If you want to install another version, replace the version number. For example, if your application requires Java 21, install the openjdk-21-jdk package.
Verify the installation:
Terminal
java -version
output
openjdk version "25.0.3-ea" 2026-04-21
OpenJDK Runtime Environment (build 25.0.3-ea+7-Ubuntu-2)
OpenJDK 64-Bit Server VM (build 25.0.3-ea+7-Ubuntu-2, mixed mode, sharing)
JRE is included in the JDK package. If you need only JRE, install the openjdk-25-jre package. For minimal Java runtime, install the openjdk-**25**-jre-headless package.
Oracle JDK is not available in the default Ubuntu repositories. You can install it by downloading the .deb package from Oracle.
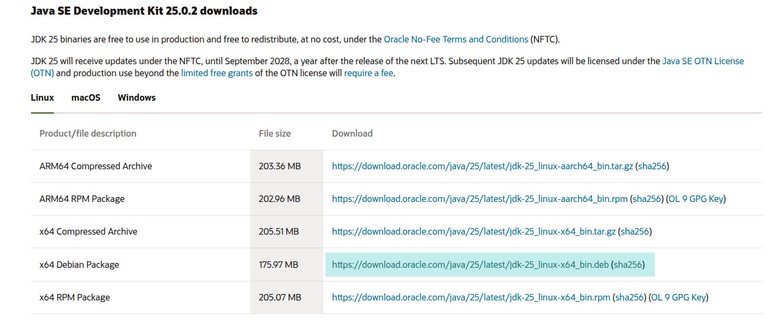
At the time of writing, Oracle’s downloads page offers both JDK 26, the latest feature release, and JDK 25, the latest LTS release. Oracle JDK 25 is available under Oracle No-Fee Terms and Conditions (NFTC), which allows free production use and redistribution for that release. If you plan to standardize on Oracle JDK, review Oracle’s current licensing terms before deployment.
Visit the Oracle Java Downloads
page and select the version you need.
In this example, we will download and install Java 25 because it is the current LTS release. If you want the newest feature release instead, download JDK 26 from the same page. Choose the Linux x64 Debian Package for the version you want and download the .deb file.
If you are installing on a server, use wget
to download the file:
If you have multiple Java versions installed, check the current default:
Terminal
java -version
Change the default version with update-alternatives:
Terminal
sudo update-alternatives --config java
You will see a list of installed Java versions:
output
There are 2 choices for the alternative java (providing /usr/bin/java).
Selection Path Priority Status
------------------------------------------------------------
* 0 /usr/lib/jvm/jdk-25.0.3-oracle-x64/bin/java 419454976 auto mode
1 /usr/lib/jvm/java-25-openjdk-amd64/bin/java 2511 manual mode
2 /usr/lib/jvm/jdk-25.0.3-oracle-x64/bin/java 419454976 manual mode
Press <enter> to keep the current choice[*], or type selection number:
Enter the number of the version you want as default and press Enter.
We covered installing OpenJDK from the Ubuntu 26.04 repositories and downloading Oracle JDK manually. The default OpenJDK 25 works for most applications, but Java 26 is also available in the Oracle repositories for the latest features.
PHP is one of the most used server-side programming languages. Many popular CMS and frameworks such as WordPress, Magento, and Laravel are written in PHP.
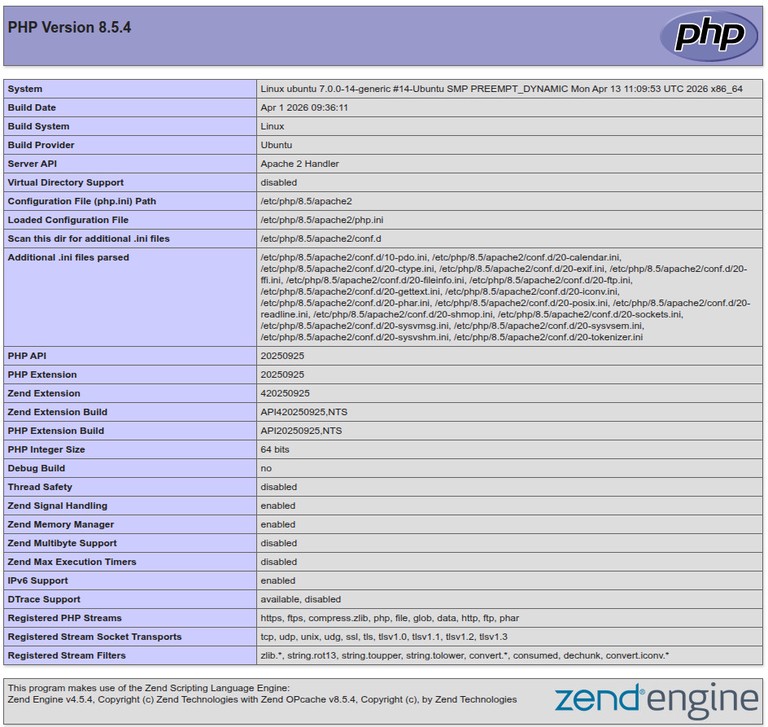
This guide covers the steps necessary to install PHP on Ubuntu 26.04 and integrate it with Nginx and Apache. The default Ubuntu 26.04 repositories include PHP 8.5. We will also show you how to install other PHP versions.
Unlike Apache, Nginx
does not have built-in support for processing PHP files. We will use PHP-FPM (FastCGI Process Manager) to handle PHP files.
Run the following commands to install PHP and the PHP-FPM package:
Terminal
sudo apt update
sudo apt install php-fpm
Once the installation is completed, the FPM service starts automatically. To check the status of the service, run:
Terminal
sudo systemctl status php8.4-fpm
output
● php8.4-fpm.service - The PHP 8.5 FastCGI Process Manager
Loaded: loaded (/usr/lib/systemd/system/php8.4-fpm.service; enabled; preset: enabled)
Active: active (running) since Sat 2026-04-26 09:15:22 UTC; 12s ago
You can now edit the Nginx server block
and add the following lines so that Nginx can process PHP files:
nginx
server{# . . . other code
location~\.php${includesnippets/fastcgi-php.conf;fastcgi_passunix:/run/php/php8.4-fpm.sock;}}
Restart the Nginx service so that the new configuration takes effect:
PHP extensions are compiled libraries that extend the core functionality of PHP. Extensions are available as packages and can be easily installed with apt
:
Terminal
sudo apt install php-[extname]
For example, to install the MySQL and GD extensions, run:
Terminal
sudo apt install php-mysql php-gd
Here are some of the most commonly used PHP extensions:
Extension
Package
Description
MySQL
php-mysql
MySQL and MariaDB database support
cURL
php-curl
URL transfer library
GD
php-gd
Image processing
Mbstring
php-mbstring
Multibyte string support
XML
php-xml
XML parsing and manipulation
ZIP
php-zip
ZIP archive support
Intl
php-intl
Internationalization functions
OPcache
php-opcache
Bytecode caching for performance
BCMath
php-bcmath
Arbitrary precision math
To install all commonly needed extensions at once:
Ondřej Surý, a Debian developer, maintains a repository that includes multiple PHP versions. This is a third-party source, so use it only if you need a different PHP version than what Ubuntu provides. To enable the repository
, run:
What PHP version does Ubuntu 26.04 include?
Ubuntu 26.04 ships with PHP 8.5 in its default repositories.
What is the difference between php and php-fpm?
The php package includes the CLI interpreter and the Apache module. The php-fpm package provides a FastCGI Process Manager used by Nginx and other web servers that do not have built-in PHP support.
Can I run multiple PHP versions at the same time?
Yes. You can install multiple PHP versions from the Ondřej Surý PPA and configure each virtual host or server block to use a different PHP version.
Do I need to restart Apache or Nginx after installing an extension?
Yes. After installing a PHP extension, restart Apache (sudo systemctl restart apache2) or PHP-FPM (sudo systemctl restart php8.4-fpm) for the extension to be loaded.
Where is the php.ini file located?
PHP uses separate php.ini files for each SAPI. The CLI config is at /etc/php/8.5/cli/php.ini, the Apache config at /etc/php/8.5/apache2/php.ini, and the FPM config at /etc/php/8.5/fpm/php.ini.
We have shown you how to install PHP 8.5 on Ubuntu 26.04 with both Apache and Nginx. You can now install extensions, configure PHP, and start building your applications.
If you have any questions, feel free to leave a comment below.
Nginx (pronounced “engine x”) is an open-source, high-performance HTTP and reverse proxy
server used by some of the largest sites on the Internet. It can act as a standalone web server, load balancer, content cache, and proxy for HTTP and non-HTTP services.
This guide explains how to install Nginx on Ubuntu 26.04, configure the firewall, and manage the service.
Nginx is available in the default Ubuntu repositories. To install it, run:
Terminal
sudo apt update
sudo apt install nginx
Once the installation is completed, the Nginx service starts automatically. To verify it is running:
Terminal
sudo systemctl status nginx
output
● nginx.service - A high performance web server and a reverse proxy server
Loaded: loaded (/usr/lib/systemd/system/nginx.service; enabled; preset: enabled)
Active: active (running) since Fri 2026-04-25 15:00:00 UTC; 10s ago
...
Nginx is now installed and running. You can manage the Nginx service
in the same way as any other systemd unit.
Now that Nginx is running, you need to make sure the firewall allows traffic on HTTP (80) and HTTPS (443). If you are using ufw
, enable the Nginx Full profile which covers both ports:
Terminal
sudo ufw allow 'Nginx Full'
To verify the firewall status:
Terminal
sudo ufw status
output
Status: active
To Action From
-- ------ ----
22/tcp ALLOW Anywhere
Nginx Full ALLOW Anywhere
22/tcp (v6) ALLOW Anywhere (v6)
Nginx Full (v6) ALLOW Anywhere (v6)
To confirm Nginx is serving requests, open http://YOUR_IP in a browser. You should see the default Nginx welcome page. You can also test from the command line:
All Nginx configuration files are located in /etc/nginx/.
The main configuration file is /etc/nginx/nginx.conf.
Create a separate configuration file for each domain to keep things manageable. Server block files are stored in /etc/nginx/sites-available/ and must be symlinked to /etc/nginx/sites-enabled/ to be active.
Follow the standard naming convention: if your domain is mydomain.com, name the file /etc/nginx/sites-available/mydomain.com.conf.
The /etc/nginx/snippets/ directory holds reusable configuration fragments that can be included in server block files.
Log files (access.log and error.log) are located in /var/log/nginx/. Use a separate log file per server block.
Common document root locations: /var/www/<site_name>, /var/www/html/<site_name>, or /home/<user>/<site_name>.
Nginx is now installed and ready to serve your applications on Ubuntu 26.04. To set up multiple sites on the same server, see the guide on Nginx server blocks
.
PostgreSQL is an open-source, object-relational database management system known for its reliability, feature set, and standards compliance. It is widely used in production environments ranging from small applications to large-scale data warehouses.
This guide explains how to install PostgreSQL 18 on Ubuntu 26.04, set up roles and authentication, and configure remote access.
The default Ubuntu 26.04 repositories include PostgreSQL 18.
Start by updating the local package index:
Terminal
sudo apt update
Install the PostgreSQL server and the contrib package, which provides several additional features:
Terminal
sudo apt install postgresql postgresql-contrib
Once the installation is completed, the PostgreSQL service starts automatically. Use the psql tool to verify the installation by connecting to the PostgreSQL server and printing its version
:
Terminal
sudo -u postgres psql -c "SELECT version();"
output
 version
----------------------------------------------------------------------------------------------------------------------------------
PostgreSQL 18.3 (Ubuntu 18.3-1) on x86_64-pc-linux-gnu, compiled by gcc (Ubuntu 15.2.0-14ubuntu1) 15.2.0, 64-bit
(1 row)
PostgreSQL has been installed and is ready to use.
The next step is to configure which hosts are allowed to connect by editing pg_hba.conf:
Terminal
sudo nano /etc/postgresql/18/main/pg_hba.conf
Add rules at the bottom of the file. Some examples:
/etc/postgresql/18/main/pg_hba.confconf
# TYPE DATABASE USER ADDRESS METHOD
# Allow jane to connect to all databases from anywhere using a password
host all jane 0.0.0.0/0 scram-sha-256
# Allow jane to connect only to janedb from anywhere
host janedb jane 0.0.0.0/0 scram-sha-256
# Allow jane to connect from a trusted host without a password
host all jane 192.168.1.134 trust
Reload PostgreSQL to apply the changes:
Terminal
sudo systemctl reload postgresql
Finally, open port 5432 in the firewall. To allow access from a specific subnet:
Terminal
sudo ufw allow proto tcp from 192.168.1.0/24 to any port 5432
Warning
Make sure your firewall is configured to accept connections only from trusted IP addresses.
We have shown you how to install PostgreSQL 18 on Ubuntu 26.04 and covered the basics of roles, authentication, and remote access. For more details, consult the PostgreSQL 18 documentation
.
MySQL
is one of the most popular open-source relational database management systems. It is fast, easy to manage, scalable, and an integral part of the popular LAMP and LEMP stacks.
This guide explains how to install and secure MySQL 8.4 on an Ubuntu 26.04 machine. Upon completion, you will have a fully functional database server that you can use for your projects.
MySQL includes a script named mysql_secure_installation that helps you improve the database server security.
Run the script:
Terminal
sudo mysql_secure_installation
You will be asked to configure the VALIDATE PASSWORD component, which tests the strength of MySQL users’ passwords:
output
Securing the MySQL server deployment.
Connecting to MySQL using a blank password.
VALIDATE PASSWORD COMPONENT can be used to test passwords
and improve security. It checks the strength of password
and allows the users to set only those passwords which are
secure enough. Would you like to setup VALIDATE PASSWORD component?
Press y|Y for Yes, any other key for No: y
There are three levels of password validation policy. Press y to enable the password validation plugin, or any other key to skip:
output
There are three levels of password validation policy:
LOW Length >= 8
MEDIUM Length >= 8, numeric, mixed case, and special characters
STRONG Length >= 8, numeric, mixed case, special characters and dictionary file
Please enter 0 = LOW, 1 = MEDIUM and 2 = STRONG: 1
Next, you will be asked to remove the anonymous user, restrict root user access to the local machine, remove the test database, and reload privilege tables. Answer y to all questions:
output
Remove anonymous users? (Press y|Y for Yes, any other key for No) : y
Success.
Disallow root login remotely? (Press y|Y for Yes, any other key for No) : y
Success.
Remove test database and access to it? (Press y|Y for Yes, any other key for No) : y
- Dropping test database...
Success.
Reloading the privilege tables will ensure that all changes
made so far will take effect immediately.
Reload privilege tables now? (Press y|Y for Yes, any other key for No) : y
Success.
All done!
You can interact with the MySQL server from the command line using the MySQL client utility, which is installed as a dependency of the MySQL server package.
On Ubuntu 26.04, the MySQL root account uses the auth_socket plugin by default. This plugin authenticates users that connect from localhost through the Unix socket file, which means you cannot authenticate as root by providing a password.
To log in to the MySQL server as the root user, type:
Terminal
sudo mysql
You will be presented with the MySQL shell:
output
Welcome to the MySQL monitor. Commands end with ; or \g.
Your MySQL connection id is 10
Server version: 8.4.8-0ubuntu1 (Ubuntu)
Copyright (c) 2000, 2024, Oracle and/or its affiliates.
Type 'help;' or '\h' for help. Type '\c' to clear the current input statement.
mysql>
To exit the MySQL shell, type exit or press Ctrl+D.
By default, MySQL only listens on localhost (127.0.0.1). To allow remote connections, you need to change the bind address.
Open the MySQL configuration file:
Terminal
sudo nano /etc/mysql/mysql.conf.d/mysqld.cnf
Find the line that starts with bind-address and change it to 0.0.0.0 to listen on all interfaces, or to a specific IP address:
/etc/mysql/mysql.conf.d/mysqld.cnfini
bind-address=0.0.0.0
Restart the MySQL service for the changes to take effect:
Terminal
sudo systemctl restart mysql
Warning
Allowing remote access to your MySQL server can be a security risk. Make sure to only grant remote access to users who need it and use strong passwords. Consider using a firewall
to restrict access to the MySQL port (3306) to trusted IP addresses only.
For production, consider enabling TLS so remote connections are encrypted. This protects credentials and data in transit when connecting over untrusted networks.
What version of MySQL does Ubuntu 26.04 include?
Ubuntu 26.04 ships with MySQL 8.4 in its default repositories. To check the exact version installed on your system, run mysql --version.
What is the difference between auth_socket and caching_sha2_password? auth_socket authenticates users based on the operating system user connecting through the Unix socket. No password is needed, but you must use sudo. caching_sha2_password uses traditional password-based authentication.
How do I reset the MySQL root password?
Stop the MySQL service with sudo systemctl stop mysql, start it with --skip-grant-tables, log in without a password, run ALTER USER 'root'@'localhost' IDENTIFIED WITH caching_sha2_password BY 'new_password';, then restart the service normally.
Is mysql_native_password still supported?
It is still available, but it is deprecated and disabled by default in MySQL 8.4. Use caching_sha2_password for new installations unless you have a specific compatibility requirement.
Can I install a newer MySQL release on Ubuntu 26.04?
Yes. If you need a newer release than the one in the Ubuntu repositories, you can use the official MySQL APT repository
. For most setups, the Ubuntu package is the simplest choice.
We have shown you how to install and secure MySQL 8.4 on Ubuntu 26.04. Now that your database server is up and running, your next step could be to learn how to manage MySQL user accounts and databases
.
Docker is an open-source container platform that lets you build, test, and run applications as portable containers. Containers package the application code together with its dependencies, which makes it easier to run the same workload across development machines, test environments, and servers.
Docker is widely used in development workflows and DevOps pipelines because it keeps application environments predictable.
This tutorial explains how to install Docker on Ubuntu 26.04.
Docker is available from the standard Ubuntu repositories, but those packages are often outdated. To ensure you get the latest stable version, we will install Docker from the official Docker repository.
At the time of writing, the Docker repository provides packages for current supported Ubuntu releases, including Ubuntu 26.04 LTS, Ubuntu 25.10, Ubuntu 24.04 LTS, and Ubuntu 22.04 LTS.
Info
Derivatives like Linux Mint are not officially supported, though they often work.
Installing Docker on Ubuntu is relatively straightforward. We will enable the Docker repository, import the repository GPG key, and install the Docker packages.
Step 1: Update the Package Index and Install Dependencies #
First, update the package index and install packages required to use repositories over HTTPS
:
$(. /etc/os-release && echo "${UBUNTU_CODENAME:-$VERSION_CODENAME}") reads your Ubuntu codename from the OS release file. On Ubuntu 26.04 it returns resolute.
To allow a non-root user to execute Docker commands, add the user to the docker group:
Terminal
sudo usermod -aG docker $USER
$USER is an environment variable
that holds the currently logged-in username. If you want to execute commands with another user, replace $USER with that username.
Run newgrp docker or log out and log back in for the group membership changes to take effect.
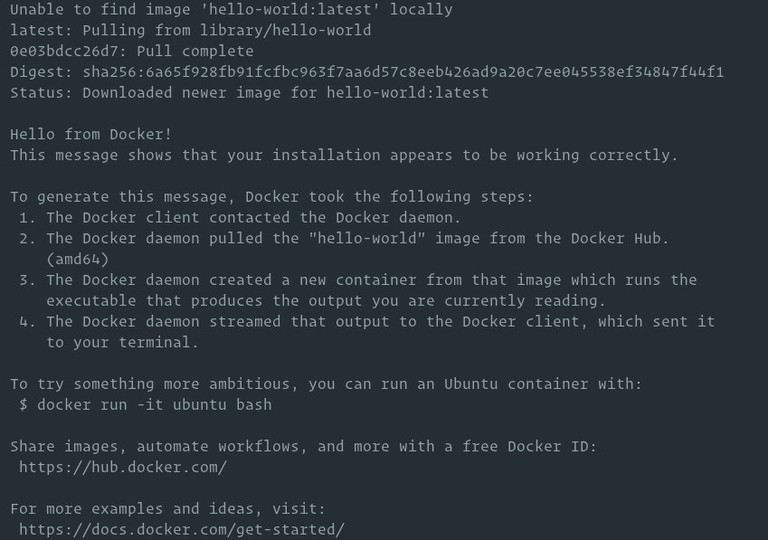
After that, you can rerun the test container without sudo
:
Terminal
docker run hello-world
Info
By default, Docker pulls images from Docker Hub. It is a cloud-based registry service that stores Docker images in public or private repositories.
Permission denied while trying to connect to the Docker daemon socket
Your user is not yet in the docker group, or the group membership has not taken effect. Run sudo usermod -aG docker $USER, then log out and back in (or run newgrp docker).
Cannot connect to the Docker daemon. Is the daemon running?
The Docker service is not running. Start it with sudo systemctl start docker and check its status with sudo systemctl status docker.
Package ‘docker-ce’ has no installation candidate
The Docker repository was not added correctly. Re-run Steps 2 and 3, then run sudo apt update before installing.
Containers fail to start after an OS or Docker upgrade
Check the Docker daemon status, the installed Docker version, and your container runtime configuration. If the host or Docker Engine was upgraded recently, review the Docker release notes and verify that your workloads are using a supported configuration before restarting them.
Installing Docker from the official repository ensures you always have access to the latest stable releases and security updates. For post-install steps such as configuring log drivers or setting up rootless mode, see the official post-install guide
.
Node.js is an open-source JavaScript runtime built on Chrome’s V8 engine. It lets you run JavaScript outside the browser and is commonly used for APIs, command-line tools, and server-side applications. npm is the default package manager for Node.js.
This guide covers three ways to install Node.js and npm on Ubuntu 26.04:
NodeSource repository - Install a specific Node.js version. NodeSource supports Node.js v25.x, v24.x, and v22.x.
nvm (Node Version Manager) - Manage multiple Node.js versions on the same machine. This is the preferred method for developers.
Ubuntu repository - The easiest way. Ubuntu 26.04 includes Node.js v22.x, which is suitable for many applications.
Choose the method that fits your needs. If you are not sure which version to install, check the documentation of the application you are deploying.
NVM (Node Version Manager) is a bash script that lets you manage multiple Node.js versions per user. This is the preferred method for developers who need to switch between versions.
Do not use sudo
, as it will enable nvm for the root user only.
The script clones the repository to ~/.nvm and adds the required lines to your shell profile:
output
=> Close and reopen your terminal to start using nvm or run the following to use it now:
export NVM_DIR="$HOME/.nvm"
[ -s "$NVM_DIR/nvm.sh" ] && \. "$NVM_DIR/nvm.sh" # This loads nvm
[ -s "$NVM_DIR/bash_completion" ] && \. "$NVM_DIR/bash_completion" # This loads nvm bash_completion
Either close and reopen your terminal or run the commands above to load nvm in the current session.
The arrow (-> v22.x) indicates the active version. The default version activates when opening new shells.
Switch to a different version:
Terminal
nvm use 24
output
Now using node v24.x (npm v11.x)
Change the default version:
Terminal
nvm alias default 24
Installing Node.js and npm from the Ubuntu repository #
Ubuntu 26.04 includes Node.js v22.x in its default repositories. This version works well for many applications and receives security updates through Ubuntu.
Install Node.js and npm:
Terminal
sudo apt update
sudo apt install nodejs npm
This installs Node.js along with the tools needed to compile native addons from npm.
Verify the installation:
Terminal
node -v
output
v22.x
Terminal
npm -v
output
10.x
Info
If you need a newer Node.js version, use NodeSource or nvm instead.
We covered three ways to install Node.js and npm on Ubuntu 26.04. NodeSource provides specific versions, nvm offers flexibility for managing multiple versions, and the Ubuntu repository includes a stable LTS version out of the box.
Ubuntu 26.04 LTS (Resolute Raccoon) was released on April 23, 2026. It ships with Linux kernel 7.0, GNOME 50, Python 3.14, PHP 8.5, Java 25, TPM-backed full-disk encryption, post-quantum cryptography support in OpenSSL, and a Wayland-only GNOME session. As an LTS release, it receives standard security updates for five years, with expanded coverage available through Ubuntu Pro.
This guide shows how to upgrade to Ubuntu 26.04 LTS from the command line. Ubuntu 25.10 systems can upgrade now, while Ubuntu 24.04 LTS systems will be offered the standard upgrade path after Ubuntu 26.04.1 is released.
If you prefer a clean setup or do not have an existing Ubuntu installation, follow our guide on how to install Ubuntu 26.04
instead.
You can upgrade to Ubuntu 26.04 from Ubuntu 25.10 today. Ubuntu 24.04 LTS systems will be offered the standard upgrade path after Ubuntu 26.04.1 is released. If you are running an older release, you must first upgrade to Ubuntu 22.04
and then to 24.04 before continuing.
Make sure you have a working internet connection before starting.
Before starting a major version upgrade, make sure you have a complete backup of your data. If you are running Ubuntu on a virtual machine, take a full system snapshot so you can restore quickly if anything goes wrong.
You can upgrade from the command line using do-release-upgrade, which works for both desktop and server installations.
do-release-upgrade is part of the update-manager-core package, which is installed by default on most Ubuntu systems. If it is not present, install it first:
Terminal
sudo apt install update-manager-core
Info
Check that the upgrade policy in /etc/update-manager/release-upgrades is set to Prompt=lts or Prompt=normal. If it is set to Prompt=never, the upgrade will not start.
If you are upgrading over SSH, do-release-upgrade may start an additional SSH daemon on port 1022 so you can reconnect if the main session drops. If you use a firewall, you may need to open that port temporarily:
Terminal
sudo ufw allow 1022/tcp
To begin the release upgrade, run:
Terminal
sudo do-release-upgrade
If Ubuntu does not offer the new release yet, follow the standard supported rollout for your current version. This guide covers the normal upgrade path.
The tool will disable third-party repositories, update the apt sources to point to the Ubuntu 26.04 repositories, and begin downloading the required packages.
You will be prompted several times during the process. When asked whether services should be automatically restarted, type y. When asked about configuration files, type Y to accept the package maintainer’s version if you have not made custom changes; otherwise keep your current version to avoid losing your customizations.
The upgrade runs inside a GNU screen
session and will automatically re-attach if the connection drops.
The process may take some time depending on the number of packages, your hardware, and your internet speed.
Once the new packages are installed, the tool will ask whether to remove obsolete software. Type d to review the list first, or y to proceed with removal.
When the upgrade finishes, you will be prompted to restart the system. Type y to reboot and complete the upgrade.
Third-party repository errors during apt update
The upgrade tool disables third-party repositories automatically. If you see errors before running do-release-upgrade, disable the affected sources under /etc/apt/sources.list.d/ and re-enable them one by one after the upgrade completes.
“Packages have been kept back”
Run sudo apt full-upgrade to resolve held-back packages before starting the upgrade. Do not proceed with do-release-upgrade until there are no held packages.
SSH connection drops mid-upgrade
The upgrade runs inside a GNU screen session. Reconnect over SSH and run sudo screen -r to re-attach to the running session.
A service or container does not work after the reboot
If something that worked before the upgrade fails afterward, check its status and logs first. Run systemctl status service_name and journalctl -xe for services, and review your container runtime logs and configuration for Docker or containerd workloads. Third-party packages and older configurations sometimes need updates after a major release upgrade.
GNOME desktop shows only Wayland sessions
Ubuntu 26.04 drops the X11 GNOME session. If you relied on an X11 desktop session, applications that do not support Wayland natively will run through XWayland automatically. For most applications this is transparent, but some older tools may behave differently.
Your system is now running Ubuntu 26.04 LTS Resolute Raccoon. Re-enable any third-party repositories you disabled before the upgrade and verify that your critical services are running. For a full list of known issues and changes, see the official Ubuntu 26.04 release notes
.
Branches are how Git keeps your work separated from the main line of development. A new branch lets you experiment, fix a bug, or build a feature without touching what is already shipped, and a merge brings the work back together when it is ready. The tool that creates, lists, and removes those branches is git branch.
This guide explains how to use git branch to manage local and remote branches, filter by merged or upstream state, rename branches, and clean up stale ones.
With no arguments, git branch lists your local branches and marks the currently checked-out one with an asterisk. With a branch name, it creates a new branch pointing at the current commit. With additional flags, it can list remote branches, delete branches, rename them, or set upstream tracking.
To list the local branches in the current repository, run git branch with no arguments:
Terminal
git branch
output
 develop
* main
feature/login
The asterisk marks the branch you are currently on. The branches are sorted alphabetically.
To include remote-tracking branches, add -a (all):
Terminal
git branch -a
output
 develop
* main
feature/login
remotes/origin/HEAD -> origin/main
remotes/origin/develop
remotes/origin/main
Anything prefixed with remotes/ is a local reference to a branch on a remote, not a branch you can commit to directly. Check it out to create a local tracking branch.
To list only remote-tracking branches, use -r:
Terminal
git branch -r
To see the latest commit on each branch, add -v:
Terminal
git branch -v
output
 develop a1b2c3d Add release notes
* main 7e8f9a0 Merge pull request #42
feature/login 3d4e5f6 Stub login form
For even more detail, -vv also prints the upstream branch each local branch tracks and whether it is ahead, behind, or in sync:
To create a new branch, pass the name as an argument. This creates the branch at the current HEAD but does not switch to it:
Terminal
git branch feature/login
To start the branch from a specific commit, tag, or another branch, pass it as the second argument:
Terminal
git branch hotfix v1.4.0
Terminal
git branch hotfix 3d4e5f6
Creating a branch without switching to it is useful when you want to mark a commit for later work. Most of the time, though, you create a branch and switch to it in one step. The modern command for that is git switch -c:
Terminal
git switch -c feature/login
The older equivalent is git checkout -b feature/login. Both create the branch at the current commit and check it out immediately. See the create and list Git branches
guide for a fuller walkthrough.
To rename the branch you are currently on, use -m with the new name:
Terminal
git branch -m new-name
To rename any branch, pass both the old and the new name:
Terminal
git branch -m old-name new-name
If a branch with the target name already exists, this form fails to protect you from overwriting it. To force the rename and overwrite the existing branch, use the capital -M instead. Use -M with care: it discards the destination branch.
After renaming a branch that is already pushed, push the new name to the remote and delete the old one so collaborators see the change. The rename a Git branch
guide walks through the full local-and-remote flow.
To delete a local branch that has been merged into the current branch, use -d:
Terminal
git branch -d feature/login
output
Deleted branch feature/login (was 3d4e5f6).
Git refuses to delete a branch that has unmerged work, to protect you from losing commits:
output
error: The branch 'feature/wip' is not fully merged.
If you are sure you want to delete it, run 'git branch -D feature/wip'.
If you are sure the work is no longer needed, force the deletion with -D:
Terminal
git branch -D feature/wip
You cannot delete the branch you are currently on. Switch to another branch first, then delete it. For remote branch deletion, see the delete local and remote Git branch
guide.
The grep filter keeps the current branch and the protected main and develop branches out of the list. If the output looks correct, pipe the same list to git branch -d:
--merged and --no-merged accept a reference argument. To check against main from the remote:
Terminal
git branch --merged origin/main
This is useful in CI or cleanup scripts where you want to see which local branches are safely merged into the shipped code, regardless of which branch you are currently on.
An upstream branch tells Git which remote branch your local branch tracks for git pull and git push. To set it on an existing branch, use --set-upstream-to (or -u):
Terminal
git branch --set-upstream-to=origin/main main
output
Branch 'main' set up to track remote branch 'main' from 'origin'.
To remove tracking information from a branch, use --unset-upstream:
Terminal
git branch --unset-upstream main
When you push a new branch to a remote for the first time, pass -u to git push to create the remote branch and set it as the upstream in one step:
git branch -c copies a branch, including its reflog and configuration, to a new name:
Terminal
git branch -c old-branch new-branch
The original branch is kept. Use the capital -C to force the copy and overwrite an existing target branch. Copying is less common than creating a fresh branch, but it is useful when you want to preserve the history and config of a branch under a new name.
By default, branches are listed alphabetically. The --sort option changes the order. To sort by the date of the most recent commit:
Terminal
git branch --sort=-committerdate
The minus sign reverses the order, so the most recently updated branch appears first. This is handy when you return to a project after a break and want to see what you were working on last.
What is the difference between git branch and git checkout? git branch manages branches: creating, listing, renaming, and deleting. git checkout (and its modern replacement git switch) changes which branch you are on. Creating and switching in one step uses git switch -c or git checkout -b.
How do I delete a remote branch? git branch -d only deletes local branches. To delete a branch on the remote, run git push origin --delete BRANCH_NAME. The delete local and remote Git branch
guide covers the full flow, including cleanup of stale tracking references.
Why does Git say “branch is not fully merged”?
The branch has commits that are not reachable from your current branch. Git is protecting you from losing work. Review the commits with git log BRANCH_NAME, merge them if needed, and then use -d again. If you are certain the commits are not needed, force the delete with -D.
How do I see which branch a remote branch tracks locally?
Run git branch -vv. The output includes each local branch’s upstream in brackets along with its ahead and behind counts relative to that upstream.
Can I list branches sorted by who committed most recently?
Yes. Use git branch --sort=-committerdate to sort branches by the timestamp of their most recent commit, with the freshest branch first. This is a fast way to see what is actively being worked on.
git branch covers the full lifecycle of a branch: creating it, renaming it, keeping track of what it points at, and deleting it when the work is done. Combined with git switch for moving between branches and git merge for integrating changes, it is the foundation of any Git workflow.
For related Git commands, see the git diff
guide for reviewing changes and the git log
guide for inspecting branch history.
By default, a Bash script will keep running after a command fails, treat unset variables as empty strings, and hide errors inside pipelines. That is convenient for one-off commands in an interactive shell, but inside a script it is a recipe for silent corruption: a failed backup step that still reports success, an unset path that expands to rm -rf /, a curl | sh pipeline that swallows a 500 error.
Bash strict mode is a short set of flags you put at the top of a script to make the shell fail loudly instead. This guide explains each flag in set -euo pipefail, shows what it changes with real examples, and covers the cases where you need to turn it off.
Running it prints both the error and the success message:
Terminal
./no-strict.sh
output
cp: cannot stat '/does/not/exist': No such file or directory
Backup complete
The script exits with status 0, so any caller thinks the backup worked. Adding set -e changes the behavior:
strict.shsh
#!/usr/bin/env bash
set -e
cp /does/not/exist /tmp/dest
echo"Backup complete"
Terminal
./strict.sh
echo$?
output
cp: cannot stat '/does/not/exist': No such file or directory
1
The script stops at the failing cp, never prints “Backup complete”, and exits with a non-zero status. Anyone scheduling this through cron or a CI pipeline now gets a real failure signal.
Sometimes you expect a command to fail and want to handle the result yourself. Append || true to tell set -e to ignore the exit status of that one command:
sh
grep "pattern" config.txt || true
You can also use if or &&, which set -e treats as deliberate checks:
sh
if ! grep -q "pattern" config.txt;thenecho"pattern missing"fi
This is the canonical way to check for something without exiting the script when it is not there.
Environment variables that may or may not be set need a default to play nicely with set -u. The ${VAR:-default} syntax provides one without touching the original:
sh
PORT="${PORT:-8080}"echo"Listening on $PORT"
If $PORT is unset or empty, the script uses 8080. If it is set, the original value is kept.
set -o pipefail: Catch Failures Inside Pipelines #
By default, the exit status of a pipeline is the exit status of the last command. Everything to the left can fail silently:
sh
curl https://bad.example.com/data | tee data.txt
If curl fails with a 404, the pipeline still exits 0 because tee wrote its (empty) input successfully. With set -o pipefail, the pipeline adopts the first non-zero exit status from any command in it:
pipefail.shsh
#!/usr/bin/env bash
set -o pipefail
curl https://bad.example.com/data | tee data.txt
echo"Exit: $?"
output
curl: (6) Could not resolve host: bad.example.com
Exit: 6
This is the one flag that fixes the most “my script said it succeeded but clearly did not” bugs, and it is the one most often forgotten when people add just set -e.
The Internal Field Separator (IFS) controls how Bash splits unquoted expansions into words. The default is space, tab, and newline, which means a filename with a space in it gets split into two arguments:
sh
files="one two.txt three.txt"for f in $files;doecho"$f"done
output
one
two.txt
three.txt
Setting IFS=$'\n\t' removes the space from the separator list. You still get clean splitting on newlines (useful for reading find or ls output) and on tabs (useful for TSV data), but spaces inside values are preserved.
Even with a narrower IFS, always quote your expansions ("$var", "${array[@]}"). IFS tightening is a safety net, not a replacement for quoting.
That works fine, but if you increment with ((count++)) inside set -e, the script exits on the first iteration because ((count++)) returns the pre-increment value (0), which Bash treats as a failure. Use count=$((count + 1)) or ((count++)) || true to stay compatible.
Another common case is probing for a command:
sh
if ! command -v jq >/dev/null;thenecho"jq is not installed"exit1fi
Using command -v inside an if is safe even under set -e, because set -e does not trigger on commands in conditional contexts.
If you need to temporarily disable a flag for a specific block, turn it off and back on:
sh
set +e
some_flaky_command
result=$?set -e
This is cleaner than sprinkling || true everywhere when you have a block of commands that need softer error handling.
Script exits silently with no error message
A command is failing under set -e without printing anything. Run the script with bash -x script.sh to trace execution and see which line aborts.
unbound variable on a variable that sometimes is set
Replace the reference with ${VAR:-} to provide an empty default, or ${VAR:-fallback} to provide a meaningful one.
Pipeline fails on a command that is supposed to stop early
Commands like head can cause the producer to receive SIGPIPE, which pipefail treats as a failure. Either redesign the pipeline or wrap the producer in || true when the early exit is expected.
Strict mode breaks a sourced script
The set flags apply to the current shell. If you source a script that expects the old behavior, either fix the sourced script or wrap the source call between set +e and set -e.
Should every Bash script use strict mode?
For scripts that run unattended (cron jobs, CI steps, deployment scripts), yes. For short interactive helpers, the flags are still useful, but the cost of a missed edge case is lower.
Does strict mode work in sh or dash? set -e and set -u are POSIX, so they work in any compliant shell. set -o pipefail is a Bash extension that also works in Zsh and Ksh, but not in pure POSIX sh or dash.
Is set -e really that unreliable? set -e has well-known edge cases, especially around functions and subshells. It is not a replacement for explicit error handling in critical paths, but combined with pipefail and -u it catches far more bugs than it causes.
How do I pass set -euo pipefail to a one-liner?
Use bash -euo pipefail -c 'your command' when invoking Bash from another program such as ssh or a Makefile.
set -euo pipefail and a tighter IFS catch many of the silent failures that make shell scripts hard to trust. Pair strict mode with clear error handling using Bash functions
and a proper shebang line
when you want scripts to fail early and predictably.
Sooner or later, every Git user runs into the same question: should you use git fetch or git pull to get the latest changes from the remote? The two commands look similar, and both talk to the remote repository, but they do very different things to your working branch.
This guide explains the difference between git fetch and git pull, how each command works, and when to use one over the other.
git fetch downloads commits, branches, and tags from a remote repository and stores them locally under remote-tracking references such as origin/main or origin/feature-x. It does not touch your working directory, your current branch, or the index.
The output shows which remote branches were updated. After the fetch, the local branch main is still pointing to whatever commit it was on before. Only the remote-tracking branch origin/main has moved.
You can then inspect what changed before doing anything with it:
Terminal
git log main..origin/main
This is the safe way to look at new work without merging or rebasing yet. It gives you a preview of what the remote has that your branch does not.
git pull is a convenience command. Under the hood, it runs git fetch followed by an integration step (a merge by default, or a rebase if configured). In other words:
Terminal
git pull origin main
is roughly equivalent to:
Terminal
git fetch origin
git merge origin/main
After git pull, your current branch has moved forward, and your working directory may contain new files, updated files, or merge conflicts that need resolving. The change is immediate and affects your checked-out branch.
Use git fetch when you want to see what changed on the remote without integrating anything yet. This is useful before you start new work, before rebasing a feature branch, or when you want to inspect a teammate’s branch safely.
For example, after fetching, you can compare your branch with the remote like this:
Terminal
git log HEAD..origin/main --oneline
This shows commits that exist on the remote but not in your current branch. Running git fetch often is cheap and has no side effects on your work, which is why many developers do it regularly throughout the day.
Use git pull when you are ready to bring remote changes into your current branch and keep working on top of them. The common flow looks like this:
Terminal
git checkout main
git pull origin main
This is the quickest way to sync a branch with its upstream when you know the integration will be straightforward, such as on a shared main branch where you rarely have local commits. git pull always updates the branch you currently have checked out, so it is worth confirming where you are before you run it.
If you want a cleaner history without merge commits, configure pull to rebase:
Terminal
git config --global pull.rebase true
From that point on, git pull runs git fetch followed by git rebase instead of git merge. Your local commits are replayed on top of the fetched changes, producing a linear history.
The biggest reason to prefer git fetch over git pull in day-to-day work is control. A bare git pull on a branch where you have local commits can create a merge commit, introduce conflicts, or rewrite history during a rebase, all in one step.
You fetch first, review what is coming, then decide whether to merge, rebase, or defer the integration. For active feature branches, this workflow avoids most of the “what just happened to my branch” moments.
If you already ran git pull and need to inspect what happened, start with:
Terminal
git log --oneline --decorate -n 5
This helps you confirm whether Git created a merge commit, fast-forwarded the branch, or rebased your local work.
If the pull created a merge commit that you do not want, ORIG_HEAD often points to the commit your branch was on before the pull. In that case, you can reset back to it:
Terminal
git reset --hard ORIG_HEAD
Warning
git reset --hard discards uncommitted changes. Use it only when you are sure you do not need the current state of your working tree.
A few flags make both commands more predictable in real workflows.
git fetch --all - Fetch from every configured remote, not only origin.
git fetch --prune - Remove remote-tracking branches that no longer exist on the remote.
git fetch --tags - Download tags in addition to branches.
git pull --rebase - Rebase your local commits on top of the fetched changes instead of merging.
git pull --ff-only - Update the branch only if Git can fast-forward it; prevents unexpected merge commits.
--ff-only is especially useful on shared branches. If your branch cannot move forward by simply advancing the pointer, the pull fails and you decide what to do next.
Does git fetch modify any local files?
No. It only updates remote-tracking references such as origin/main. Your branches, working directory, and staging area stay the same.
Is git pull the same as git fetch plus git merge?
By default, yes. With pull.rebase set to true (or --rebase on the command line), it runs git fetch followed by git rebase instead.
Which one should I use daily?
Prefer git fetch for visibility and git pull --ff-only (or git pull --rebase) for the integration step. A bare git pull works, but it hides two operations behind one command.
How do I see what git fetch downloaded?
Use git log main..origin/main to see commits on the remote that are not yet in your local branch, or git diff main origin/main to compare the content directly.
Can git fetch cause conflicts?
No. Conflicts only happen when you merge or rebase the fetched commits into your branch. Fetching itself is conflict-free.
git fetch lets you inspect remote changes without touching your branch, while git pull fetches and integrates those changes in one step. If you want more control and fewer surprises, fetch first, review the incoming commits, and then merge or rebase on your own terms. For more Git workflow details, see the git log command
and git diff command
guides.