为什么箭头函数如此重要
在现代 JavaScript 开发中,你是否遇到过这些场景:
- 在 React 组件中,事件处理函数的 this 总是 undefined
- 在定时器或异步回调中,访问不到外层的 this
- 看到别人代码中的
var _this = this,不理解为什么要这样写
- 面试官问"箭头函数和普通函数的区别",只能回答"语法更简洁"
箭头函数是 ES6 引入的最重要特性之一,它不仅仅是语法糖,更是解决了 JavaScript 中 this 绑定的历史难题。在 React、Vue 等现代框架中,箭头函数已经成为标配写法。
本文收益:
- 深入理解箭头函数的 this 绑定机制
- 掌握箭头函数的各种简写技巧和使用场景
- 学会判断何时使用箭头函数,何时使用普通函数
- 通过 4 道经典面试题,建立完整的 this 知识体系
- 了解箭头函数在实际项目中的最佳实践
一、箭头函数的本质:词法作用域的 this
1.1 什么是箭头函数
箭头函数(Arrow Function)是 ES6 引入的新函数语法,因其使用 => 符号而得名,也被称为"胖箭头"函数。

** 图9-1 箭头函数的箭头**
基础语法结构:
// 基础模板
(参数) => { 函数体 }

// 实际示例
const add = (a, b) => {
  return a + b;
}

// 简写形式
const add = (a, b) => a + b;
核心特性:
-
更简洁的语法:相比传统函数表达式,代码量可减少 30%-50%
-
不绑定 this:this 由外层作用域决定,不受调用方式影响
-
没有 arguments 对象:需要使用剩余参数
...args 替代
-
不能作为构造函数:不能使用 new 关键字调用
1.2 箭头函数的语法解析
语法结构分解:
| 要素 |
描述 |
作用 |
() |
参数列表 |
定义函数输入。单个参数可省略括号,无参数或多参数必须保留 |
=> |
箭头符号 |
连接参数和函数体,标识这是箭头函数 |
{} |
函数体 |
包含执行语句。单条返回语句可省略大括号和 return |
两种常见写法对比:
// 方式1:内联方式(推荐用于简单逻辑)
var nums = [10, 20, 30, 40]
nums.forEach((value, index, array) => {
  console.log(value, index, array)
})

// 方式2:完整方式(适用于复杂逻辑或需要复用)
var foo = (value, index, array) => {
  console.log(value, index, array)
}
nums.forEach(foo)
选择建议:
- 简单的一次性逻辑:使用内联方式,代码更直观
- 复杂逻辑或需要复用:抽取为独立函数,提高可维护性
- 团队协作:优先考虑可读性,而非极致简洁
1.3 箭头函数的三种简写技巧
简写1:省略参数括号
条件:只有一个参数时可省略
// 简写前
nums.forEach((item) => {
  console.log(item)
})

// 简写后
nums.forEach(item => {
  console.log(item)
})
简写2:省略函数体大括号
条件:函数体只有一条语句且需要返回值
// 完整写法
var newNums = nums.filter(item => {
  return item % 2 === 0
})

// 简写(隐式返回)
var newNums = nums.filter(item => item % 2 === 0)
隐式返回:省略大括号后,表达式的结果会自动作为返回值,无需 return 关键字。
实战案例:
const books = [
  { title: "Book A", rating: 4.5 },
  { title: "Book B", rating: 3.9 },
  { title: "Book C", rating: 4.7 }
];

// 链式调用 + 箭头函数简写
const titles = books
  .filter(book => book.rating > 4)
  .map(book => book.title);

console.log(titles); // ["Book A", "Book C"]

// 对比:传统写法需要 10+ 行代码
var highRatingBooks = [];
for (var i = 0; i < books.length; i++) {
  if (books[i].rating > 4) {
    highRatingBooks.push(books[i]);
  }
}

var titles2 = [];
for (var i = 0; i < highRatingBooks.length; i++) {
  titles2.push(highRatingBooks[i].title);
}
这种链式调用在 React、Vue 等现代框架中随处可见,是必须掌握的技能。
简写3:返回对象字面量
陷阱:直接返回对象会产生语法冲突
// ❌ 错误写法:大括号被解析为函数体
var bar = () => { name: "小吴", age: 18 }
console.log(bar()) // undefined

// ✅ 正确写法:用小括号包裹对象
var bar = () => ({ name: "why", age: 18 })
console.log(bar()) // { name: "why", age: 18 }

// 或者使用完整写法(推荐用于复杂对象)
var bar = () => {
  return { name: "小吴", age: 18 }
}

** 图9-2 简写3-通俗易懂的写法及结果**
原理解析:
- JavaScript 引擎会将
{} 优先解析为函数体,而非对象字面量
- 小括号
() 强制将内容视为表达式,避免歧义
- 类似数学表达式中的括号,改变运算优先级
代码规范建议:
- 简单对象:使用小括号包裹
- 复杂对象:使用完整 return 语句,提高可读性
- 避免过度简写,团队协作中可读性优先
二、箭头函数的 this:词法绑定的革命
2.1 箭头函数没有自己的 this
核心概念:箭头函数不创建自己的 this 上下文,而是继承外层作用域的 this。
社区中有两种说法:
- "箭头函数没有 this"
- "箭头函数的 this 由外层作用域决定"
准确理解:
- 箭头函数本身不绑定 this
- 箭头函数内的 this 是从外层(非箭头函数)作用域继承而来
- 这种继承是词法的(静态的),在函数定义时就确定了
var name = "小吴"

var foo = () => {
  console.log(this);
}

foo()                    // window
var obj = { foo: foo }
obj.foo()                // window(不受隐式绑定影响)
foo.call("这是call调用")  // window(不受显式绑定影响)
为什么三种调用方式都是 window?
- foo 的外层作用域是全局作用域
- 全局作用域的 this 指向 window(浏览器环境)
- 箭头函数不受调用方式影响,始终使用外层的 this
2.2 箭头函数 vs 普通函数的 this 对比
普通函数(受调用方式影响):
var name = "小吴"

function foo() {
  console.log(this);
}

var obj = {
  name: "你已经被小吴绑定到obj上啦",
  foo: foo
}

obj.foo() // { name: '你已经被小吴绑定到obj上啦', foo: [Function: foo] }
箭头函数(不受调用方式影响):
var name = "小吴"

var foo = () => {
  console.log(this);
}

var obj = {
  name: "你已经被小吴绑定到obj上啦",
  foo: foo
}

obj.foo() // window
关键差异:
- 普通函数:this 由调用方式决定(隐式绑定生效)
- 箭头函数:this 由定义位置的外层作用域决定(隐式绑定无效)
2.3 箭头函数解决的经典问题
问题场景:异步回调中的 this 丢失
在 ES6 之前,异步回调中访问外层 this 是一个常见痛点:
// ES5 时代的解决方案:保存 this 引用
var obj = {
  data: [],
  getData: function() {
    var _this = this  // 保存外层 this

    setTimeout(function() {
      var result = ["小吴", 'why', 'JS高级']
      _this.data = result  // 通过闭包访问外层 this
      console.log(_this)
    }, 2000)
  }
}

obj.getData()
为什么需要 var _this = this?
- setTimeout 的回调函数是独立调用,this 指向 window
- 无法直接访问 getData 方法的 this(obj 对象)
- 通过变量保存 this,利用闭包机制保持引用

** 图9-3 var _this = this操作内存图**
内存机制解析:
- obj 对象存储在堆内存中
- getData 方法中的
_this 变量保存了 obj 的引用
- setTimeout 回调形成闭包,持有
_this 的引用
- 即使回调函数的 this 指向 window,仍可通过
_this 访问 obj
箭头函数的优雅解决方案
// ES6 箭头函数方案
var obj = {
  data: [],
  getData: function() {
    setTimeout(() => {
      var result = ["小吴", 'why', 'JS高级']
      this.data = result  // 直接使用 this,指向 obj
      console.log(this)
    }, 2000)
  }
}

obj.getData()
优势:
- 无需
var _this = this 的样板代码
- this 自动指向外层作用域(getData 方法的 this)
- 代码更简洁,意图更清晰
2.4 实战场景:网络请求中的 this
在实际项目中,网络请求是箭头函数最常见的应用场景:
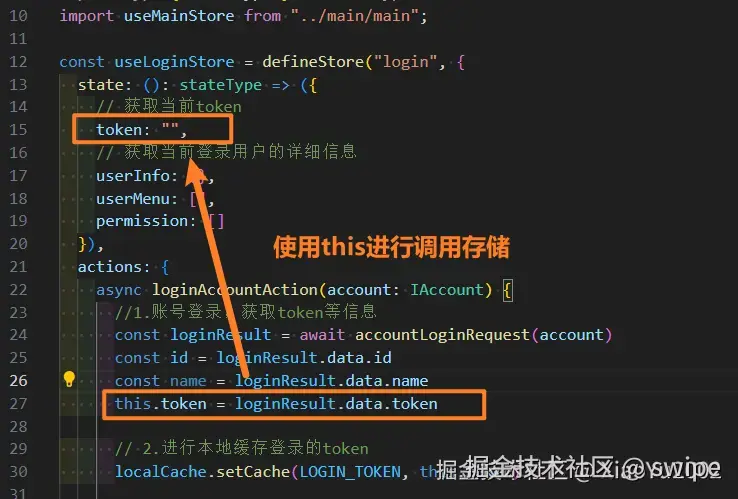
** 图9-4 正式网络请求存储(this指向)**
典型模式:
// Vue 组件中的网络请求
export default {
  data() {
    return {
      userList: []
    }
  },
  methods: {
    fetchUsers() {
      // 使用箭头函数,this 自动指向 Vue 实例
      fetch('/api/users')
        .then(res => res.json())
        .then(data => {
          this.userList = data  // this 指向 Vue 实例
        })
    }
  }
}

// React 类组件中的网络请求
class UserList extends React.Component {
  state = { users: [] }

  fetchUsers = () => {
    // 箭头函数属性,this 自动绑定到组件实例
    fetch('/api/users')
      .then(res => res.json())
      .then(data => {
        this.setState({ users: data })
      })
  }
}
小结:
- 箭头函数不绑定 this,继承外层作用域的 this
- 解决了异步回调中 this 丢失的问题
- 在现代框架中是处理事件和异步操作的标准方案
- 理解箭头函数的 this 机制,比死记硬背规则更重要
三、箭头函数的使用场景
3.1 适合使用箭头函数的场景
| 使用场景 |
描述 |
示例 |
| 回调函数 |
事件监听、异步处理中保持外层 this |
setTimeout(() => console.log(this), 1000) |
| 数组操作 |
配合 map、filter、reduce 等方法 |
nums.map(n => n * 2) |
| 简洁表达 |
一行代码完成函数定义 |
const square = x => x * x |
| 链式调用 |
Promise 链和流式 API |
fetch(url).then(res => res.json()) |
| 柯里化 |
简化函数柯里化实现 |
const add = x => y => x + y |
3.2 不适合使用箭头函数的场景
1. 对象方法
// ❌ 错误:this 不指向对象
const obj = {
  name: "小吴",
  sayName: () => {
    console.log(this.name) // undefined
  }
}

// ✅ 正确:使用普通函数
const obj = {
  name: "小吴",
  sayName: function() {
    console.log(this.name) // 小吴
  }
}
2. 原型方法
// ❌ 错误
Person.prototype.sayName = () => {
  console.log(this.name)
}

// ✅ 正确
Person.prototype.sayName = function() {
  console.log(this.name)
}
3. 需要动态 this 的场景
// ❌ 错误:事件处理中需要访问 DOM 元素
button.addEventListener('click', () => {
  this.classList.toggle('active') // this 不是 button
})

// ✅ 正确
button.addEventListener('click', function() {
  this.classList.toggle('active') // this 是 button
})
四、this 面试题深度解析
在学习了箭头函数后,我们已经掌握了 this 的完整知识体系。接下来通过 4 道经典面试题,验证学习成果。
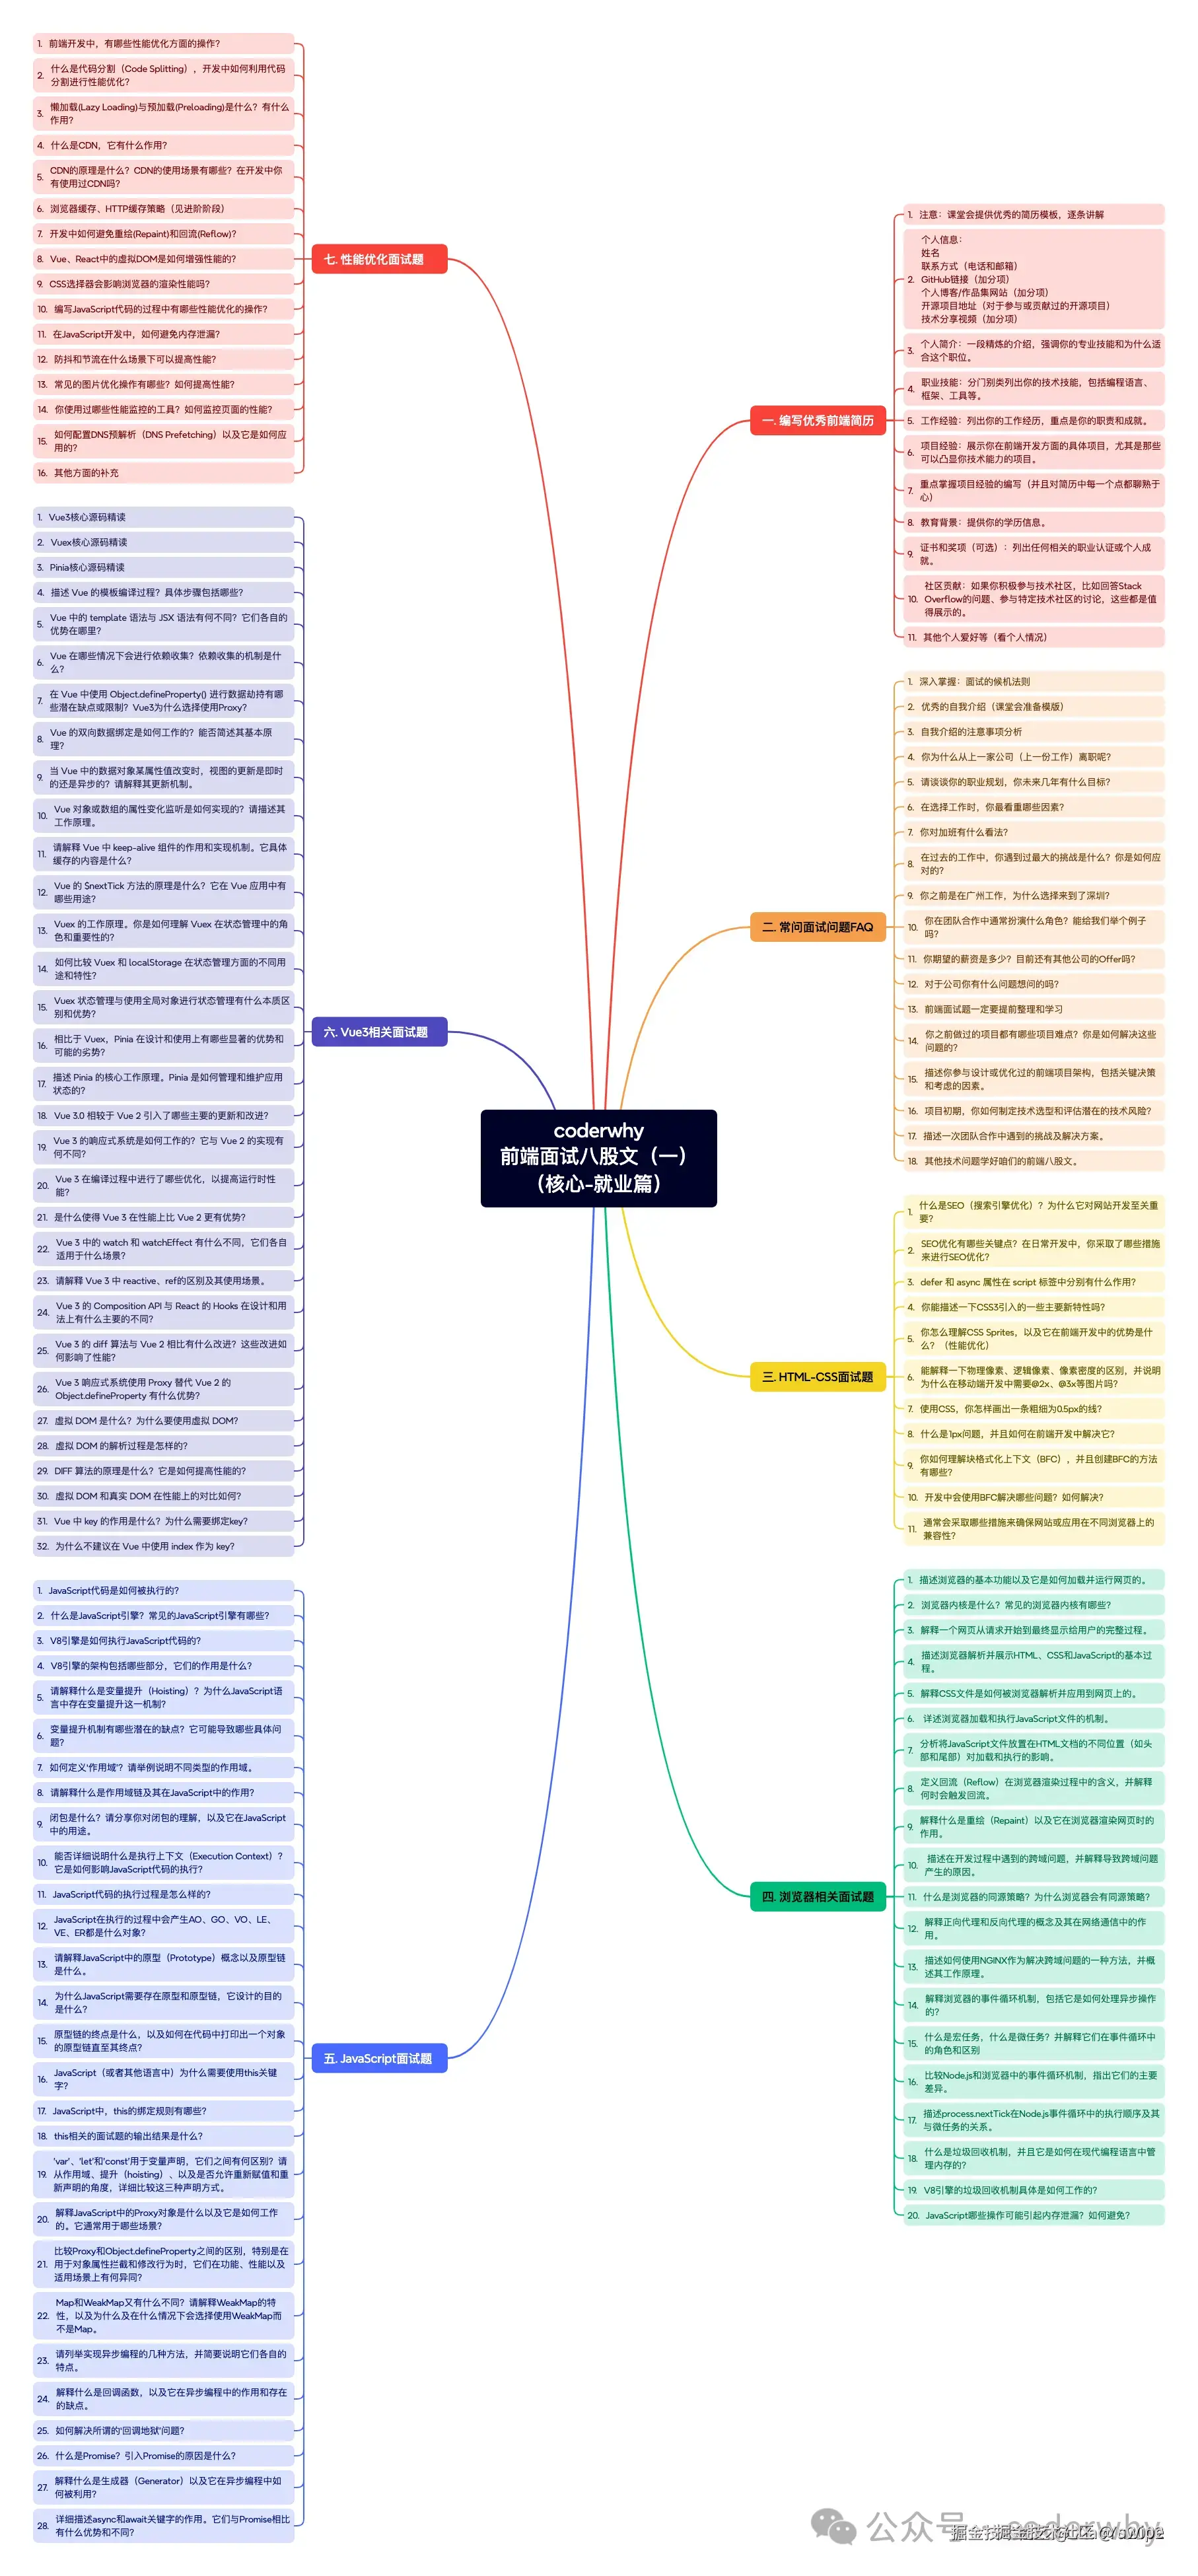
** 图9-5 基础篇面试题大纲**
4.1 面试题1:绑定规则综合考察
题目:判断以下代码的输出
var name = "window"
var person = {
  name: "person",
  sayName: function() {
    console.log(this.name);
  }
};

function sayName() {
  var sss = person.sayName
  sss();                    // ?
  person.sayName();         // ?
  (person.sayName)();       // ?
  (b = person.sayName)();   // ?
}

sayName()
考点分析:
逐行解析:
var name = "window"
var person = {
  name: "person",
  sayName: function() {
    console.log(this.name);
  }
};

function sayName() {
  var sss = person.sayName
  sss();                    // "window" - 独立调用,默认绑定
  person.sayName();         // "person" - 隐式绑定
  (person.sayName)();       // "person" - 括号不改变隐式绑定
  (b = person.sayName)();   // "window" - 间接引用,独立调用
}

sayName()
详细解释:
-
sss():
- sss 保存的是函数引用(内存地址)
- 调用时没有对象前缀,属于独立调用
- 应用默认绑定,this 指向 window
-
person.sayName():
- 通过对象调用方法
- 应用隐式绑定,this 指向 person
-
(person.sayName)():
- 括号只是将表达式视为整体,不改变调用方式
- 本质仍是
person.sayName()
- 应用隐式绑定,this 指向 person
-
(b = person.sayName)():
- 赋值表达式返回函数引用
- 相当于先执行
b = person.sayName,再执行 b()
- 属于独立调用,应用默认绑定,this 指向 window
关键要点:
- 函数引用赋值后,调用方式决定 this
- 括号不改变调用方式,除非内部是赋值表达式
- 间接引用是独立调用的一种形式
4.2 面试题2:箭头函数与显式绑定
题目:判断以下代码的输出
var name = 'window'

var person1 = {
  name: 'person1',
  foo1: function () {
    console.log(this.name)
  },
  foo2: () => console.log(this.name),
  foo3: function () {
    return function () {
      console.log(this.name)
    }
  },
  foo4: function () {
    return () => {
      console.log(this.name)
    }
  }
}

var person2 = { name: 'person2' }

person1.foo1();                  // ?
person1.foo1.call(person2);      // ?

person1.foo2();                  // ?
person1.foo2.call(person2);      // ?

person1.foo3()();                // ?
person1.foo3.call(person2)();    // ?
person1.foo3().call(person2);    // ?

person1.foo4()();                // ?
person1.foo4.call(person2)();    // ?
person1.foo4().call(person2);    // ?
答案与解析:
person1.foo1();                  // "person1" - 隐式绑定
person1.foo1.call(person2);      // "person2" - 显式绑定优先级更高

person1.foo2();                  // "window" - 箭头函数,外层是全局
person1.foo2.call(person2);      // "window" - 箭头函数不受 call 影响

person1.foo3()();                // "window" - 返回普通函数,独立调用
person1.foo3.call(person2)();    // "window" - 返回的函数仍是独立调用
person1.foo3().call(person2);    // "person2" - 对返回的函数显式绑定

person1.foo4()();                // "person1" - 箭头函数继承 foo4 的 this
person1.foo4.call(person2)();    // "person2" - foo4 的 this 被改为 person2
person1.foo4().call(person2);    // "person1" - 箭头函数不受 call 影响
核心考点:
-
foo1 系列:普通函数的隐式绑定和显式绑定
-
foo2 系列:箭头函数的特性
- 箭头函数定义在对象字面量中,外层作用域是全局
- call/apply/bind 无法改变箭头函数的 this
-
foo3 系列:返回普通函数
-
foo3() 返回一个新函数,再调用 () 是独立调用
-
foo3().call(person2) 对返回的函数进行显式绑定
-
foo4 系列:返回箭头函数
- 箭头函数的 this 取决于 foo4 执行时的 this
-
foo4.call(person2)() 改变了 foo4 的 this,箭头函数继承这个 this
-
foo4().call(person2) 无法改变箭头函数的 this
记忆技巧:
- 箭头函数的 this 在定义时确定(词法绑定)
- 普通函数的 this 在调用时确定(动态绑定)
- 连续调用
()() 时,每个 () 都是一次独立的调用判断
4.3 面试题3:new 绑定与箭头函数
题目:判断以下代码的输出
var name = 'window'

function Person(name) {
  this.name = name
  this.foo1 = function () {
    console.log(this.name)
  },
  this.foo2 = () => console.log(this.name),
  this.foo3 = function () {
    return function () {
      console.log(this.name)
    }
  },
  this.foo4 = function () {
    return () => {
      console.log(this.name)
    }
  }
}

var person1 = new Person('person1')
var person2 = new Person('person2')

person1.foo1()                   // ?
person1.foo1.call(person2)       // ?

person1.foo2()                   // ?
person1.foo2.call(person2)       // ?

person1.foo3()()                 // ?
person1.foo3.call(person2)()     // ?
person1.foo3().call(person2)     // ?

person1.foo4()()                 // ?
person1.foo4.call(person2)()     // ?
person1.foo4().call(person2)     // ?
答案与解析:
person1.foo1()                   // "person1" - 隐式绑定
person1.foo1.call(person2)       // "person2" - 显式绑定

person1.foo2()                   // "person1" - 箭头函数继承构造函数的 this
person1.foo2.call(person2)       // "person1" - 箭头函数不受 call 影响

person1.foo3()()                 // "window" - 独立调用
person1.foo3.call(person2)()     // "window" - 独立调用
person1.foo3().call(person2)     // "person2" - 显式绑定

person1.foo4()()                 // "person1" - 箭头函数继承 foo4 的 this
person1.foo4.call(person2)()     // "person2" - foo4 的 this 被改变
person1.foo4().call(person2)     // "person1" - 箭头函数不受 call 影响
关键理解:
-
new 绑定创建新对象:
-
new Person('person1') 创建新对象,this 指向该对象
- 构造函数中的 this.foo2 是箭头函数,继承构造函数的 this
-
箭头函数在构造函数中的特殊性:
- foo2 是箭头函数,定义在构造函数中
- 外层作用域是构造函数,this 指向 new 创建的对象
- 因此 person1.foo2() 输出 "person1"
-
与对象字面量的区别:
- 对象字面量中的箭头函数,外层是全局作用域
- 构造函数中的箭头函数,外层是构造函数作用域
4.4 面试题4:嵌套对象中的 this
题目:判断以下代码的输出
var name = 'window'

function Person(name) {
  this.name = name
  this.obj = {
    name: 'obj',
    foo1: function () {
      return function () {
        console.log(this.name)
      }
    },
    foo2: function () {
      return () => {
        console.log(this.name)
      }
    }
  }
}

var person1 = new Person('person1')
var person2 = new Person('person2')

person1.obj.foo1()()                 // ?
person1.obj.foo1.call(person2)()     // ?
person1.obj.foo1().call(person2)     // ?

person1.obj.foo2()()                 // ?
person1.obj.foo2.call(person2)()     // ?
person1.obj.foo2().call(person2)     // ?
答案与解析:
person1.obj.foo1()()                 // "window" - 独立调用
person1.obj.foo1.call(person2)()     // "window" - 返回的函数独立调用
person1.obj.foo1().call(person2)     // "person2" - 显式绑定

person1.obj.foo2()()                 // "obj" - 箭头函数继承 foo2 的 this
person1.obj.foo2.call(person2)()     // "person2" - foo2 的 this 被改变
person1.obj.foo2().call(person2)     // "obj" - 箭头函数不受 call 影响
难点解析:
-
person1.obj.foo2()():
-
person1.obj.foo2() 通过 obj 调用,this 指向 obj
- 返回箭头函数,继承 foo2 的 this(obj)
- 输出 "obj"
-
person1.obj.foo2.call(person2)():
-
foo2.call(person2) 改变 foo2 的 this 为 person2
- 返回箭头函数,继承 foo2 的 this(person2)
- 输出 "person2"
-
person1.obj.foo2().call(person2):
-
person1.obj.foo2() 返回箭头函数,this 已确定为 obj
-
.call(person2) 无法改变箭头函数的 this
- 输出 "obj"
判断技巧:
- 看到
()() 连续调用,先判断第一个 () 返回什么
- 如果返回箭头函数,this 取决于外层函数执行时的 this
- 如果返回普通函数,this 取决于第二个
() 的调用方式
五、实战应用与最佳实践
5.1 箭头函数的使用决策树
是否需要动态 this?
├─ 是 → 使用普通函数
│   ├─ 对象方法
│   ├─ 原型方法
│   └─ 事件处理(需要访问 DOM 元素)
│
└─ 否 → 考虑使用箭头函数
    ├─ 回调函数(保持外层 this)
    ├─ 数组方法(map、filter 等)
    ├─ Promise 链
    └─ 简单的工具函数
5.2 常见陷阱与解决方案
陷阱1:对象方法使用箭头函数
// ❌ 错误
const calculator = {
  value: 0,
  add: (num) => {
    this.value += num  // this 不指向 calculator
  }
}

// ✅ 正确
const calculator = {
  value: 0,
  add(num) {
    this.value += num
  }
}
陷阱2:原型方法使用箭头函数
// ❌ 错误
function Person(name) {
  this.name = name
}
Person.prototype.sayName = () => {
  console.log(this.name)  // this 不指向实例
}

// ✅ 正确
Person.prototype.sayName = function() {
  console.log(this.name)
}
陷阱3:需要 arguments 对象
// ❌ 错误:箭头函数没有 arguments
const sum = () => {
  console.log(arguments)  // ReferenceError
}

// ✅ 正确:使用剩余参数
const sum = (...args) => {
  console.log(args)
  return args.reduce((a, b) => a + b, 0)
}
5.3 框架中的最佳实践
React 类组件:
class MyComponent extends React.Component {
  // ✅ 推荐:箭头函数属性,自动绑定 this
  handleClick = () => {
    this.setState({ clicked: true })
  }

  // ❌ 不推荐:需要在构造函数中手动绑定
  handleClick() {
    this.setState({ clicked: true })
  }
  constructor() {
    super()
    this.handleClick = this.handleClick.bind(this)
  }
}
Vue 组件:
export default {
  data() {
    return { count: 0 }
  },
  methods: {
    // ✅ 推荐:普通方法,this 自动指向组件实例
    increment() {
      this.count++
    },

    // ✅ 推荐:异步操作中使用箭头函数
    async fetchData() {
      const data = await fetch('/api/data')
        .then(res => res.json())  // 箭头函数保持 this
      this.data = data
    }
  }
}
5.4 性能优化建议
避免在渲染中创建箭头函数:
// ❌ 不推荐:每次渲染都创建新函数
render() {
  return (
    <button onClick={() => this.handleClick()}>
      点击
    </button>
  )
}

// ✅ 推荐:使用箭头函数属性
handleClick = () => {
  // ...
}
render() {
  return <button onClick={this.handleClick}>点击</button>
}
5.5 团队协作规范
代码审查检查点:
- 对象方法是否误用箭头函数
- 事件处理是否需要访问 DOM 元素(this)
- 箭头函数是否在不必要的地方使用
- 是否有过度简写影响可读性
编码规范建议:
- 对象方法统一使用简写语法:
method() {} 而非 method: function() {}
- 回调函数优先使用箭头函数
- 需要动态 this 时明确使用普通函数
- 复杂逻辑避免过度简写,保持可读性
六、总结与进阶路线
6.1 核心要点回顾
箭头函数的本质:
- 更简洁的函数语法
- 不绑定 this,继承外层作用域的 this
- 没有 arguments 对象,使用剩余参数替代
- 不能作为构造函数使用
this 绑定规则完整体系:
-
默认绑定:独立调用 → 全局对象或 undefined
-
隐式绑定:对象方法调用 → 调用对象
-
显式绑定:call/apply/bind → 指定对象
-
new 绑定:构造函数调用 → 新对象
-
箭头函数:不绑定 this → 继承外层作用域
优先级:new > 显式 > 隐式 > 默认 > 箭头函数(不参与优先级)
使用原则:
- 需要动态 this:使用普通函数
- 需要保持外层 this:使用箭头函数
- 简单工具函数:优先箭头函数
- 对象/原型方法:使用普通函数
6.2 团队落地建议
阶段一:知识普及(1 周)
- 组织箭头函数专题分享
- 整理常见误用案例库
- 在代码审查中重点关注 this 相关问题
阶段二:规范制定(1 周)
- 制定箭头函数使用规范
- 配置 ESLint 规则自动检测
- 建立最佳实践文档
阶段三:工具支持(持续)
- 使用 TypeScript 减少 this 错误
- 引入现代框架减少 this 依赖
- 建立单元测试覆盖 this 逻辑
阶段四:持续优化(持续)
- 定期回顾 this 相关 bug
- 更新团队知识库
- 在新人培训中加入专题
6.3 进阶学习路线
下一步学习内容:
-
手写实现 call/apply/bind
- 理解显式绑定的内部机制
- 掌握 arguments 对象的使用
- 实现函数柯里化
-
深入理解作用域
- 词法作用域 vs 动态作用域
- 闭包与箭头函数的关系
- 作用域链的查找机制
-
ES6+ 新特性
- 解构赋值与箭头函数
- 默认参数与剩余参数
- 模板字符串与标签函数
-
框架源码分析
- React Hooks 如何避免 this
- Vue 3 Composition API 的设计思想
- 现代框架的 this 处理策略
推荐资源:
- 《你不知道的 JavaScript(上卷)》- this 和对象原型
- MDN Web Docs - 箭头函数
- JavaScript.info - 箭头函数基础
6.4 自测题
基础题:
- 以下代码输出什么?
const obj = {
  name: "obj",
  getName: () => this.name
}
console.log(obj.getName())
- 如何修改使其正确输出 "obj"?
进阶题:
- 解释为什么以下代码无法正常工作:
function Timer() {
  this.seconds = 0
  setInterval(() => {
    this.seconds++
  }, 1000)
}
const timer = new Timer()
- 在 React 中,以下两种写法有什么区别?
// 方式1
<button onClick={() => this.handleClick()}>

// 方式2
<button onClick={this.handleClick}>
答案:
- undefined(箭头函数的 this 指向全局)
- 使用普通函数:
getName: function() { return this.name }
- 代码可以正常工作,箭头函数继承构造函数的 this
- 方式1 每次渲染创建新函数,性能较差;方式2 需要确保 handleClick 已绑定 this
七、写在最后
箭头函数是 ES6 最重要的特性之一,它不仅简化了语法,更从根本上解决了 JavaScript 中 this 绑定的痛点。
关键心态:
- 理解箭头函数的本质:词法作用域的 this
- 不要盲目使用箭头函数,根据场景选择
- 在现代开发中,优先考虑函数式编程思想
- 善用工具和框架,减少对 this 的依赖
实践建议:
- 在真实项目中刻意练习箭头函数的使用
- 遇到 this 问题时,先判断是否适合用箭头函数
- 代码审查时,关注箭头函数的使用场景
- 定期回顾本文,加深理解
掌握箭头函数和 this,是成为高级前端工程师的必经之路。接下来,我们将手写实现 call/apply/bind,深入理解显式绑定的内部机制。
持续学习,保持好奇心,我们下期见!